Blooming from this free crochet daisy amigurumi pattern are all the sunny scenes of sweet springtime—the bursts of birdsong celebrating the end of an afternoon shower, fragrant flowers filling the air with their sweet perfume, and busy bees buzzing about, filling their bellies with fresh nectar.
While you bask in the fresh floral breeze of sunny springtime, there’s no better way to celebrate the rebirth of the earth than with this free crochet daisy amigurumi pattern!
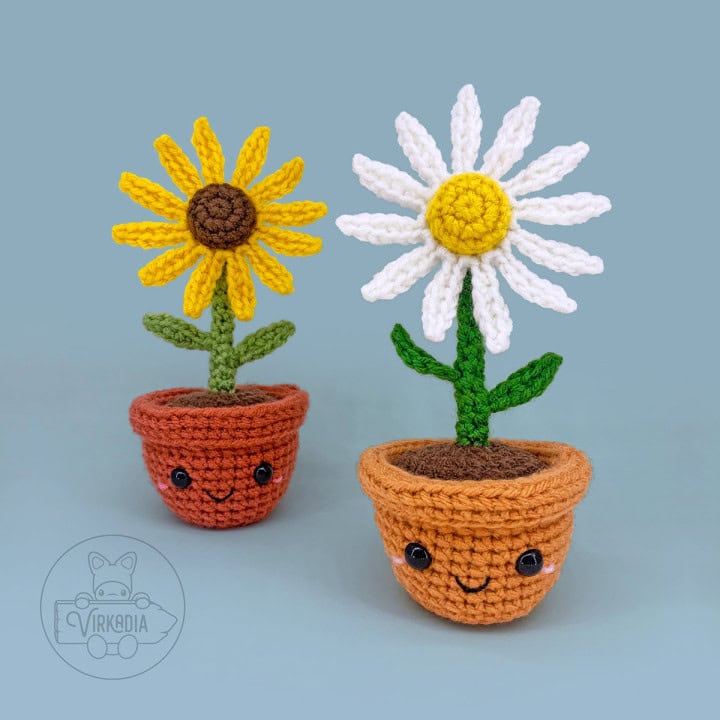
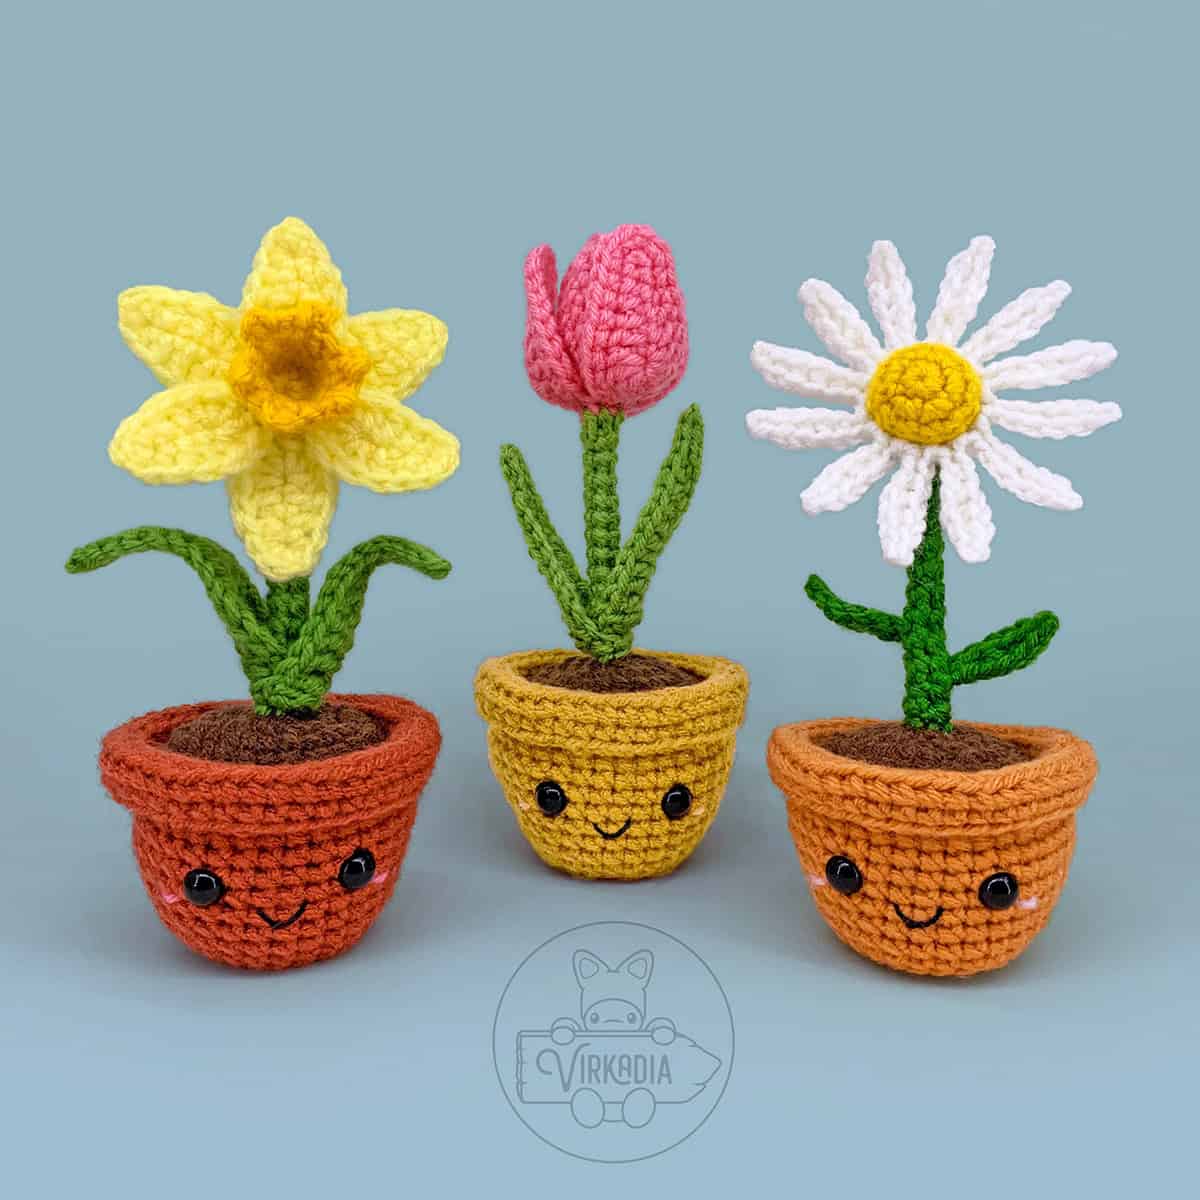
So, without further ado, here is the pattern for the Daisy Cutie, part 3 of 9 in the Flower Cuties collection!
Pattern Information | Free Crochet Daisy Amigurumi
This free crochet daisy amigurumi pattern has a difficulty rating of intermediate.
The finished dimensions are 7.5 inches (height) by 3.25 inches (width) by 3.25 inches (depth).*
You may also make your pieces larger or smaller by increasing or decreasing your yarn weight and/or hook size, respectively.
*Finished dimensions are calculated from a model using medium weight yarn, a size H-8 (5 mm) crochet hook, the YU/YO method and the following gauge: 18 sc x 21 rows = 4 inches.
And don’t forget to add your project on Ravelry!
Supplies:
- Size H-8 (5 mm) crochet hook
- Medium (4) weight yarn in 5 colors:
- Yarn A – brown (example uses Loops & Threads Soft Classic: Mocha)
- Yarn B – orange (Caron One Pound: Faded Brick)
- Yarn C – yellow (Red Heart Super Saver: Saffron)
- Yarn D – white (Red Heart Super Saver: Soft White)
- Yarn E – green (Big Twist Value: Forest Green)
- Pink embroidery floss or pink yarn (Red Heart Super Saver: Baby Pink)
- Black embroidery floss
- 10 mm black safety eyes (x2)
- Wire (14 Gauge Black Aluminum Wire by hildie & jo)
- Wire Cutters
- Polyester fiberfill
- Yarn needle
- Scissors
- Stitch markers
Alternate Yarn Supplies:
Color Variation 2 (as seen on the left in cover photo):
- Medium (4) weight yarn in 5 colors:
- Yarn A – brown (example uses Loops & Threads Soft Classic: Mocha)
- Yarn B – rust (Loops & Threads Soft Classic: Ginger)
- Yarn C – brown (Loops & Threads Soft Classic: Mocha)
- Yarn D – yellow (Red Heart Super Saver: Saffron)
- Yarn E – green (Red Heart Super Saver: Tea Leaf)
- Pink embroidery floss or pink yarn (Red Heart Super Saver: Perfect Pink)
Terminology:
This free crochet daisy amigurumi pattern uses English (US) terminology:
- st (sts) = stitch (stitches)
- ch = chain stitch
- sl st = slip stitch
- sc = single crochet
- sc2tog = single crochet 2 together (over the span of 2 stitches), also known as a decrease
- hdc = half double crochet
- FLO = front loop only
- BLO = back loop only
- sk = skip
Please note that this pattern is written so that each crochet stitch abbreviation is attached to a number, such as 1sc, 2sc, etc. This number denotes how many of that stitch is to be worked into the same stitch.
You can learn more about how to read Virkadia patterns on our Pattern Help FAQ page!
Special Stitch Instructions:
Please review our special stitch instructions on our Stitch Tutorials FAQ before beginning, as some techniques may be unique to this pattern.
You can also watch our amigurumi techniques video tutorial for all of our tips and tricks for improving your project!
This free crochet daisy amigurumi pattern uses the following special stitch tutorials:
- Single Crochet (YU/YO Method)
- Invisible Decrease
- Joining Rounds
This pattern is worked in the round, with each round joined at the end with a slip stitch. Unless otherwise instructed, the first stitch of your next round will always be worked into the same stitch as your joining slip stitch has been worked into.
Be sure to always keep the ‘right side’ of your stitches facing outwards as you work. The right side is the front side of the stitch that is facing you as you are completing each stitch.
Pattern Instructions | Free Crochet Daisy Amigurumi
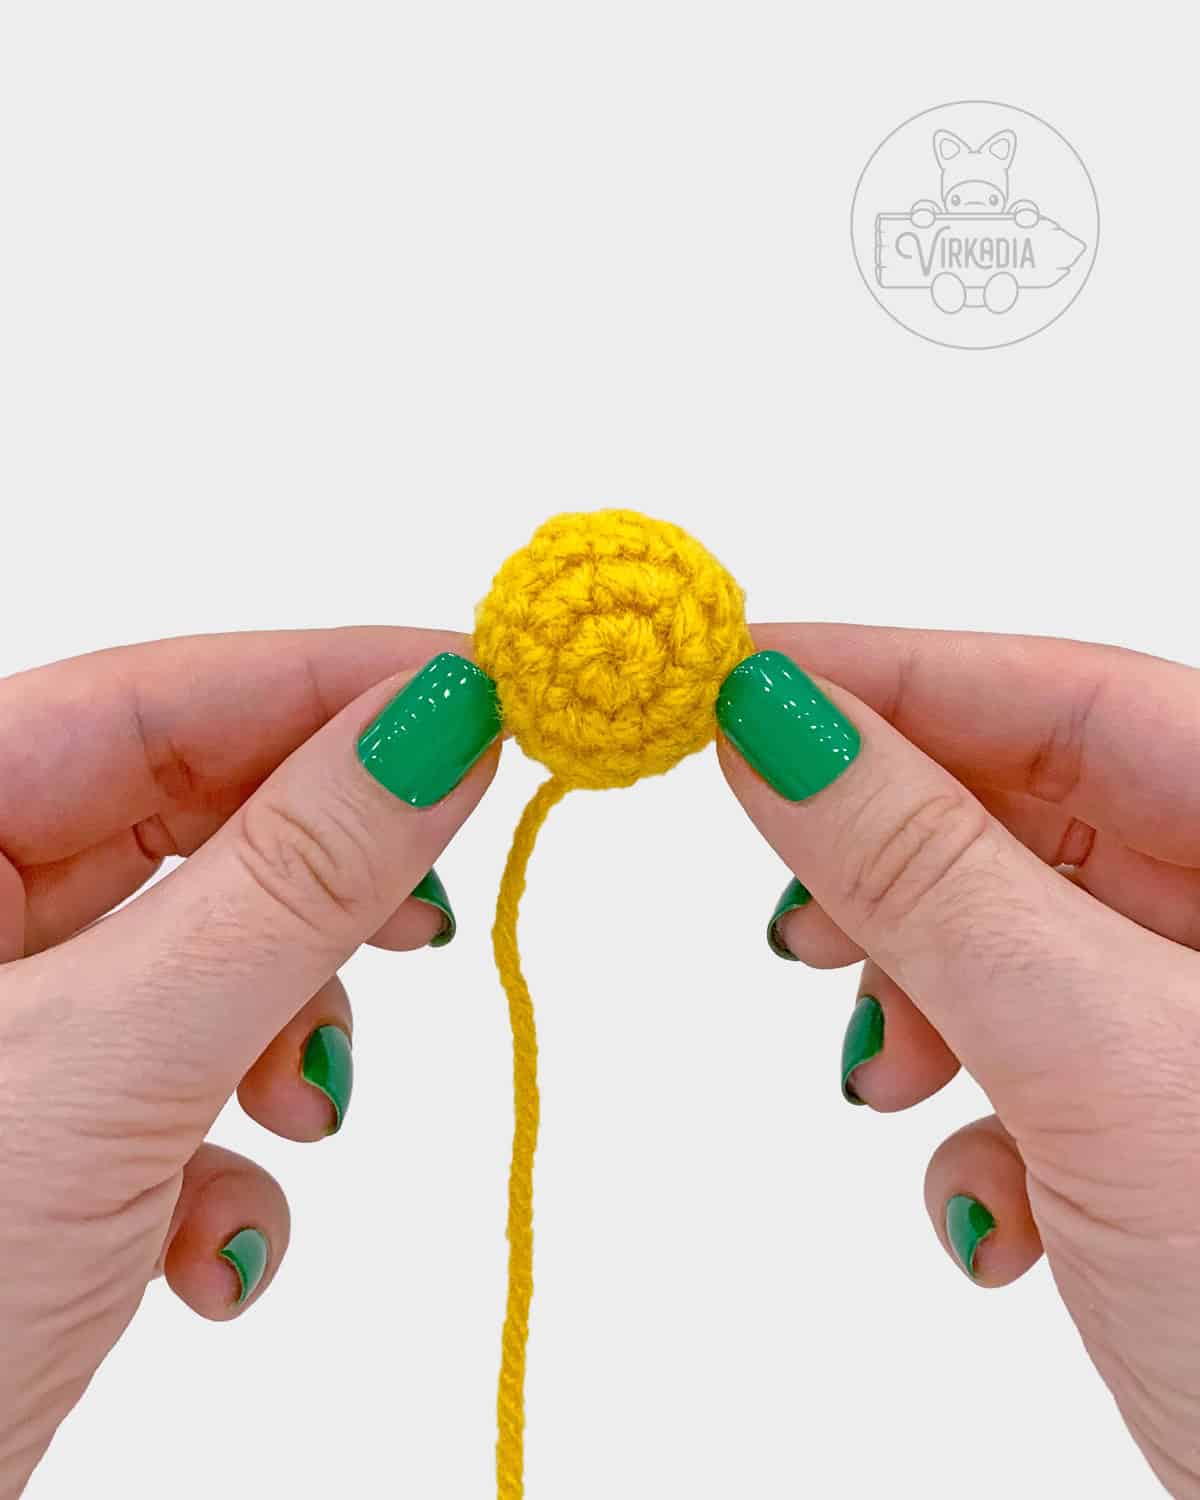
Crochet Daisy Center:
With yarn C (yellow), make a magic ring (or ch 4, sl st into 1st st to form ring, ch 1).
Rnd 1: 6sc into ring, sl st into 1st st to join, ch 1 (6).
Rnd 2: 2sc into each st around, join, ch 1 (12).
Rnd 3: 1sc into each st around, join, ch 1 (12).
Rnd 4: 1sc into each st around, join (12).
Fasten off yarn C and leave an end tail for sewing. Set aside for now.
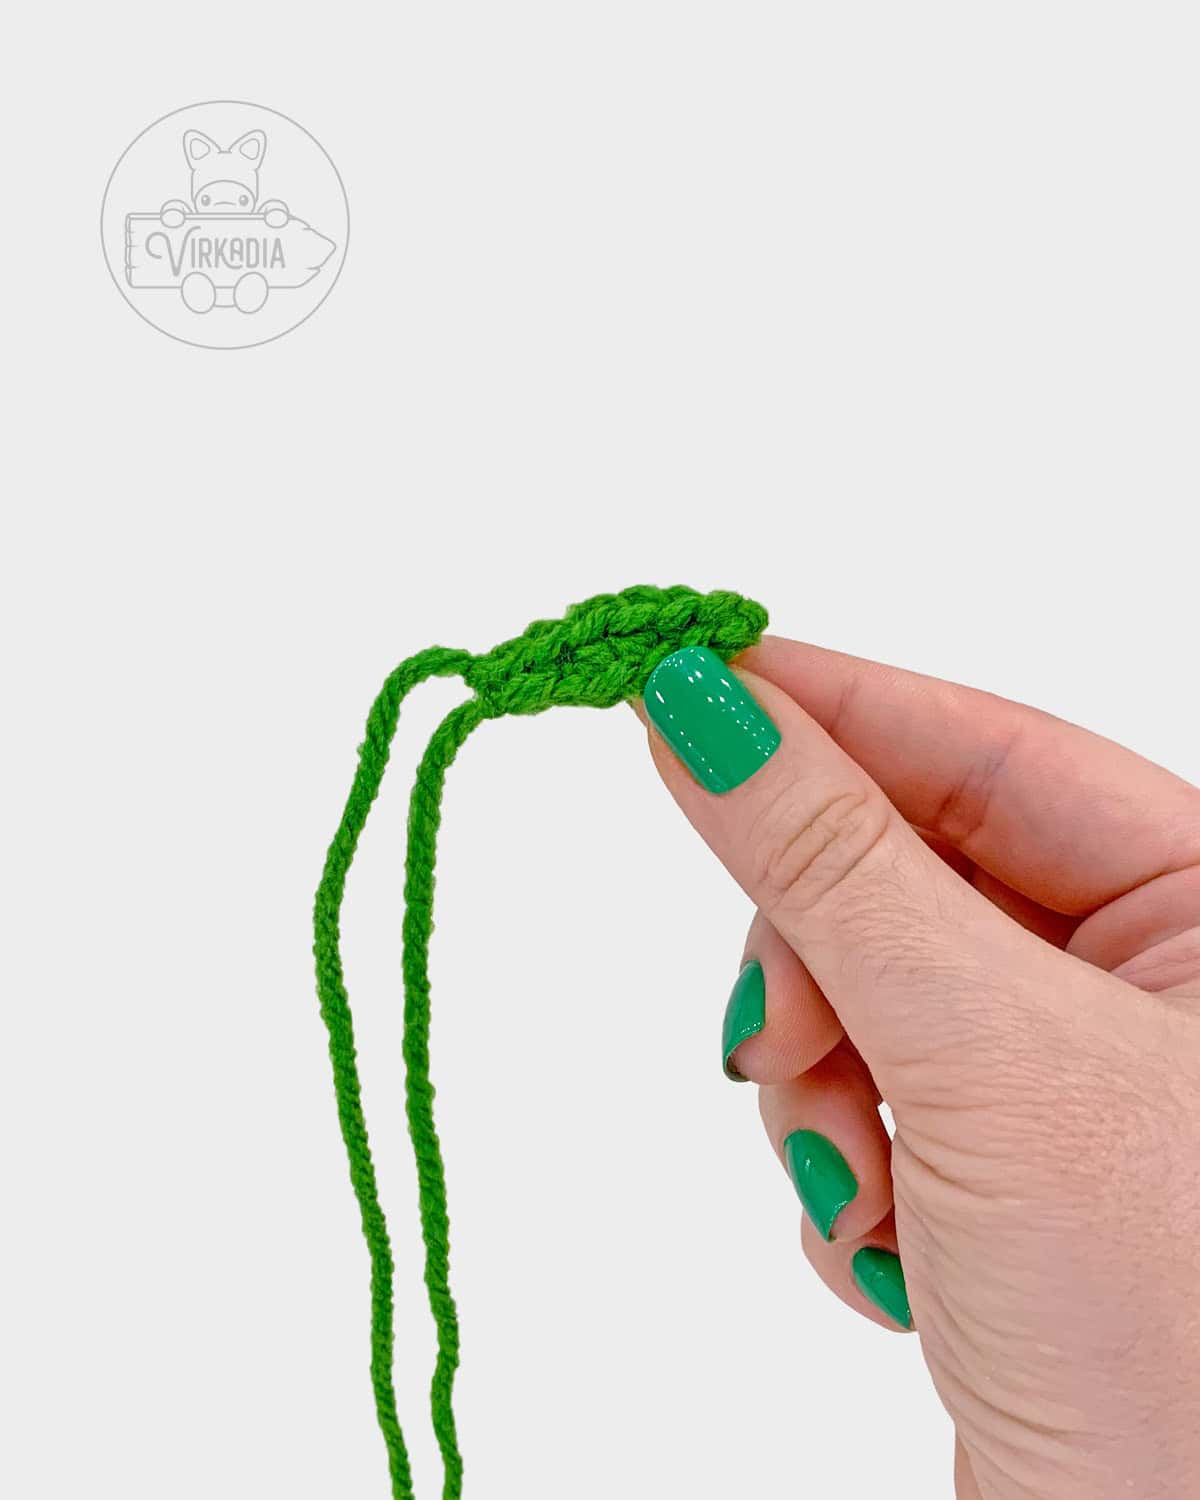
Crochet Daisy Leaves:
With yarn E (green), leave a beginning tail for tying and chain 7.
For best results, try working row 1 into the back bars of the chain stitches.
Row 1: sl st into 2nd ch from hook, 1sc into next st, 1hdc into each of next 2 sts, 1sc into next st, sl st into next st (6).
Fasten off yarn E and leave an end tail for tying, as well. Set aside for now.
Repeat row 1, one more time, for a total of two leaves.
Crochet Daisy Stem:
The majority of this crochet daisy stem is worked in rounds of only 4 stitches each.
While this creates a nice, slim stem for your flower, it may be challenging for some crocheters to work into.
If you have difficulty working into small rounds, you may instead replace rounds 3 to 15 with continuing rounds of 6 stitches each (1sc into each st around, join).
Choose whichever method works best for you!
With yarn E (green), chain 13.
For best results, try working round 1 into the back bars of the chain stitches.
Rnd 1: 1sc into 2nd ch from hook, 1sc into each of next 11 sts, sl st into 1st st to join into a circle, ch 1 (12). Rnd 2: [sc2tog over next 2 sts] 6 times, join, ch 1 (6).
Rnd 3: [1sc into next st, sc2tog over next 2 sts] 2 times, join, ch 1 (4).
Rnd 4: 1sc into each st around, join, ch 1 (4).
Rnd 5 to 13 (9 rnds): repeat round 4 (4).
Secure your working loop with a stitch marker and retrieve your leaves set aside earlier.
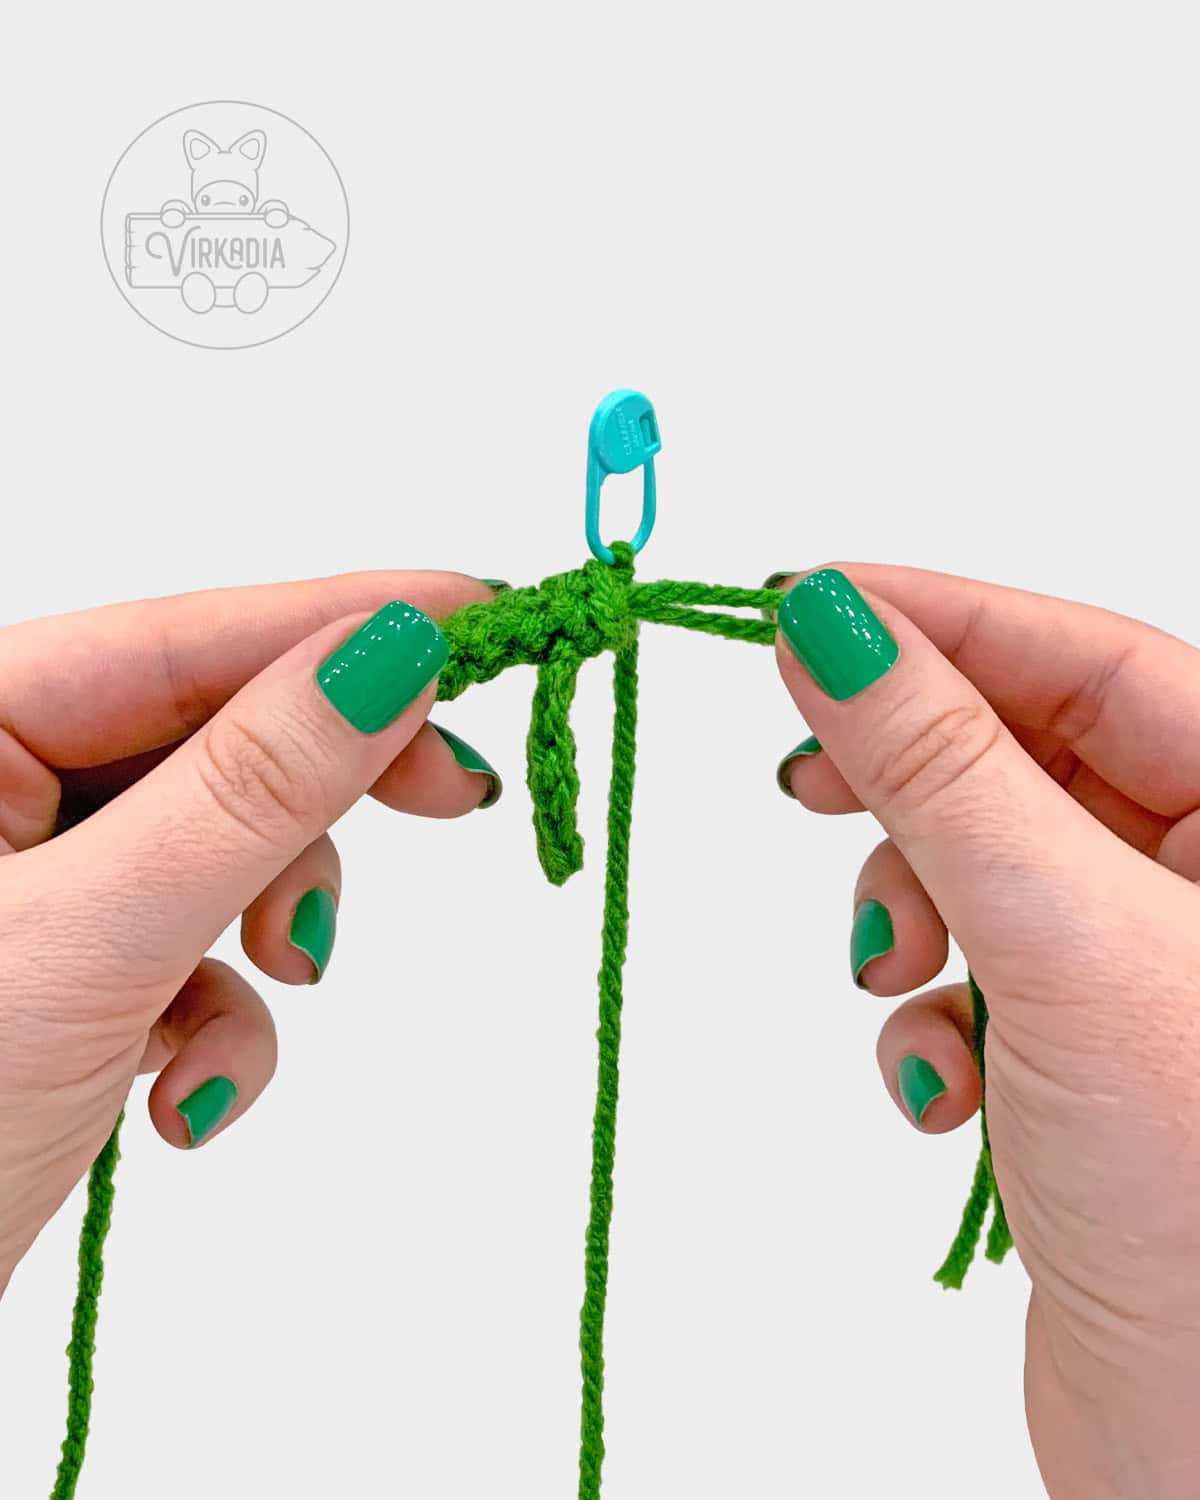
Take the beginning tail from your first leaf and thread it between any two stitches, from outside to inside, between rounds 12 and 13.
Then, take your end tail and thread it through an adjacent stitch (but not the same space), so that both tails are now on the inside.
Knot both tails together on the inside of your stem to secure your leaf and trim any excess length. Then, continue to round 14.
Rnd 14: 1sc into each st around, join, ch 1 (4).
Rnd 15: 1sc into each st around, join, ch 1 (4).
Secure your working loop with a stitch marker.
Retrieve your second leaf and position it on the opposite side of your stem from your first leaf, between rounds 14 and 15.
Repeat the same steps as before to attach your second leaf to the stem, then continue to round 15.
Rnd 16: [1sc into next st, 2sc into next st] 2 times, join (6).
Fasten of yarn E and leave a short tail for tying.
Crochet Daisy Petals:
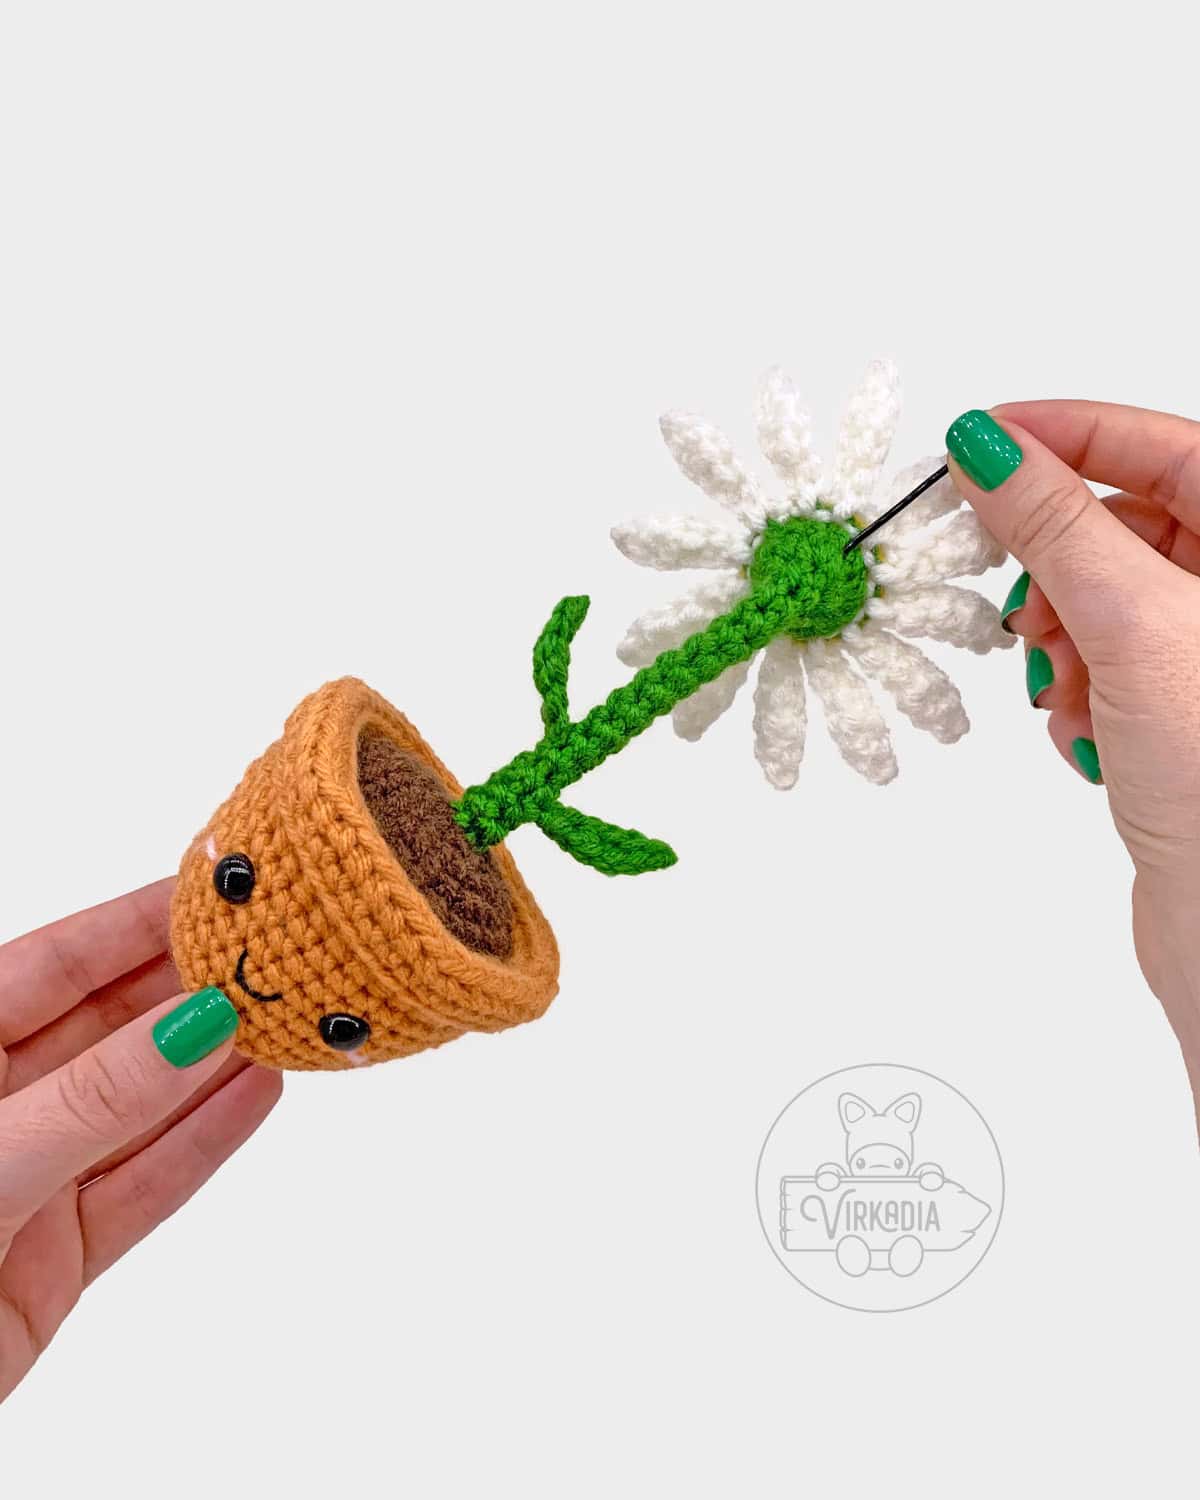
Retrieve your daisy center and align it on top of your stem so that the last round of the center lines up with the first round of your stem.
With the end tail leftover from the daisy center, sew around the entire circumference of the back loops only of both pieces to connect them.
If you did not work into the back bars during round 1 of your stem, don’t worry! Just be sure to at least keep the front loops of the daisy center untouched, and you may work off of these loops alone.
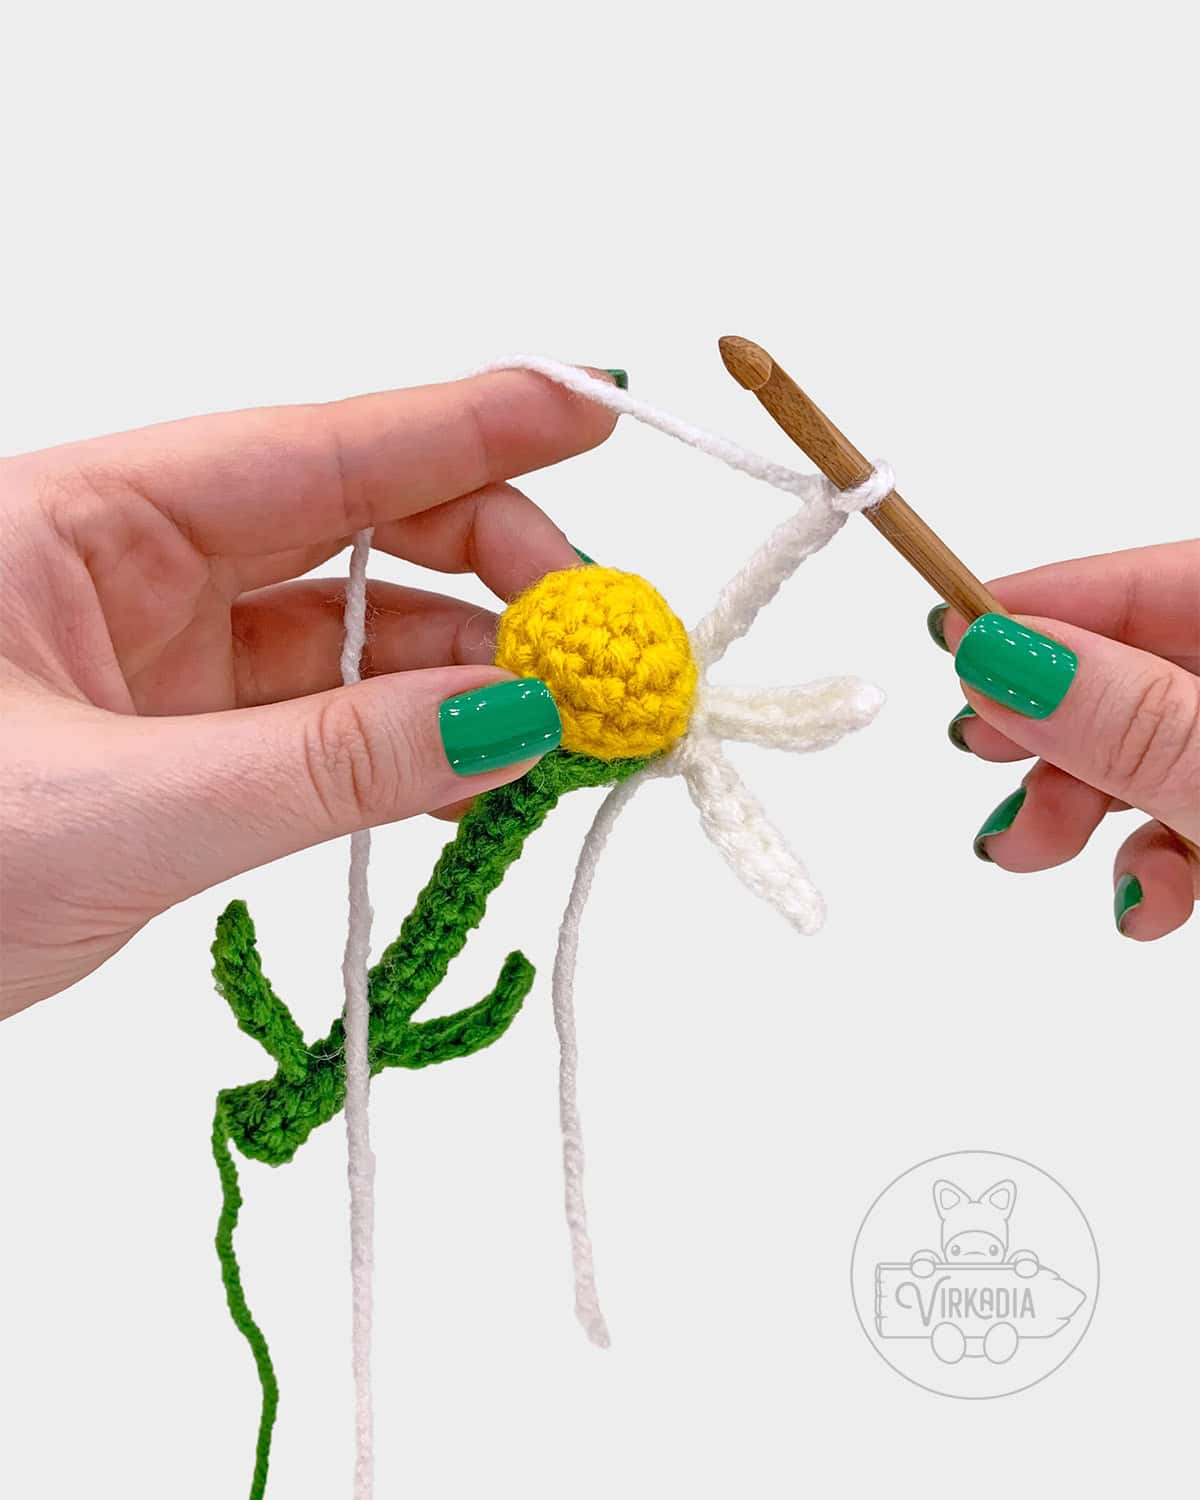
Once your daisy center is sewn onto the top of your stem, you will now be working round 1 of the petals through the front loops only of both pieces together, as though both front loops together were the two loops of one normal stitch.
Again, if you did not work into the back bars during round 1 of your stem, simply work into the front loops of the daisy center only.
With yarn D (white) make a slip knot. For best results, trying working into the back bars of each chain stitch in round 1.
Rnd 1: [sl st into next st of daisy center, ch 7, sl st into 2nd ch from hook, 1sc into next ch, 1hdc into each of next 2 ch, 1sc into next ch, sl st into next ch, sl st into same st of daisy center] 12 times, sl st into 1st st to join (96).
Fasten off yarn D and weave in ends. Set your crochet daisy aside for now.
Crochet Pot Dirt:
With yarn A (brown), leave a tail for sewing and chain 6. Slip stitch into the first chain to form a circle and chain 1.
Rnd 1: 2sc into each ch around, sl st into 1st st to join, ch 1 (12).
Rnd 2: [1sc into next st, 2sc into next st] 6 times, join, ch 1 (18).
Rnd 3: [2sc into next st, 1sc into each of next 2 sts] 6 times, join, ch 1 (24).
Rnd 4: [1sc into each of next 3 sts, 2sc into next st] 6 times, join, ch 1 (30).
Rnd 5: [2sc into next st, 1sc into each of next 4 sts] 6 times, join (36).

Fasten off yarn A and leave a long (~2 ft) tail for sewing.
Alternatively, you can also leave just a short end tail if you start the next section of your pot with a long beginning tail—either works!
Crochet Terracotta Pot:
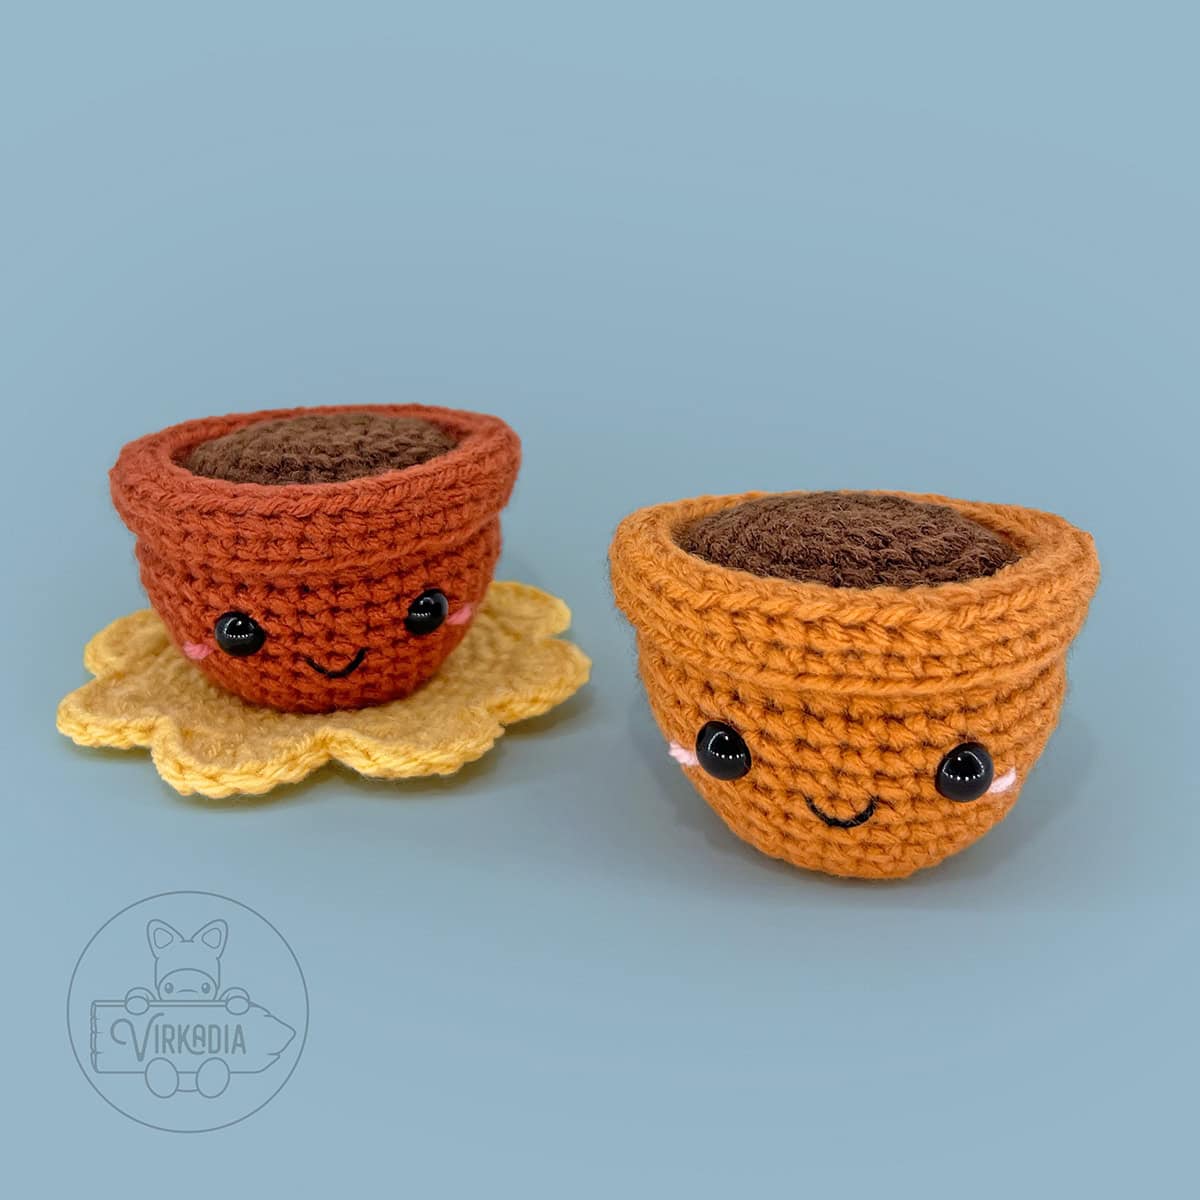
Follow the tutorial for the Terracotta Pot Cutie companion pattern before continuing to the next steps.
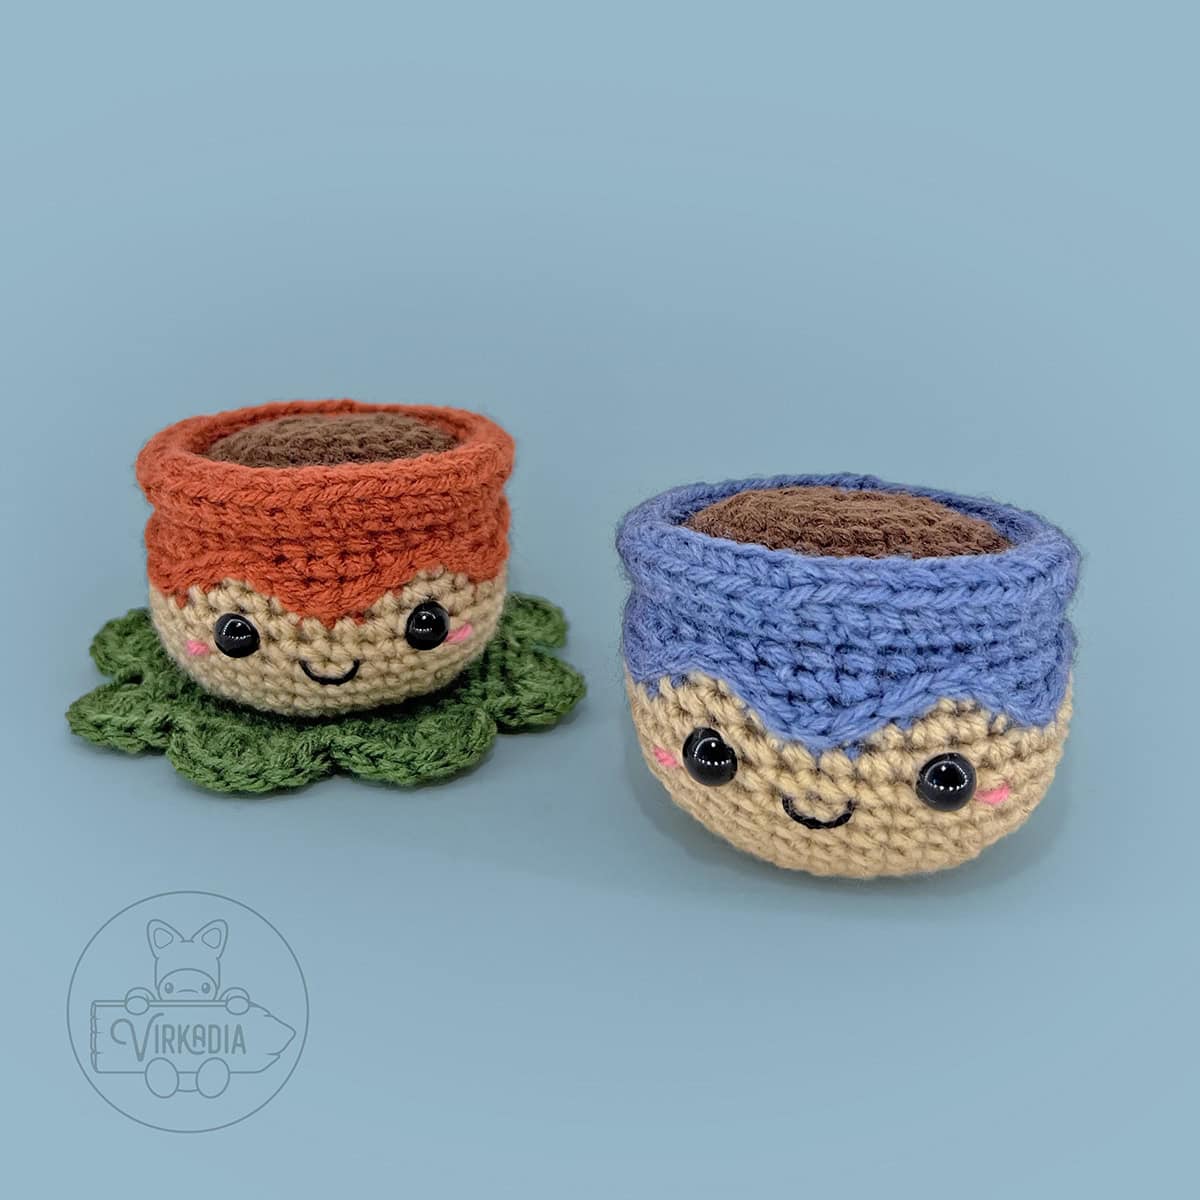
If desired, you may also substitute the terracotta pot with a Drip Glaze Pot Cutie—both pot patterns are compatible with all of our Flower Cuties and Plant Cuties!
The terracotta pot pattern, as seen in the photo above, is easier in difficulty than the drip glaze pot and is a great option for crocheters that are not comfortable with mid-round color changing and surface crochet techniques.
Conversely, the drip glaze pot pattern, as seen below, is more challenging but also has a wider base than the terracotta pot and makes your projects less prone to being top-heavy.
Choose whichever pattern works best for you!
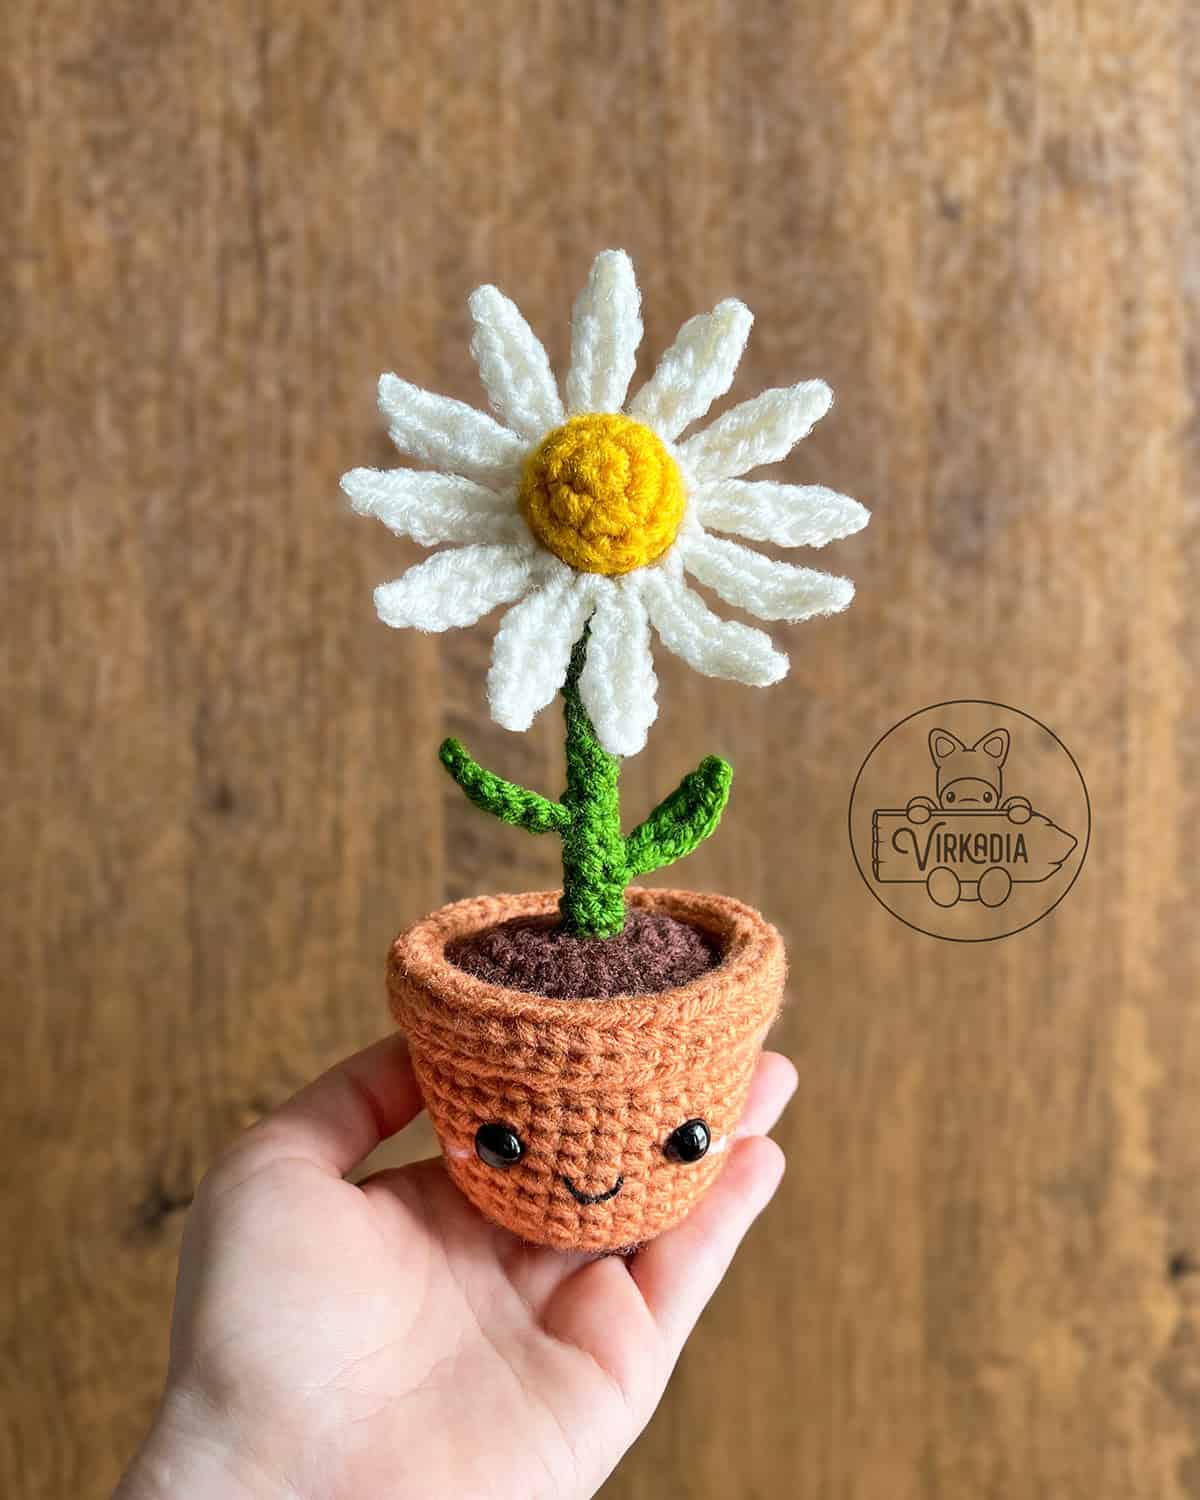
Crochet Daisy – Sewing Together:
Retrieve your daisy and place the bottom of the stem over top of the center hole (round 1) of your chosen flower pot.
Using the tail of yarn A left over from the beginning of the flower pot, sew around the entire circumference of the daisy stem and flower pot hole to attach them together.
Secure with a knot to the end tail of the stem, trim any excess length, and weave in tails.
Finally, cut a length of wire to the height of your crochet daisy, from the bottom of the flower pot to the top of stem.
Gently thread the wire between 2 stitches at the top of the stem until it reaches the bottom of your crochet flower pot and your daisy is able to stand upright on its own.
Conclusion | Free Crochet Daisy Amigurumi
And with that, you’re done the free crochet Daisy Cutie pattern! If you enjoyed this pattern, be sure to check out its five companion patterns in the Flower Cuties collection: the Daffodil Cutie, the Tulip Cutie, the Carnation Cutie, the Sunflower Cutie, the Rose Cutie, the Lily of the Valley Cutie, the Pansy Cutie, and the Lily Cutie!
You can also explore the Cutie Collections page and the Pocket Pets page for more original and free amigurumi patterns, or our Home Decor Patterns for other homemade household goodies!
If you’re looking to cozy up with a longer project, check out our Clothing Patterns, or assemble your own designs from one of our Granny Square Patterns!
And don’t forget to browse our downloadable, ad-free patterns in our Etsy store!
Follow Virkadia on Instagram to stay updated on all new and upcoming patterns, crochet content, and amigurumi adventures! Thank you for all of your support!

Hey hey, I'm Joey Diehl!
I am the fiber artist behind Virkadia! I have a BFA in Fibers & Material Studies and have been crocheting for over 20 years. I have designed, photographed, and written dozens of original crochet patterns that I am honored to have been shared to hundreds of thousands of readers.
Leave a Reply