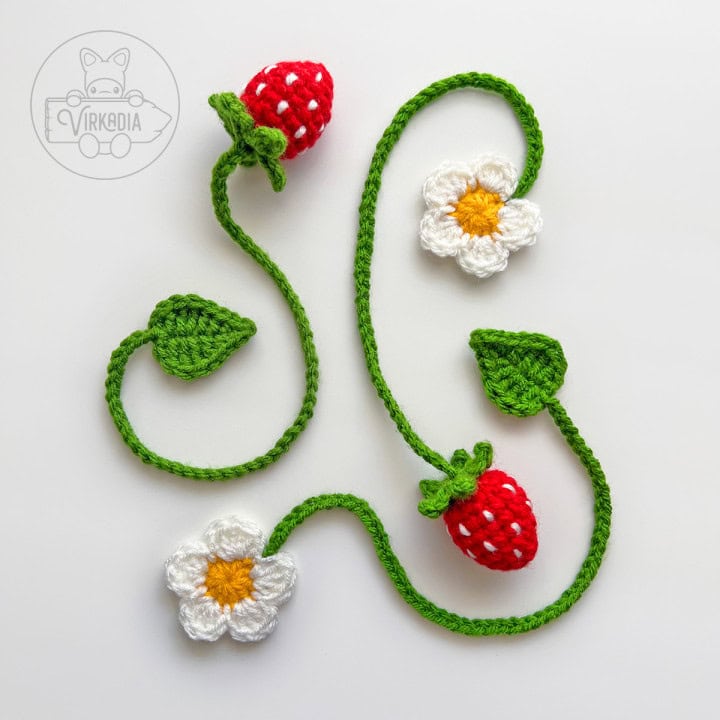
Sweetened into this free crochet strawberry bookmark pattern set are all the restful relaxations of early summer—an impromptu picnic in the park, stretching out in the sun for an afternoon read, and the fresh breeze rustling the pages of your favorite book.
While you crack the spine into your favorite literary world, there’s no better way to set the mood than with this free strawberry amigurumi bookmark pattern set!
Pattern Information | Free Crochet Strawberry Bookmark
Tired of ads? Check out our ad-free PDF download, available for purchase on Etsy!
And don’t forget to add your project on Ravelry!
This free crochet strawberry bookmark pattern set has a difficulty rating of easy.
The finished dimensions of each strawberry are 2 inches (height) by 1.5 inches (width) by 1.5 inches (depth).*
Each leaf motif is 1.5 inches (height) by 1.5 inches (width), and each flower motif is 2 inches (height) by 2 inches (width).*
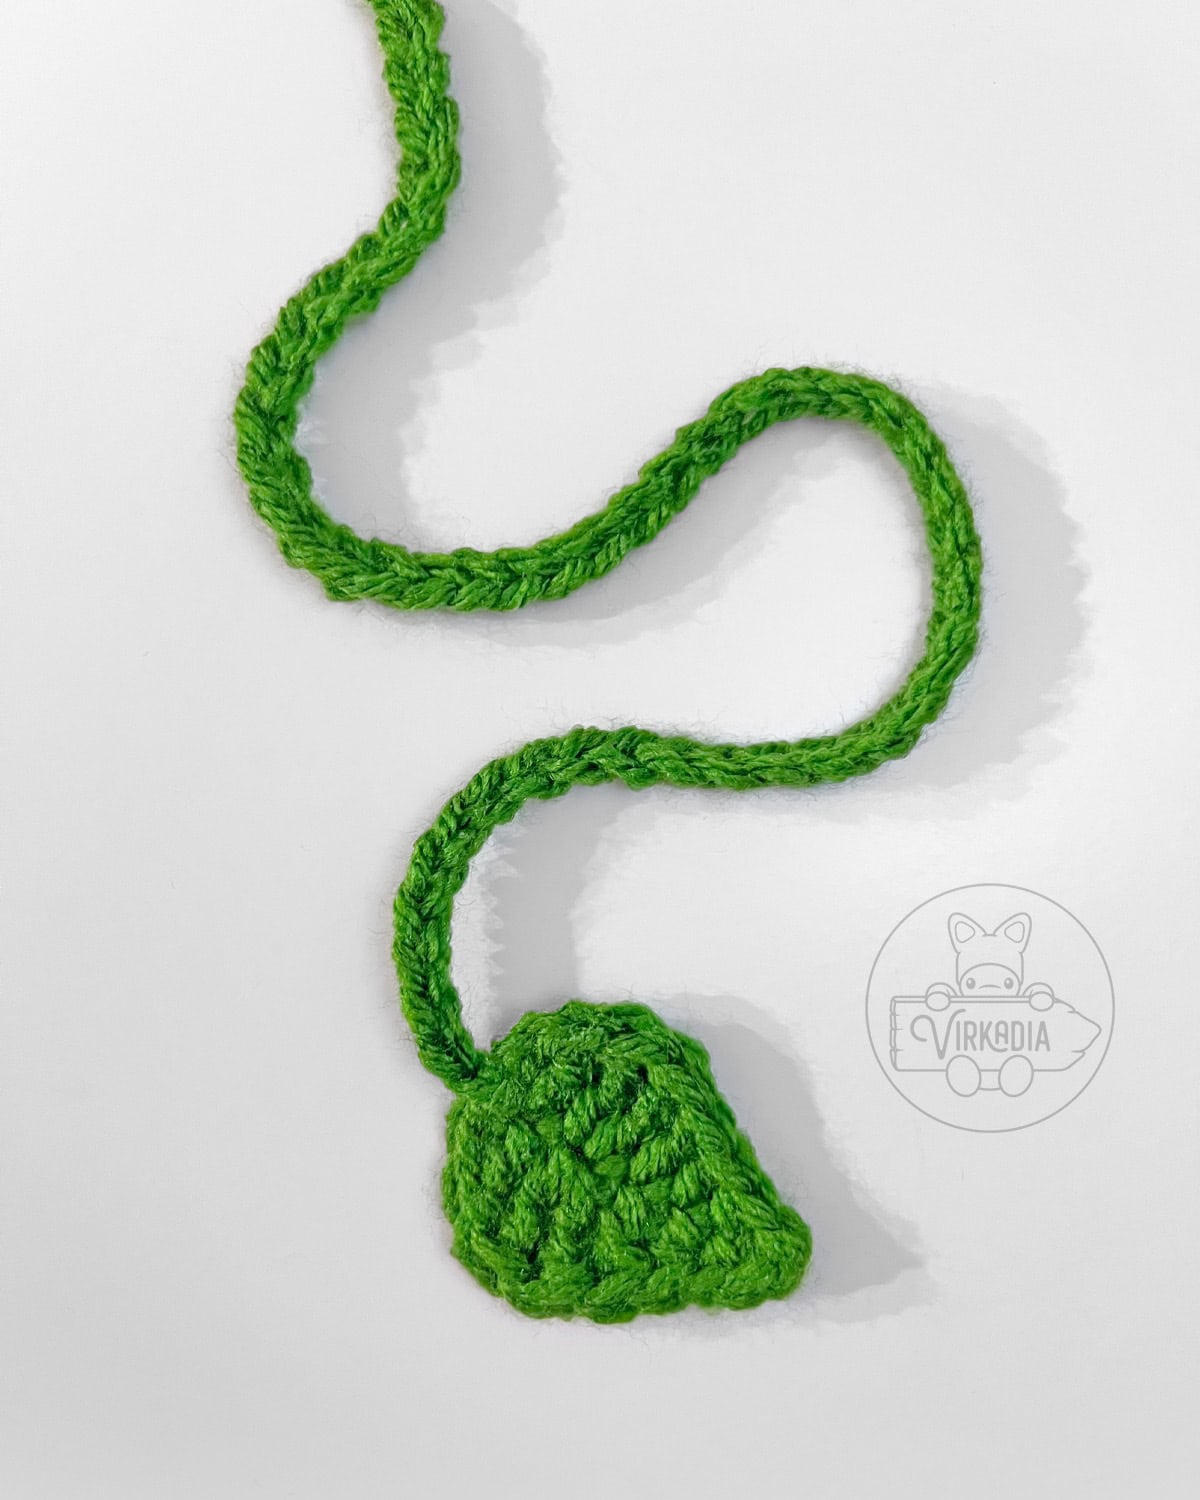
The finished length of each example bookmark string is 12 inches, but this pattern includes instructions for customizing your bookmark to any length that you desire!
*Finished dimensions are calculated from a model using medium weight yarn, a size H-8 (5 mm) crochet hook, the YU/YO method and the following gauge: 18 sc x 21 rows = 4 inches.
Supplies:
- Size H-8 (5 mm) crochet hook
- Medium (4) weight yarn in 4 colors:
- Yarn A - red (example uses Red Heart Super Saver: Cherry Red)
- Yarn B - white (example uses Red Heart Super Saver: Soft White)
- Yarn C - green (example uses Big Twist Value: Forest Green)
- Yarn D - yellow (example uses Red Heart Super Saver: Saffron)
- Polyester fiberfill
- Yarn needle
- Scissors
- Stitch markers
Terminology:
This free crochet strawberry bookmark pattern set uses English (US) terminology:
- st (sts) = stitch (stitches)
- ch = chain stitch
- sl st = slip stitch
- sc = single crochet
- sc2tog = single crochet 2 together (over the span of 2 stitches), also known as a decrease
- hdc = half double crochet
- dc = double crochet
- tr = treble crochet
Please note that this pattern is written so that each crochet stitch abbreviation is attached to a number, such as 1sc, 2sc, etc. This number denotes how many of that stitch is to be worked into the same stitch.
In other words, 1sc = one single crochet, whereas 2sc = two single crochet worked into one stitch, also known as an increase.
You can learn more about how to read Virkadia patterns on our Pattern Help FAQ page!
Special Stitch Instructions:
Please review our special stitch instructions on our Stitch Tutorials FAQ before beginning, as some techniques may be unique to this pattern.
You can also watch our amigurumi techniques video tutorial for all of our tips and tricks for improving your project!
This free crochet strawberry bookmark set uses the following special stitch tutorials:
- Single Crochet (YU/YO Method)
- Invisible Decrease
- Joining Rounds
Most of this pattern is worked in the round, with each round joined at the end with a slip stitch. Unless otherwise instructed, the first stitch of your next round will always be worked into the same stitch as your joining slip stitch has been worked into.
Be sure to always keep the ‘right side’ of your stitches facing outwards as you work. The right side is the front side of the stitch that is facing you as you are completing each stitch.
Pattern Instructions | Free Crochet Strawberry Bookmark
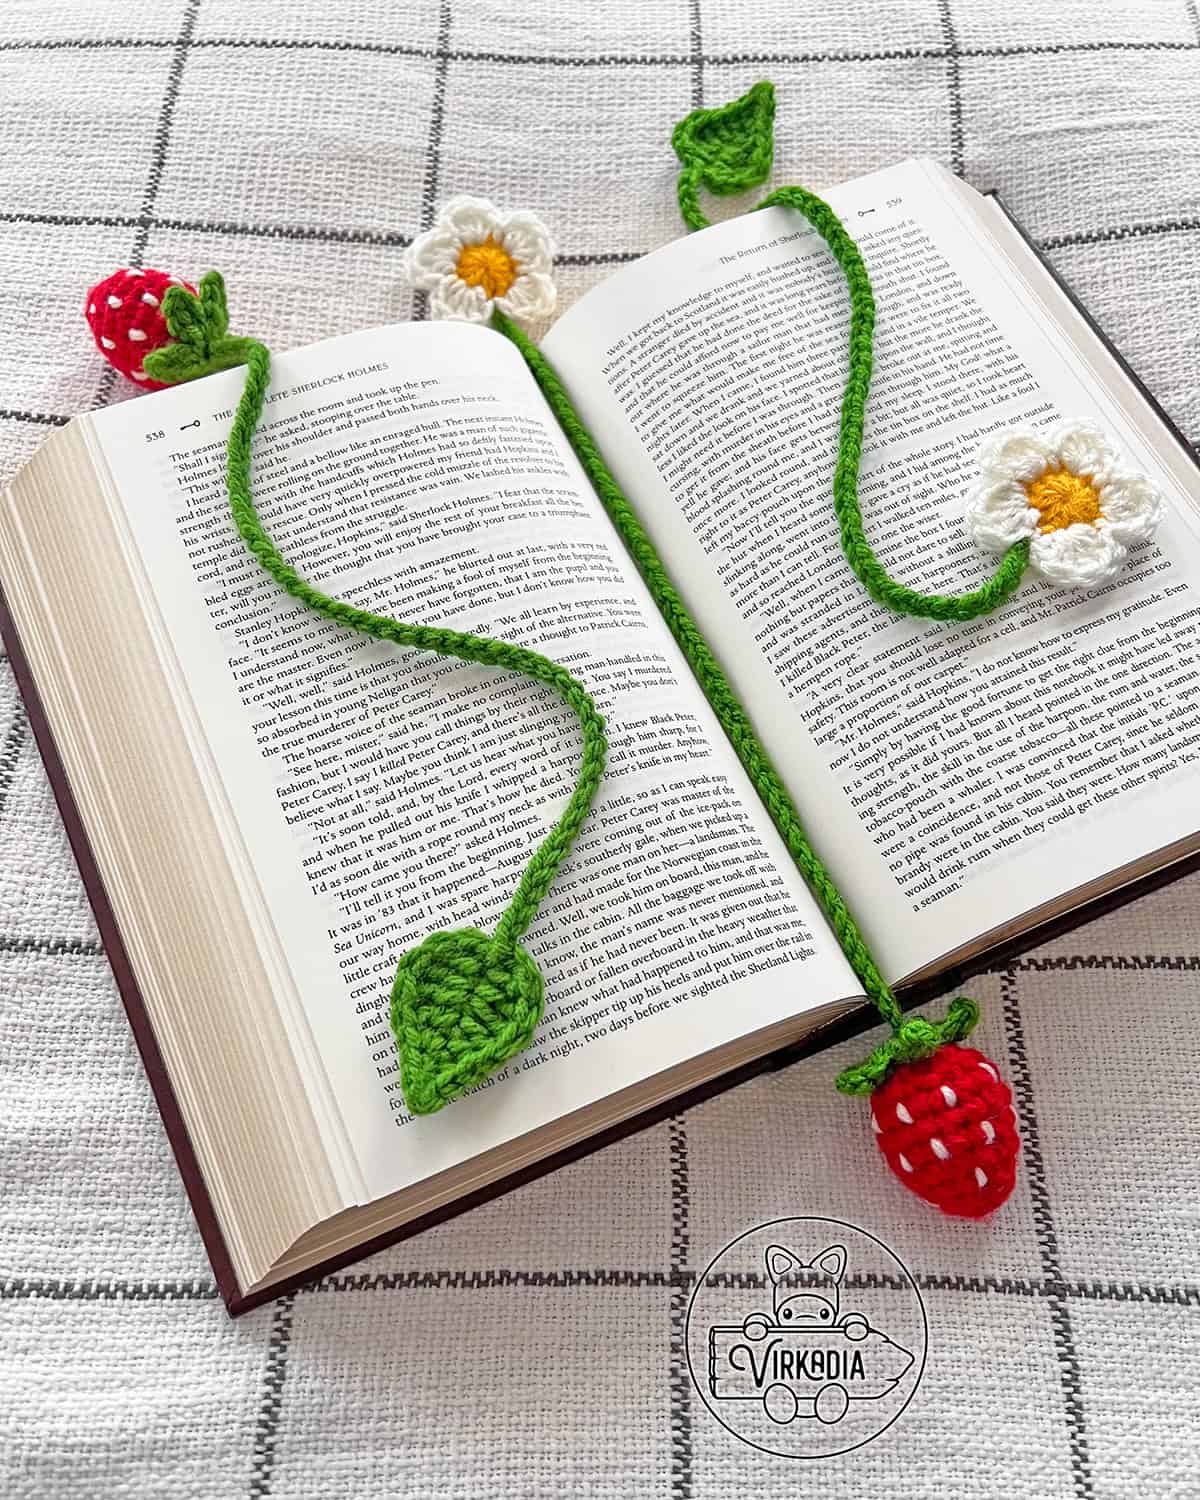
This free crochet strawberry bookmark pattern set includes instructions for three different bookmark variations: strawberry with leaf, flower with leaf, or strawberry with flower.
Follow each of the relevant sections below for the specific bookmark variation you’d like to make, or repeat each section twice before sewing together for enough pieces to create the full set of three!
Crochet Strawberry – Rounds 1 to 8:
With yarn A (red), make a magic ring (or ch 4, sl st into 1st st to form ring, ch 1).
Rnd 1: 6sc into ring, sl st into 1st st to join, ch 1 (6).
Rnd 2: [1sc into next st, 2sc into next st] 3 times, join, ch 1 (9).
Rnd 3: [2sc into next st, 1sc into each of next 2 sts] 3 times, join, ch 1 (12).
Rnd 4: [1sc into each of next 2 sts, 2sc into next st] 4 times, join, ch 1 (16).
Rnd 5: 1sc into each st around, join, ch 1 (16).
Rnd 6: 1sc into each st around, join, ch 1 (16).
Rnd 7: 1sc into each st around, join, ch 1 (16).
Rnd 8: [sc2tog over next 2 sts, 1sc into each of next 2 sts] 4 times, join, ch 1 (12).
Secure your working loop with a stitch marker and follow the directions below for embroidering the seeds before continuing to round 9.
Crochet Strawberry – Embroidering Seeds:
With a length of yarn B (white), embroider seeds around the entire circumference of the strawberry.
To get the exact look as the example crochet strawberry bookmark, begin by inserting your needle between rounds 7 and 8, from inside to outside.
Pull through and leave a short tail on the inside of your strawberry for tying later.
Then, reinsert your needle 1 round directly below where you’ve just exited from, between rounds 6 and 7. This completes 1 seed embroidery, over top of round 7.
Repeat these steps around the entire circumference of round 7, working 1 seed every 2 stitches, for a total of 8 seeds around your strawberry.
Then, moving down 2 rounds, sew 8 more seeds over top of round 5. Each seed should again be 2 stitches apart, but this time embroidered so that they are evenly staggered with the seeds above.
Lastly, sew 4 more seeds over top of round 3. Each of these seeds should be 3 stitches apart and vertically aligned with every-other seed in round 7.
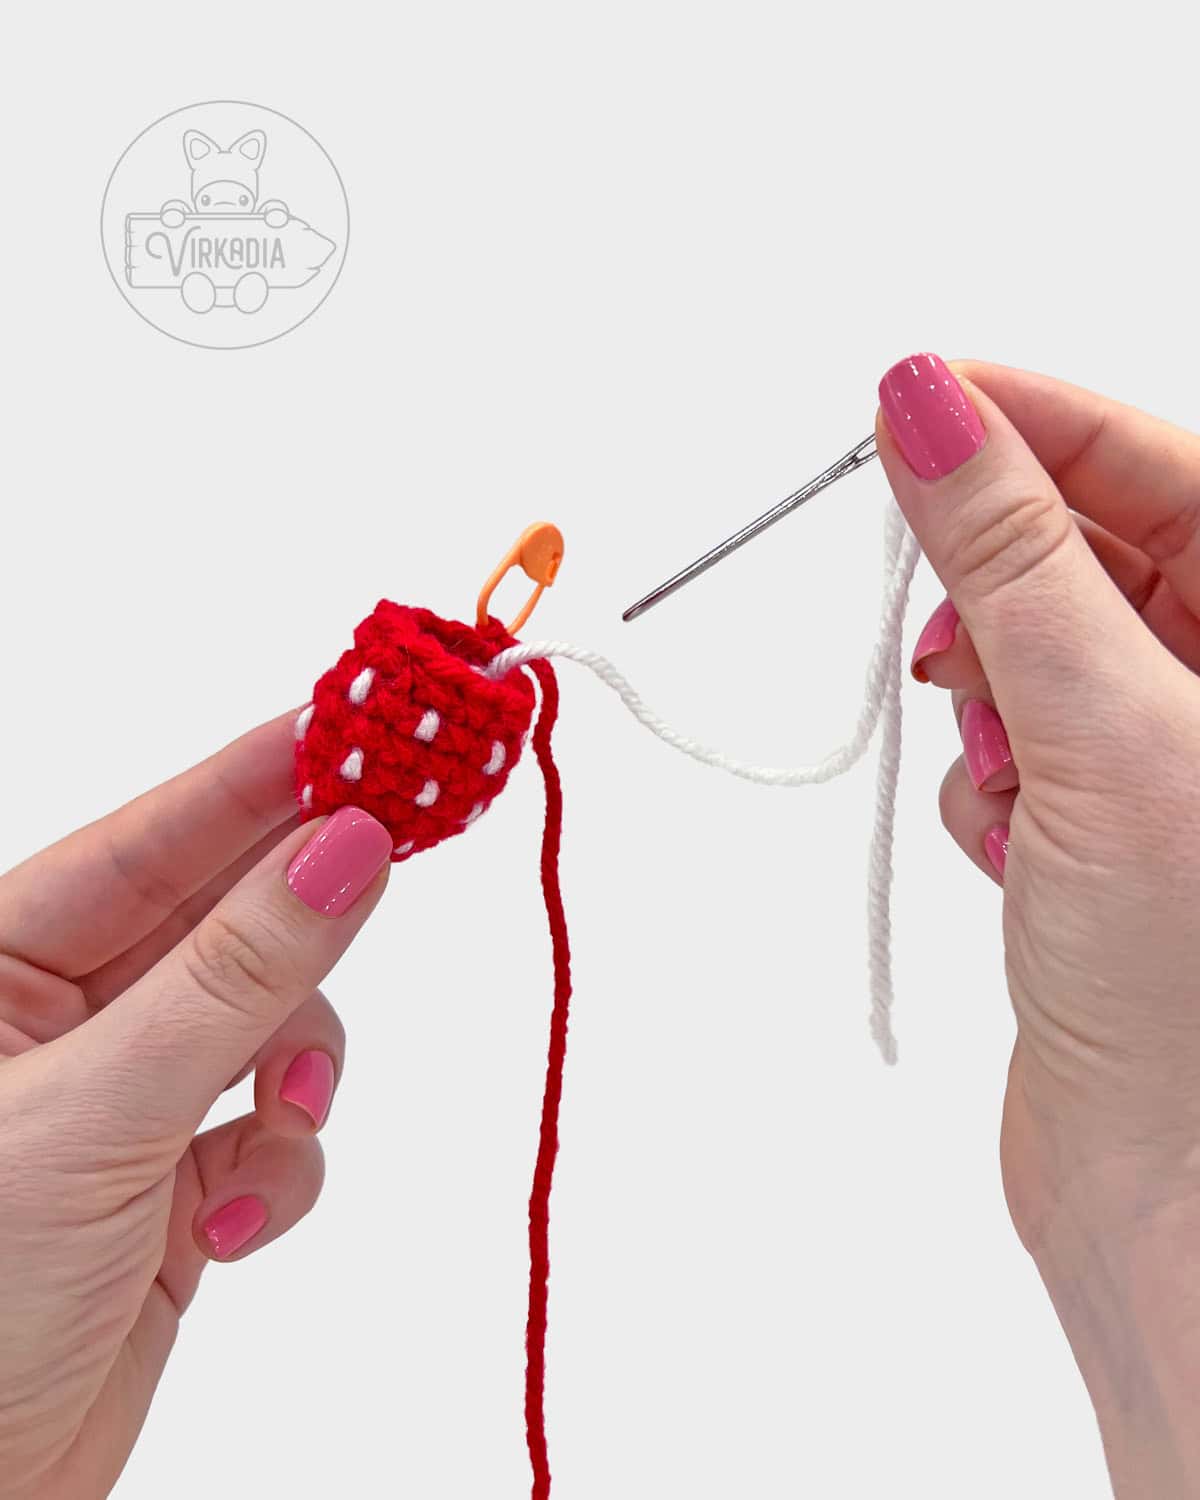
Tie your ends together on the inside of your strawberry to secure your embroidery and cut any excess length.
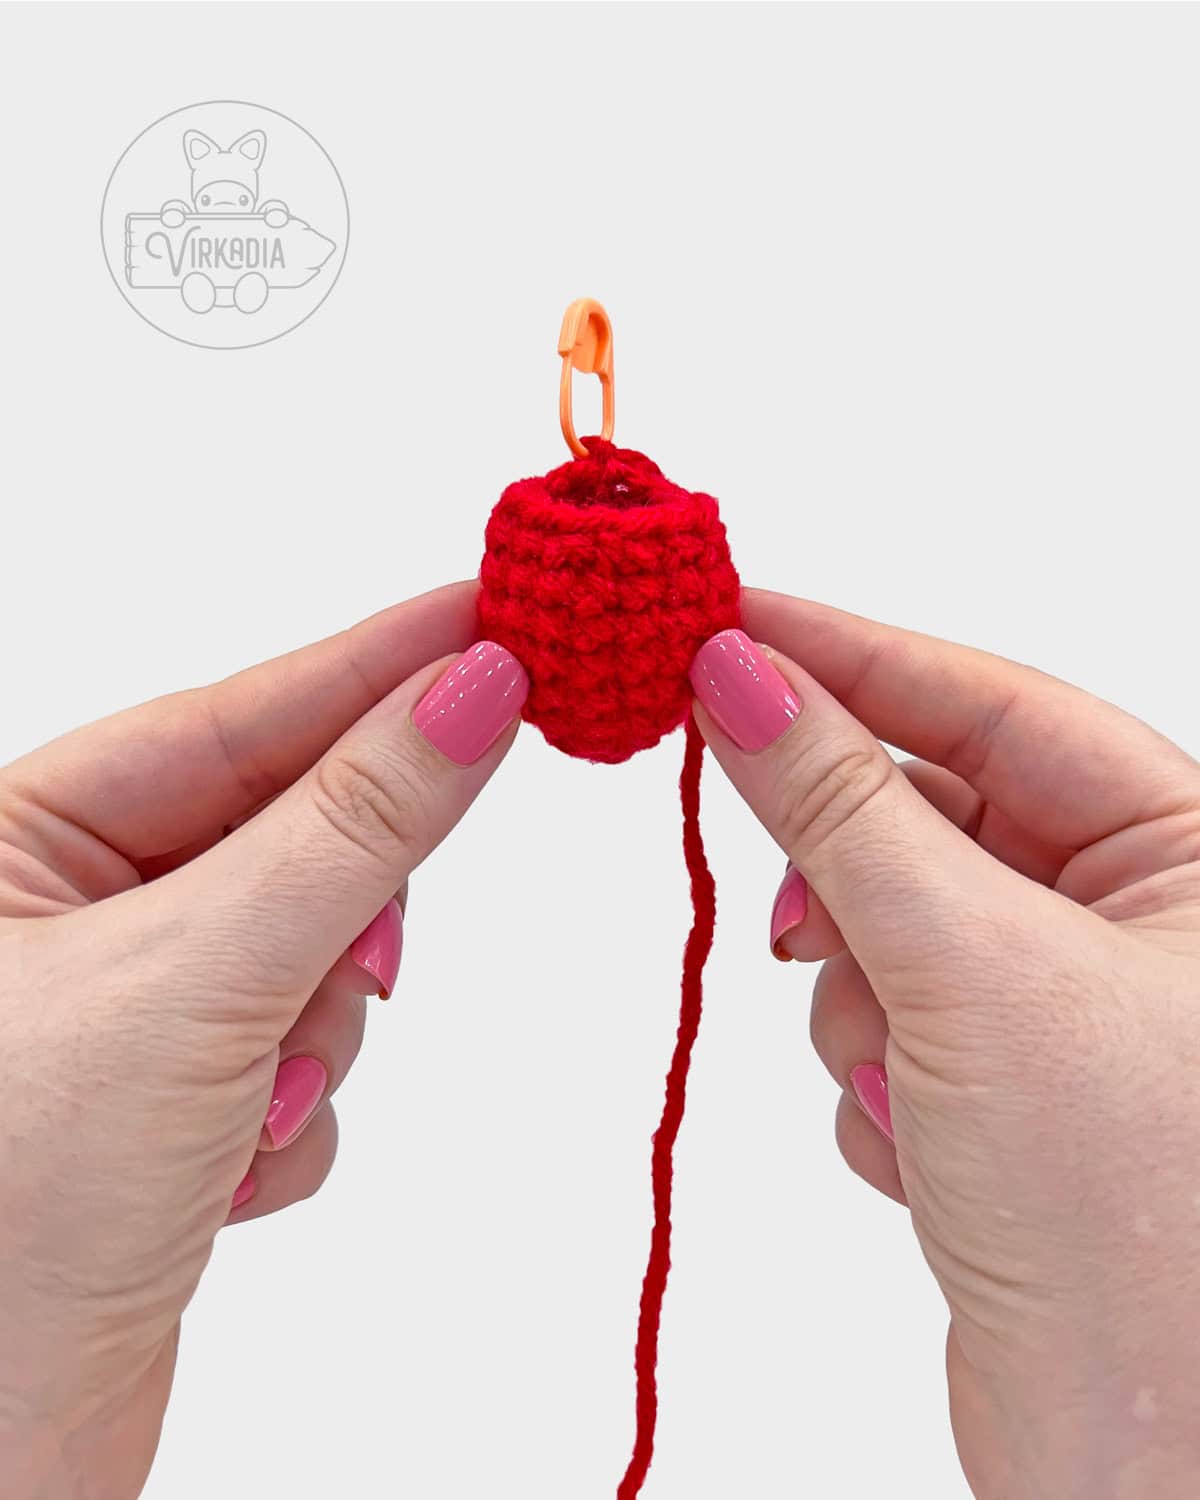
Crochet Strawberry – Round 9:
Stuff your crochet strawberry until full. Remove your stitch marker and continue to add stuffing as you complete round 9.
Rnd 9: [sc2tog over next 2 sts] 6 times, join (6).
Fasten off and leave a tail for sewing closed.

To sew the top hole closed, pass the needle, from front to back, through the front loop only of each stitch around and then pull tight.
Secure your sewing with a knot, trim your tail, and sew in any remaining length.
Set your strawberry aside for now, and follow the directions below for the crochet strawberry leaves.
Crochet Strawberry Leaves:
With yarn C (green), ch 4, sl st into 1st st to form ring.
Rnd 1: [ch 4, sl st into 2nd ch from hook, 1sc into next st, 1hdc into next st, sl st into ring] 5 times (20).
Fasten off and leave a tail for sewing. Retrieve your strawberry you’ve set aside earlier.
Using the tail left over from fastening off, sew the crochet strawberry leaves onto the top center of your strawberry.
The leaves in the example piece are secured between each leaf by sewing into the strawberry between rounds 8 and 9, but you may use whatever method works best for you!
Secure your sewing with a knot, or tie your end tail together with your beginning tail, trim your ends, and sew in any remaining length.
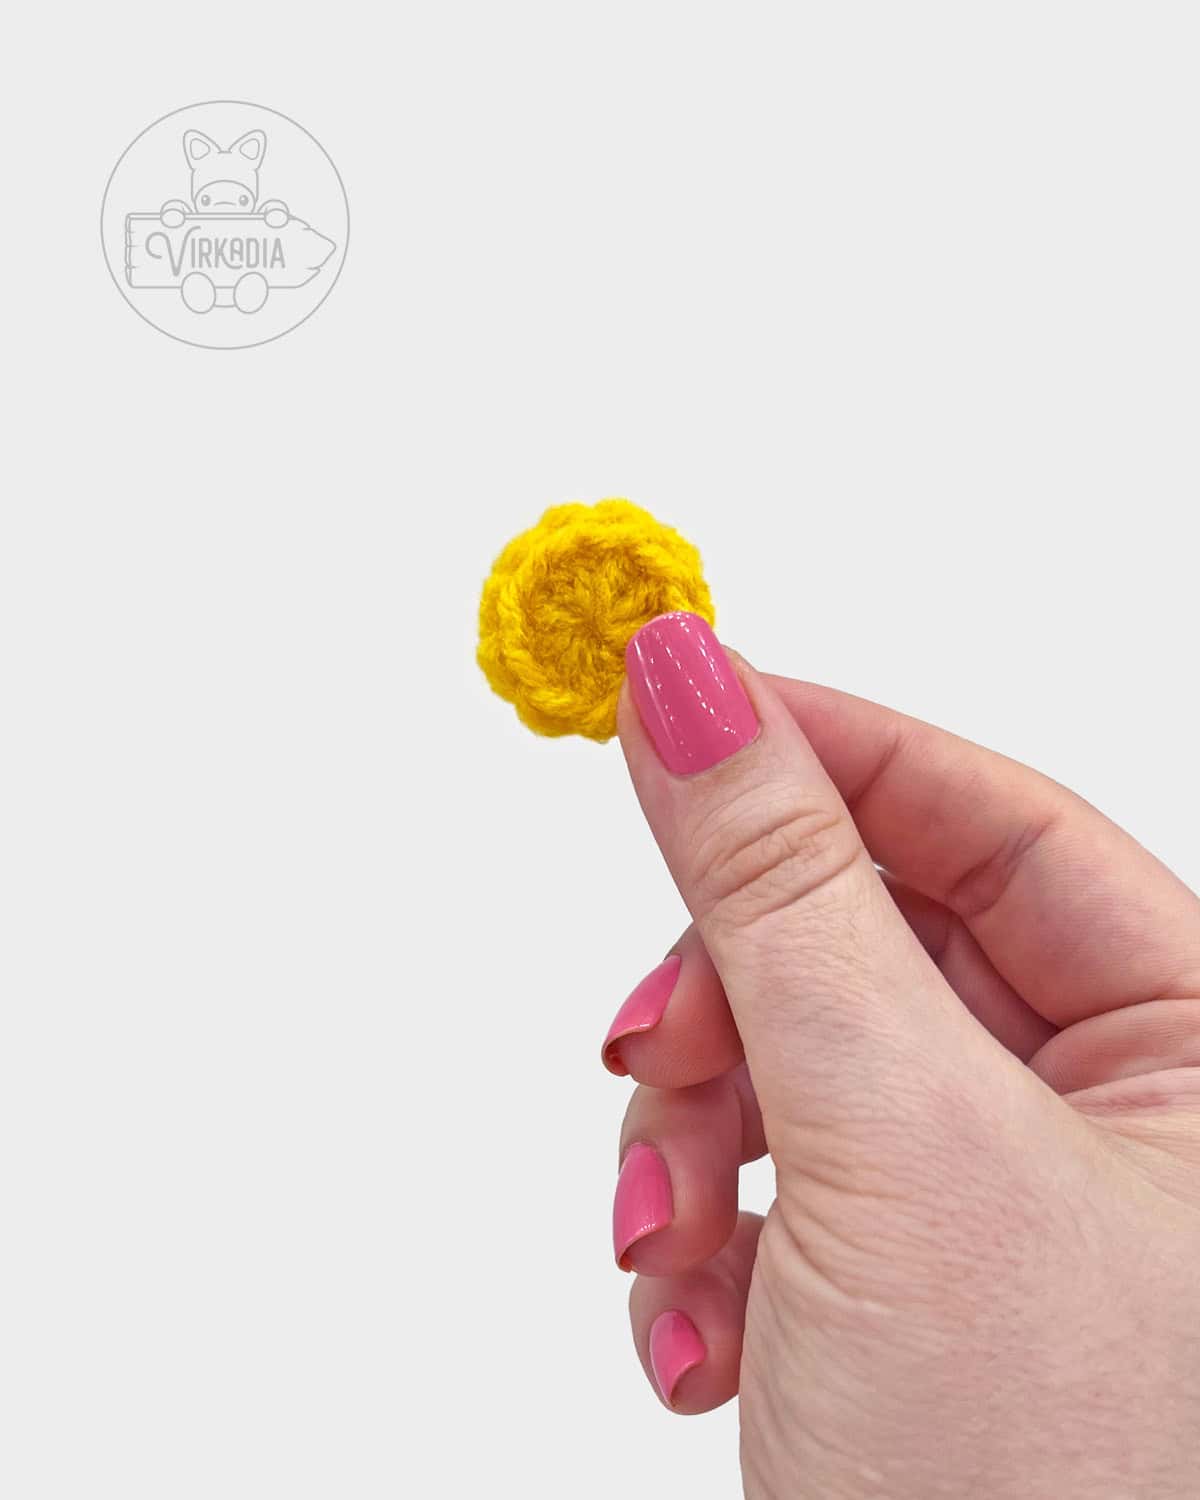
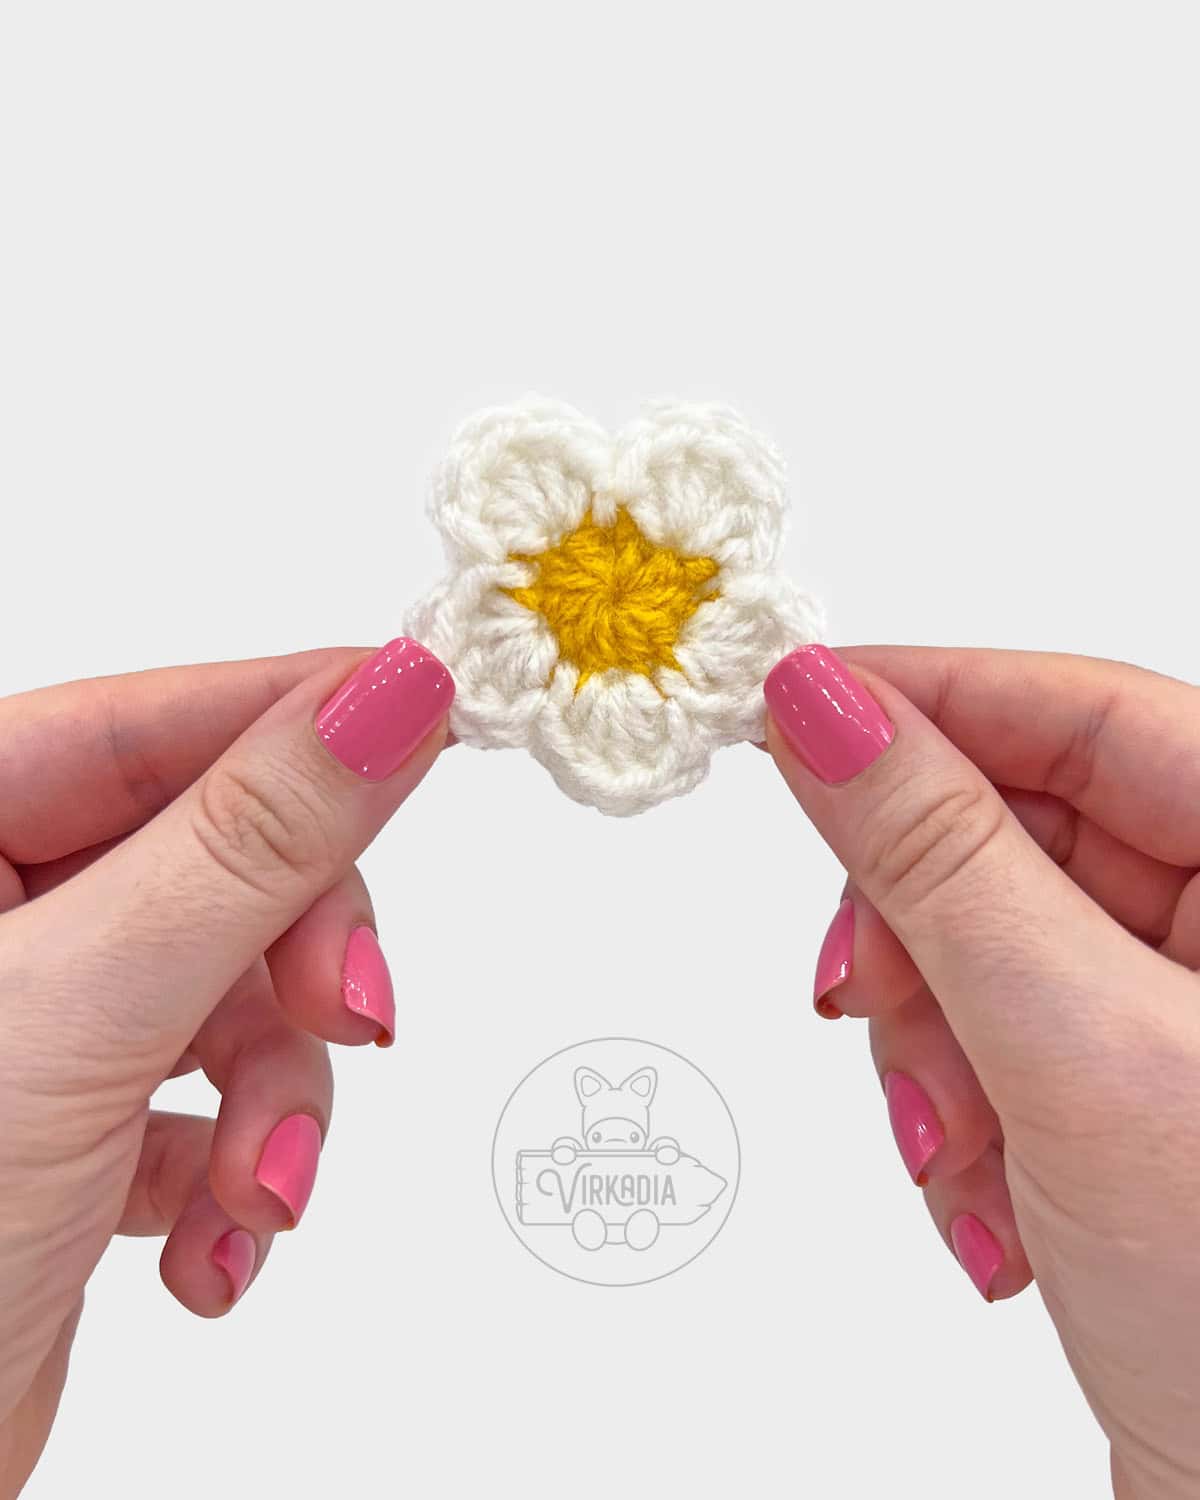
Crochet Strawberry Flower:
With yarn D (yellow), make a magic ring (or ch 4, sl st into 1st st to form ring, ch 1).
Rnd 1: 10hdc into ring, sl st into 1st hdc to join (10).
Fasten off yarn D and weave in tails.
Join yarn B (white) by inserting your hook into any stitch from round 1 and pulling up a loop of yarn B.
Chain 2 and begin the next round in the same stitch as where you’ve just joined your yarn.
Rnd 2: [5dc into next st, sl st into next st] 5 times, sl st into 1st dc to join (30).
Fasten off yarn B and weave in tails.
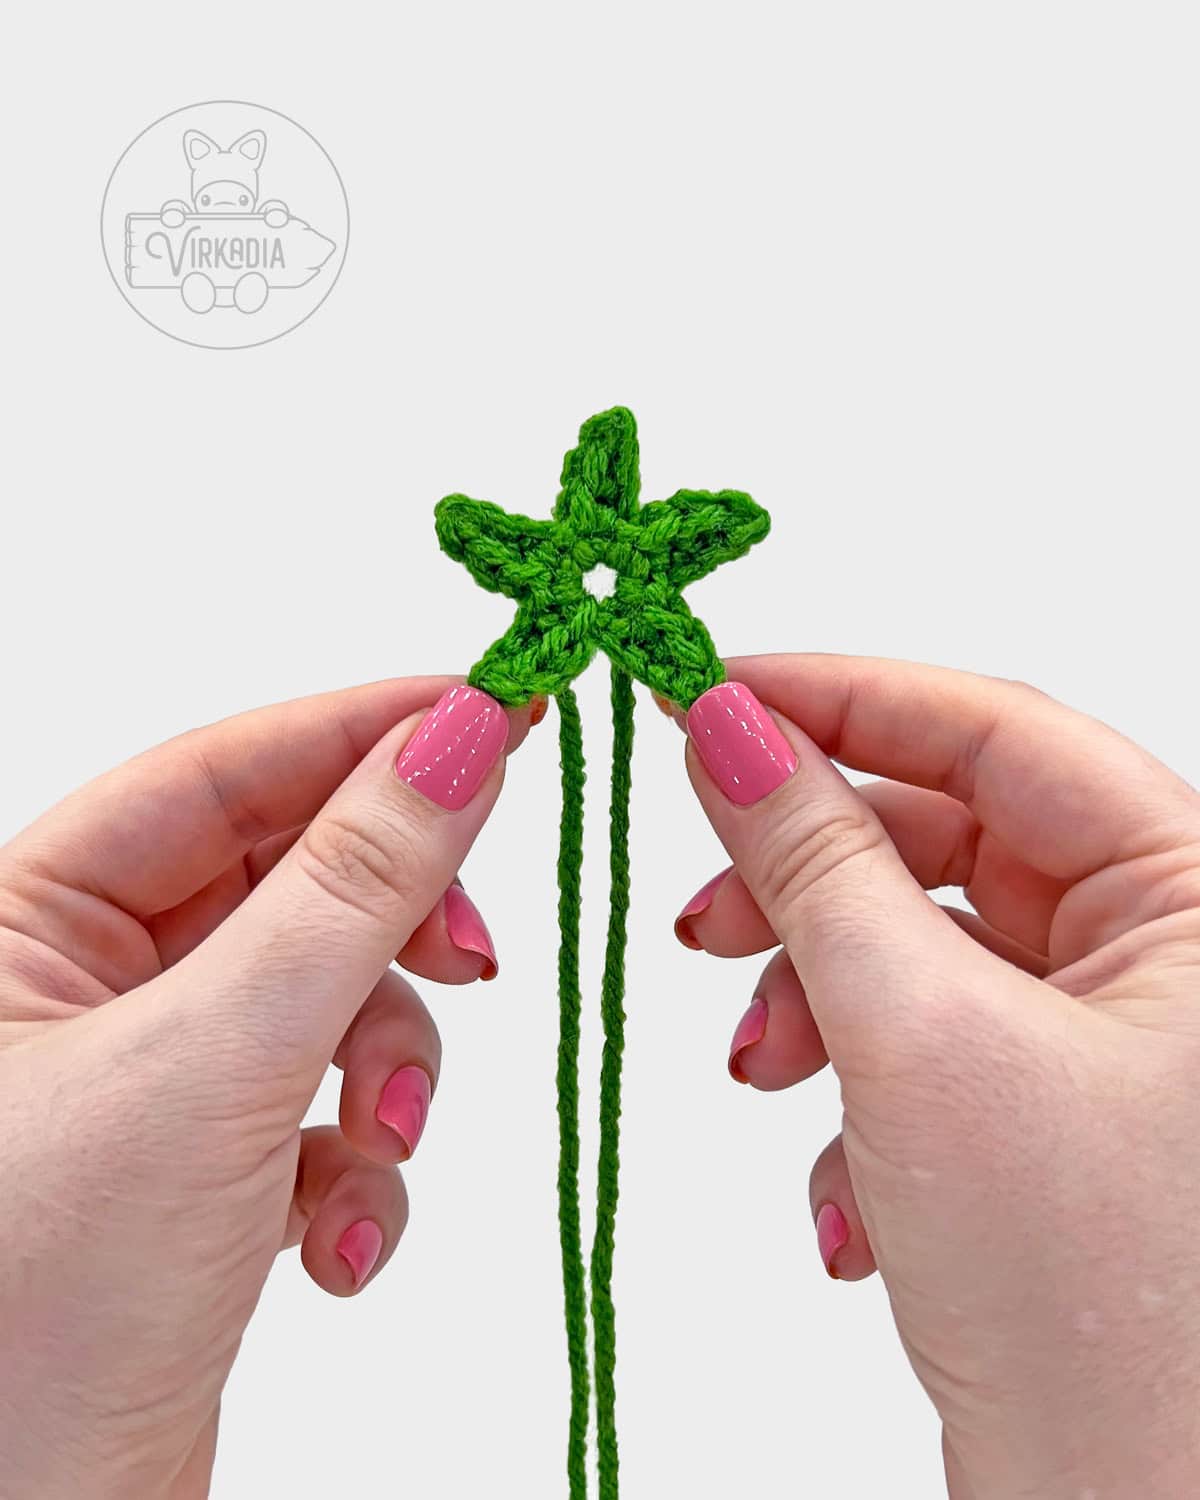
Crochet Leaf:
For a more detailed tutorial of the leaf, feel free to check out our dedicated Mini Crochet Leaf post. Otherwise, continue ahead for the consolidated leaf instructions.
With yarn C (green), chain 8.
Rnd 1: 1dc into 3rd ch from hook, 2tr into next st, 1dc into next st, 1hdc into next st, 1sc into next st, sl st into next st, ch 1, working into other side of ch sts, sl st into next st, 1sc into next st, 1hdc into next st, 1dc into next st, 2tr into next st, 1dc into next st, ch 2, sl st into same st as last dc, ch 50* (70).
*If you want to customize your bookmark to fit a specific book, you may adjust the amount of chains you work at the end of round 1.
Add more chains at the end of your leaf for a longer bookmark, or fewer chains for a shorter string.
Then, fasten off yarn D and leave an end tail for sewing
Sewing Together:
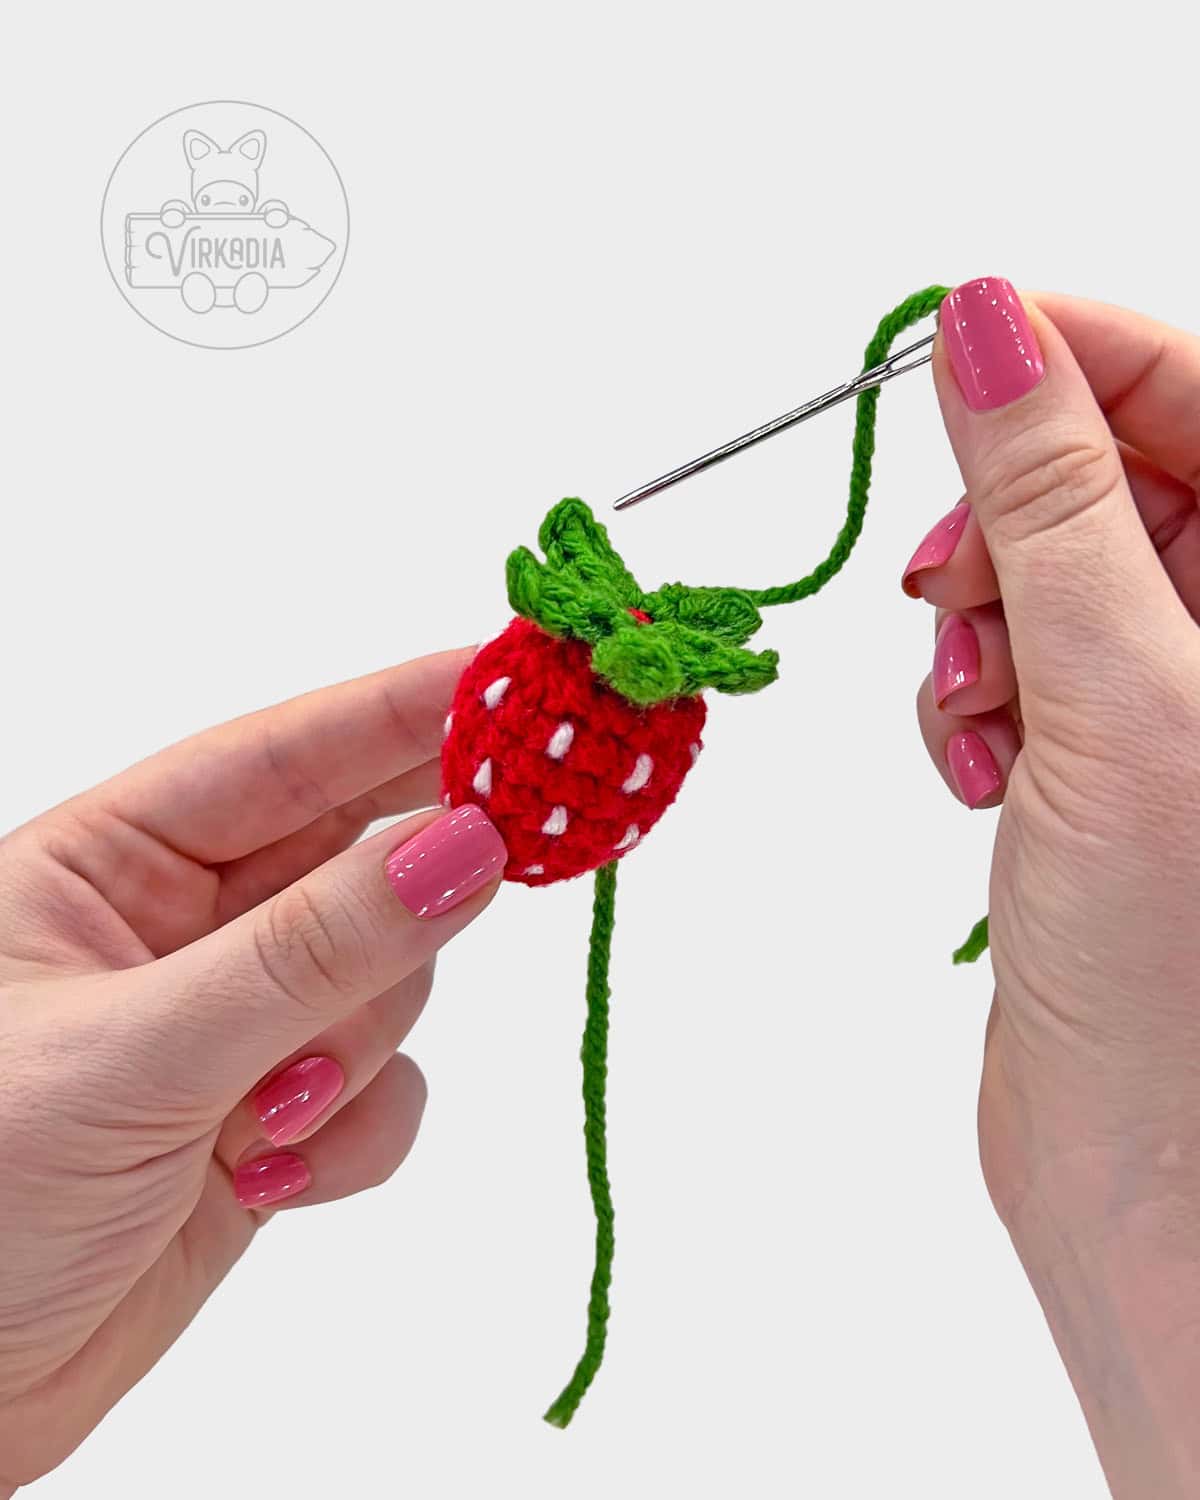
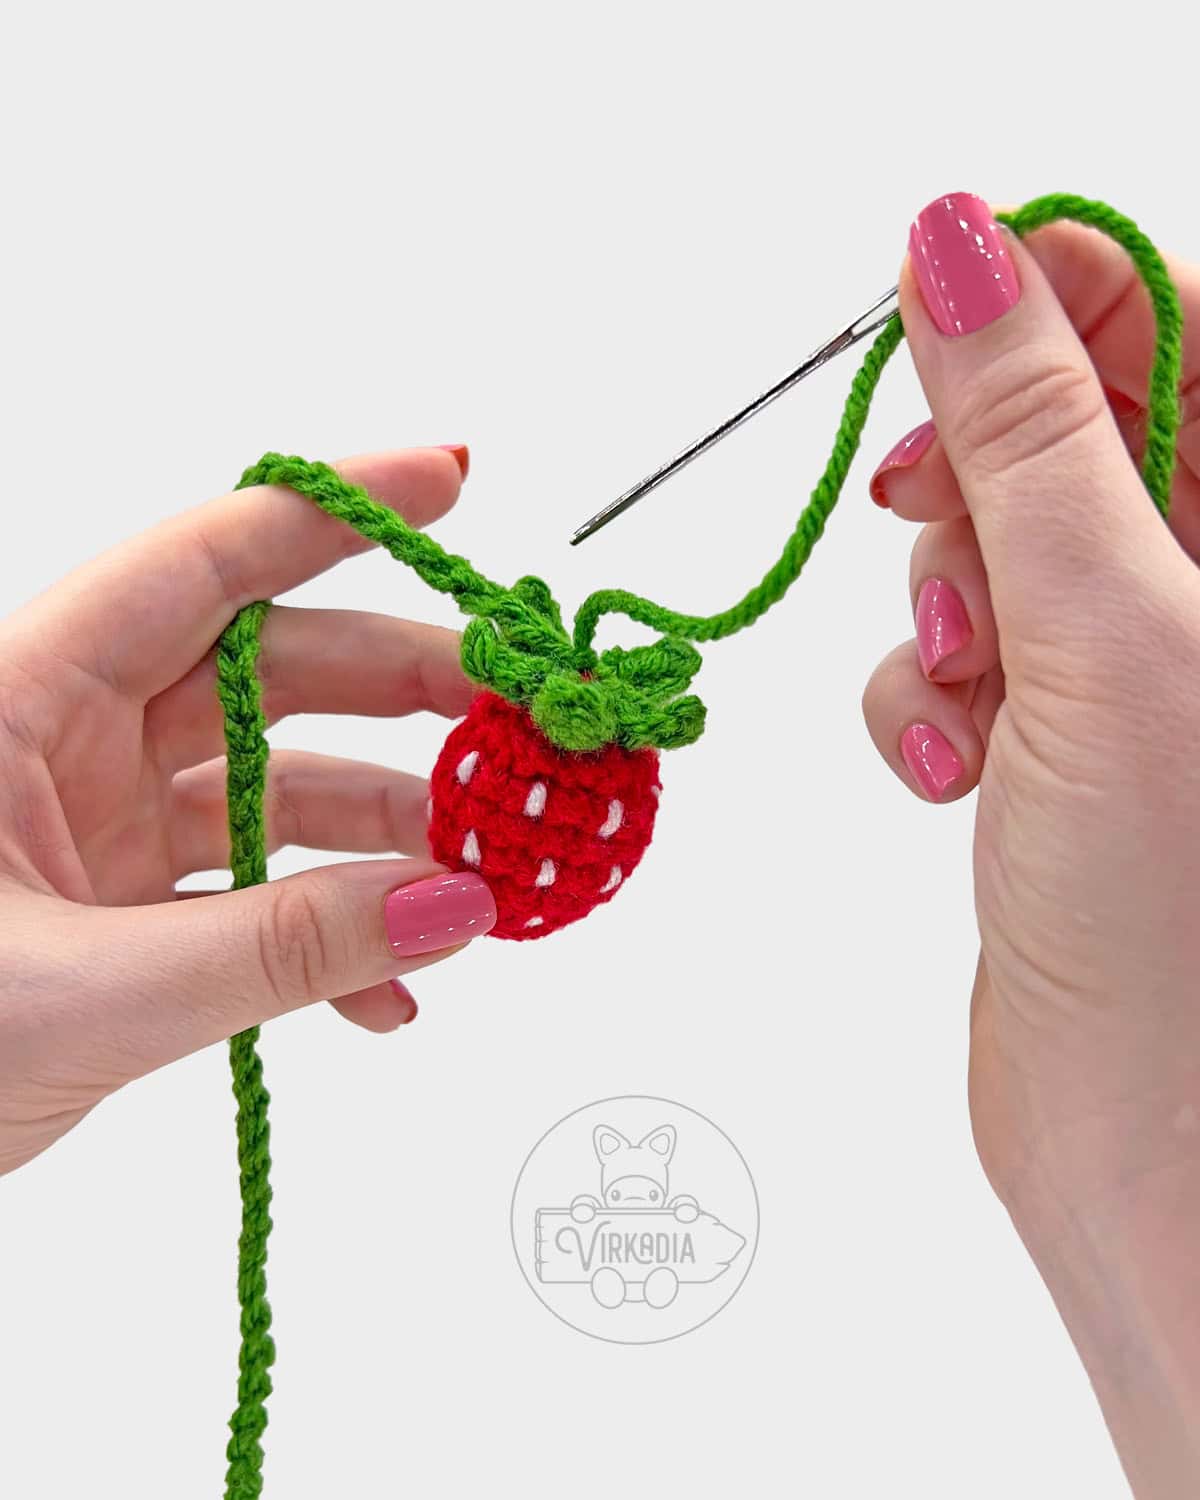
Crochet Strawberry and Leaf Bookmark:
To complete a strawberry and leaf bookmark, use your end tail left over from fastening off of the crochet leaf to attach it to the strawberry.
The end of the chain should be sewn onto the top of the strawberry, in the center of the leaves, as seen below.
Secure your sewing with a knot, trim your tail, and sew in any remaining length.
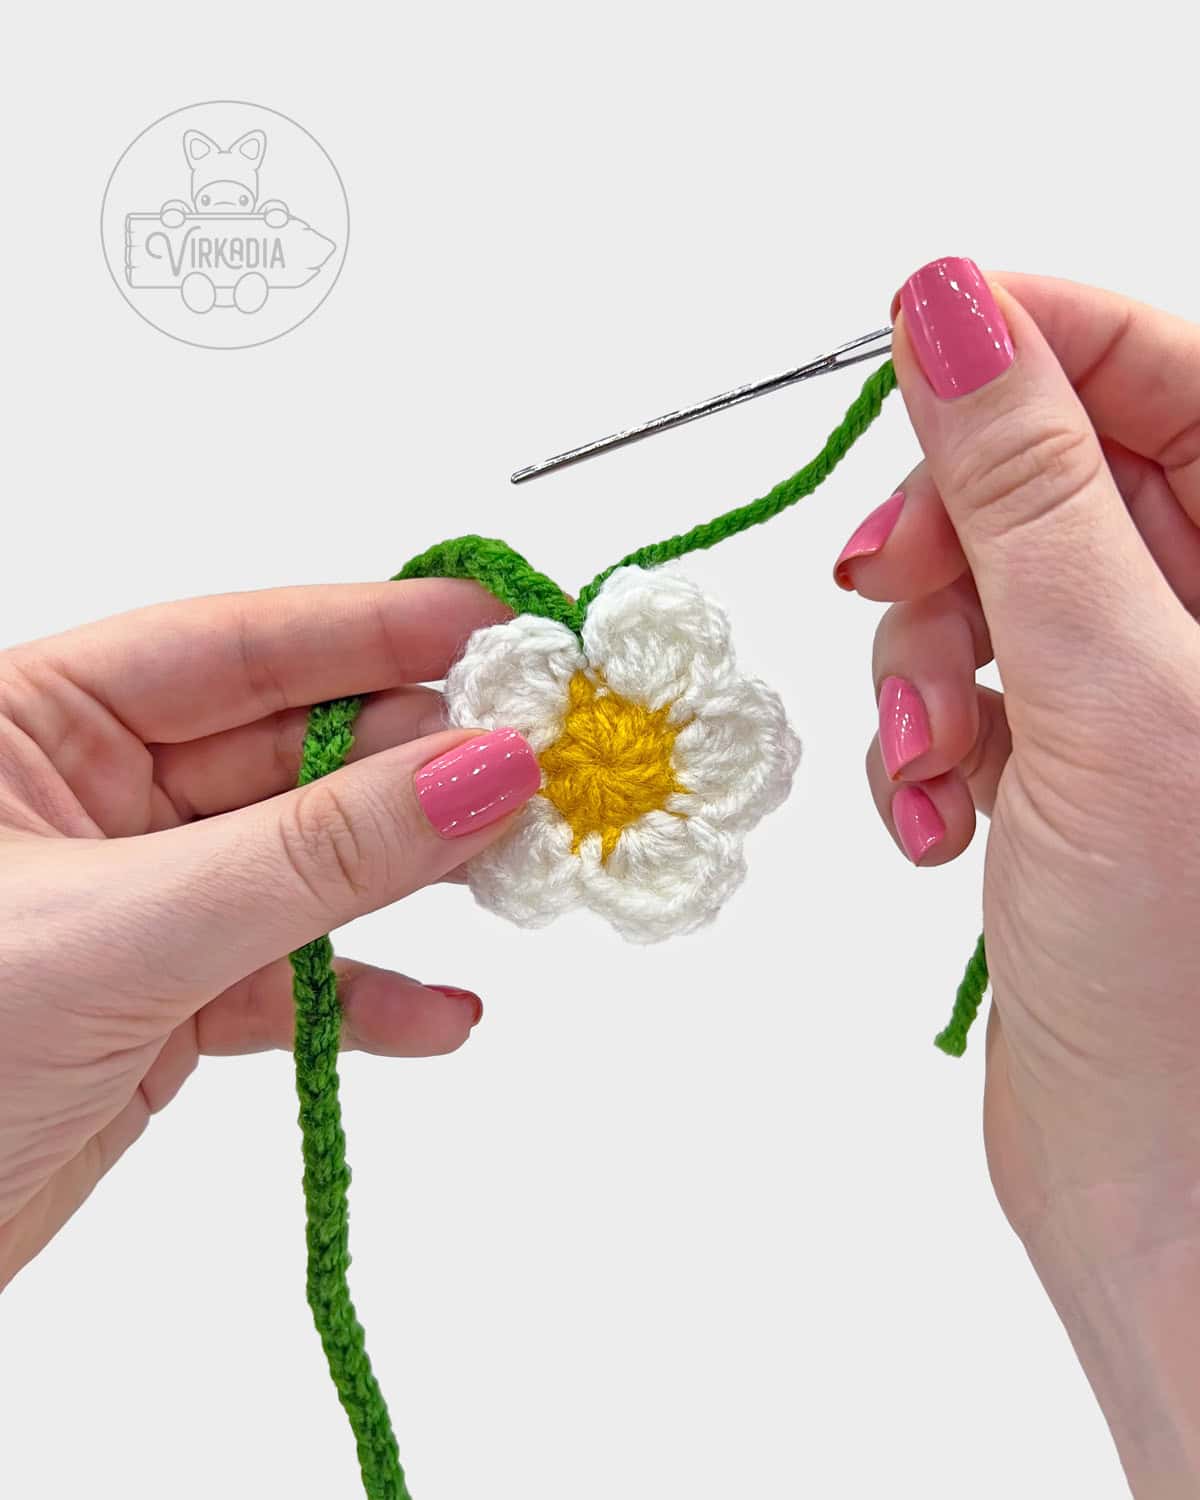
Crochet Flower and Leaf Bookmark:
To complete a flower and leaf bookmark, use your end tail left over from fastening off of the crochet leaf to attach it to the flower.
The end of the chain should be sewn into the slip stitch between any two petals of the flower, as seen below.
Secure your sewing with a knot, trim your tail, and sew in any remaining length.
Crochet Strawberry and Flower Bookmark:
With yarn C (green), leave a beginning tail for sewing and chain 50.*
*If you want to customize your bookmark to fit a specific book, you may adjust the amount of chains you work.
Add more chains for a longer bookmark, or fewer for a shorter string.
Fasten off and leave an end tail for sewing, as well.
To complete a strawberry and flower bookmark, use your beginning and end tails left over from your chain to attach the strawberry and flower together.
One end of the chain should be sewn onto the top of the strawberry, in the center of the leaves.
The other end of the chain should be sewn into the slip stitch between any two petals of the flower.
Secure each end with a knot, trim your tails, and sew in any remaining length.
Conclusion | Free Crochet Strawberry Bookmark
And with that, you’re done the free crochet Strawberry Bookmark Set! If you’ve enjoyed this pattern, be sure to check out our Home Decor page for more homemade household goodies!
You can also explore the Cutie Collections and the Pocket Pets archives for our original and free amigurumi patterns!
If you’re looking to cozy up with a longer project, check out our Clothing Patterns, or assemble your own designs from one of our Granny Square Patterns!
And don’t forget to browse our downloadable, ad-free patterns in our Etsy store!
Follow Virkadia on Instagram to stay updated on all new and upcoming patterns, crochet content, and amigurumi adventures! Thank you for all of your support!


Hey hey, I'm Joey Diehl!
I am the fiber artist behind Virkadia! I have a BFA in Fibers & Material Studies and have been crocheting for over 20 years. I have designed, photographed, and written dozens of original crochet patterns that I am honored to have been shared to hundreds of thousands of readers.
Wayne says
Wow! Those are lovely. Will definitely make these: one for my librarian sister and another for my sister who is a teacher. Thank you.
JustaGirl says
TYSM IT HELPED SM. I MADE THIS BOOKMARK FOR MY MOTHER ❤️❤️
Virkadia says
That is so sweet! ❤️ I'm so glad you liked the pattern!
Brittney says
I accidentally used the wrong size yarn, but it turned into the perfect size for a fabulous rearview mirror charm. Love it !