In this FAQ for Stitch Tutorials, you can find instructions for any special stitches that may be used in your Virkadia pattern, such as the Small Popcorn Stitch, the Spike Stitch, and the Puff Stitch.
Below, we will first go over the tutorials for the Single Crochet (YU/YO Method), the Invisible Decrease, and instructions for Joining Rounds, as these three techniques are used in almost all Virkadia patterns.
Following these first three tutorials, the rest of our special stitch instructions will be listed in alphabetical order. You may refer to the Pattern Information section of each pattern for which stitches will be used in that specific pattern.
Single Crochet (YU/YO Method):
All Virkadia amigurumi patterns use a variation of the traditional single crochet stitch, sometimes referred to as the YU/YO (yarn under/yarn over) method.
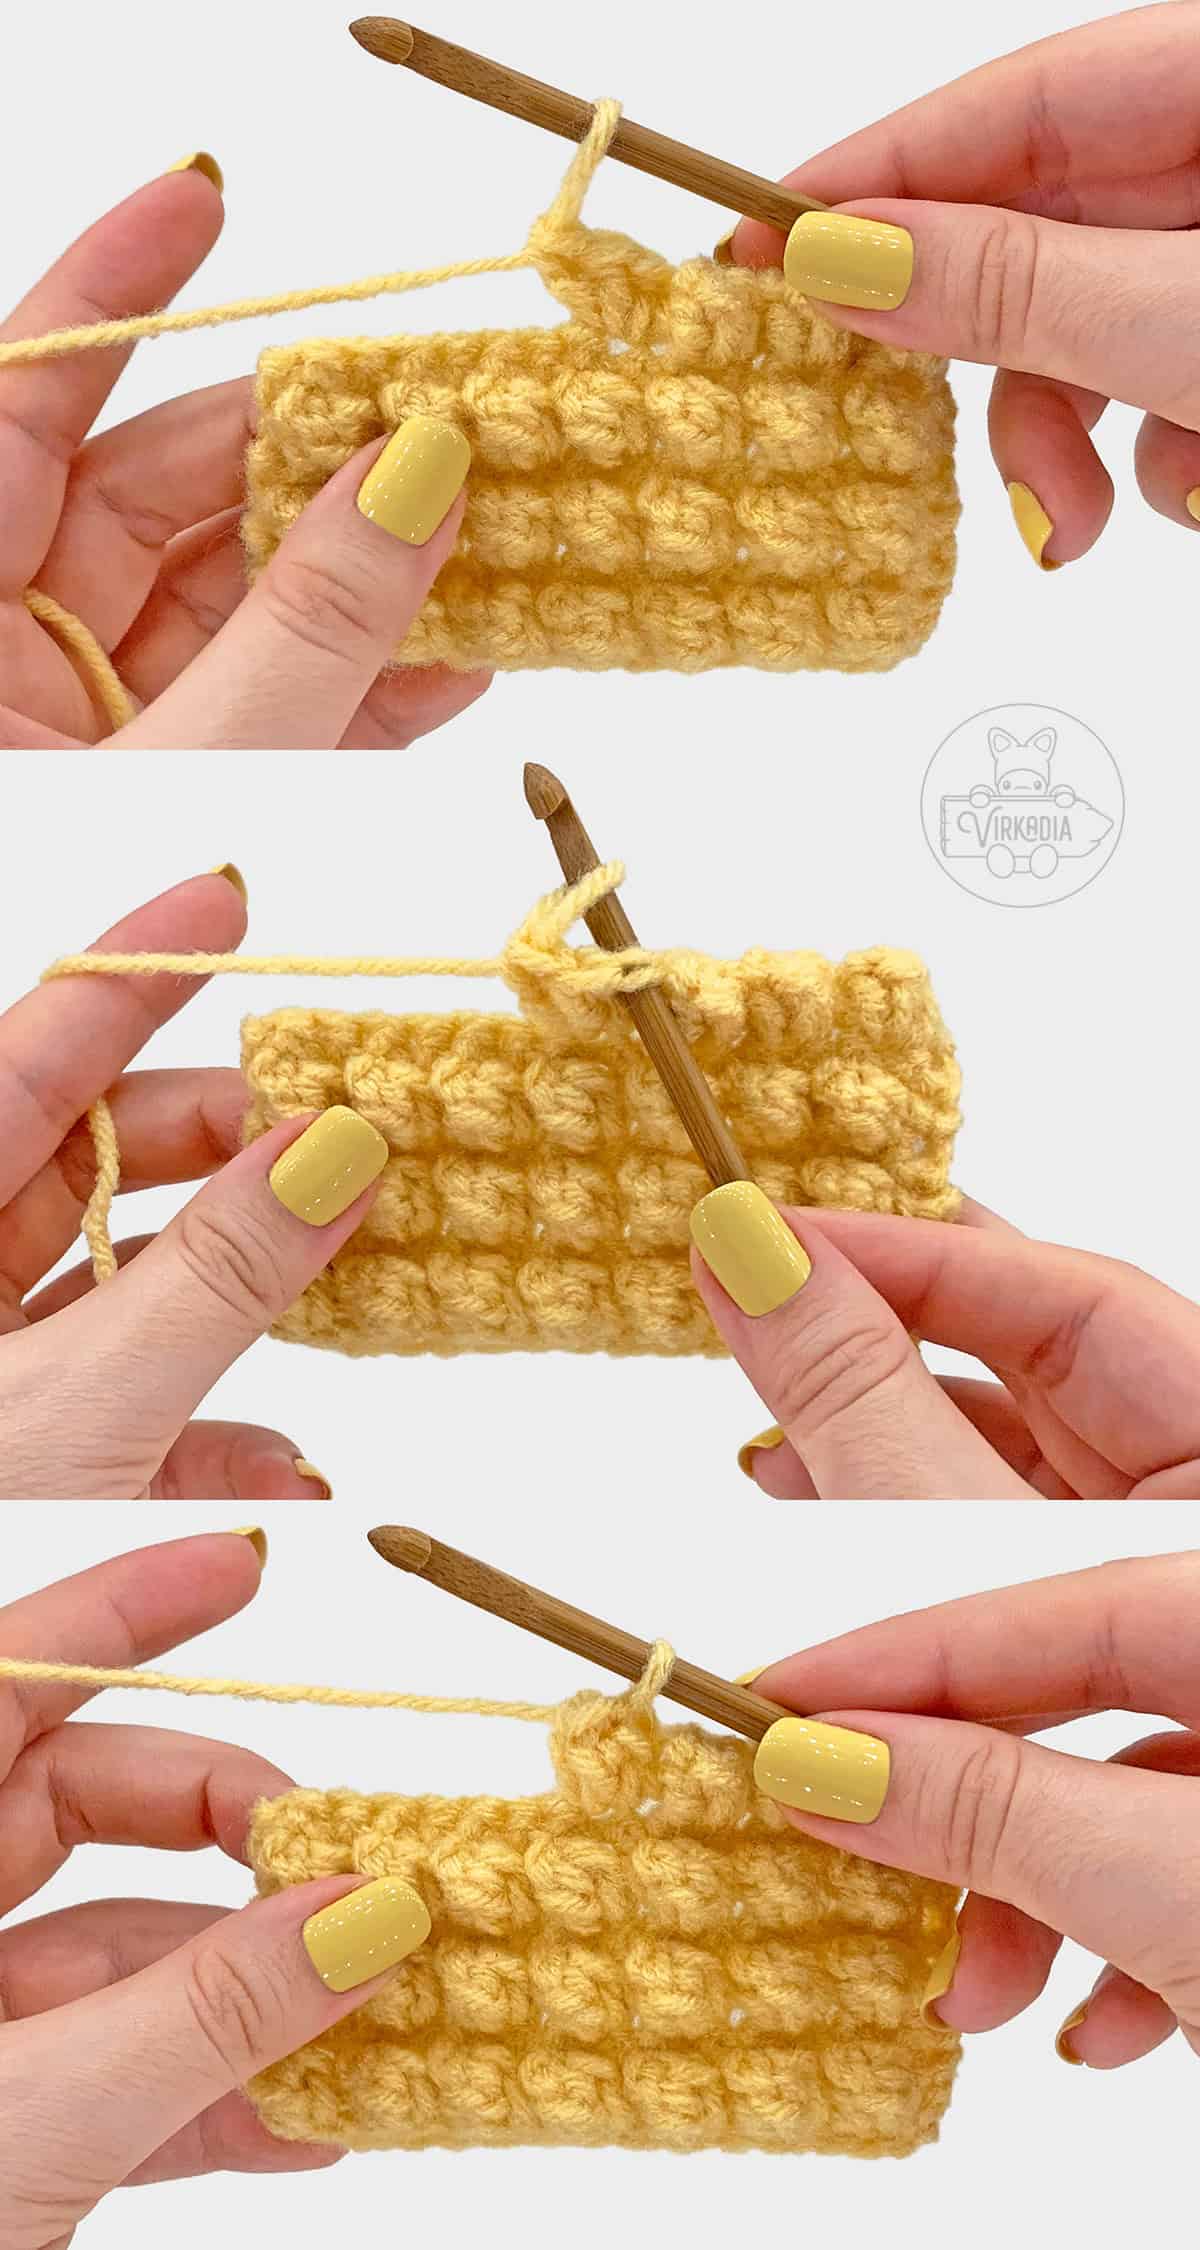
Instead of yarning over before pulling through, this method utilizes a yarn under technique on the first pass of each stitch, as seen below.
Begin by inserting your hook into the next stitch, then yarn under (not over) as shown above. Pull through the stitch, then yarn over as normal and pull through both loops on your hook to complete your single crochet.
Using the above technique produces a slightly tighter and stiffer fabric than traditional single crochet stitches. This method minimizes holes between stitches, improves shaping, and decreases stitch slanting.
All patterns will still work with the traditional technique of single crochet stitches, so choose what works best for you.
However, be wary that your project may result in having slight visual differences than those shown in examples if using the traditional method—especially for patterns such as the Pumpkin Cutie and Squash Cutie, where slanting will be very noticeable!
Invisible Decrease:
All Virkadia amigurumi patterns use a variation of the single crochet decrease stitch, often called an invisible decrease. This method produces a tighter stitch that improves shaping and blends in more seamlessly with regular stitches.
Insert your hook into the front loop only of the next stitch, then insert into the front loop only of the second stitch in the same way.
Yarn under (not over) as shown above and pull through both front loops. Yarn over as normal and pull through both loops on your hook to complete your invisible decrease.
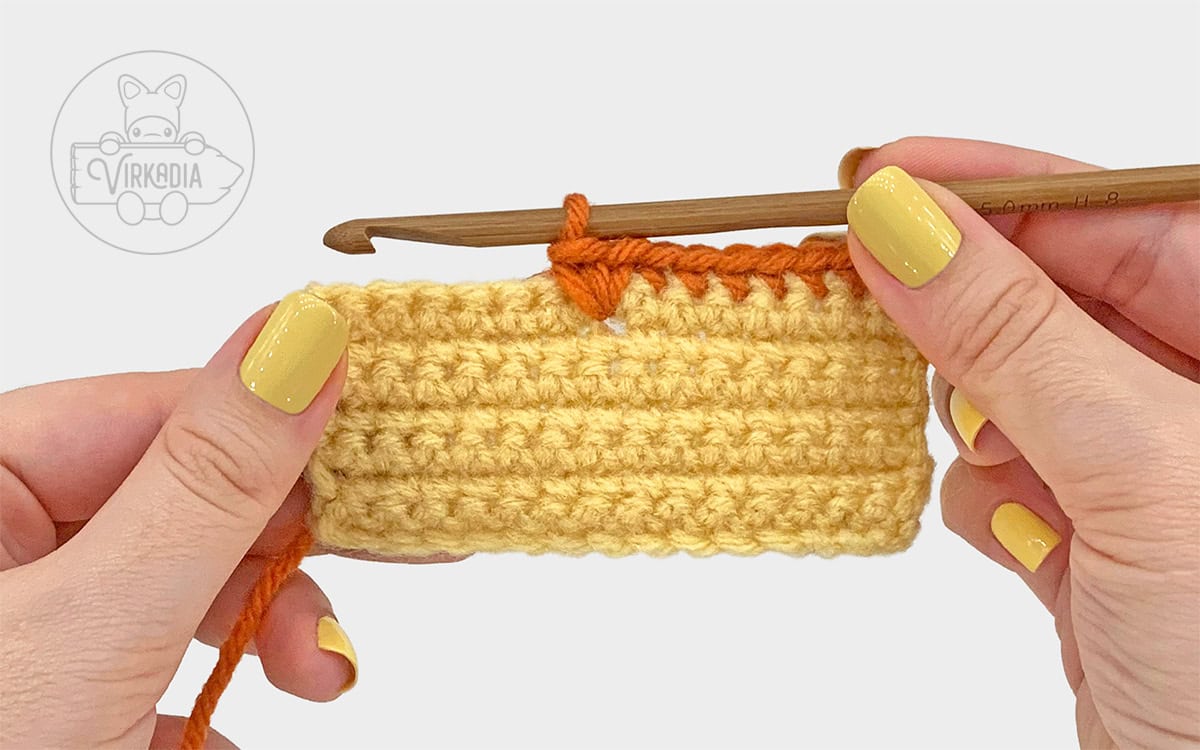
Joining Rounds:
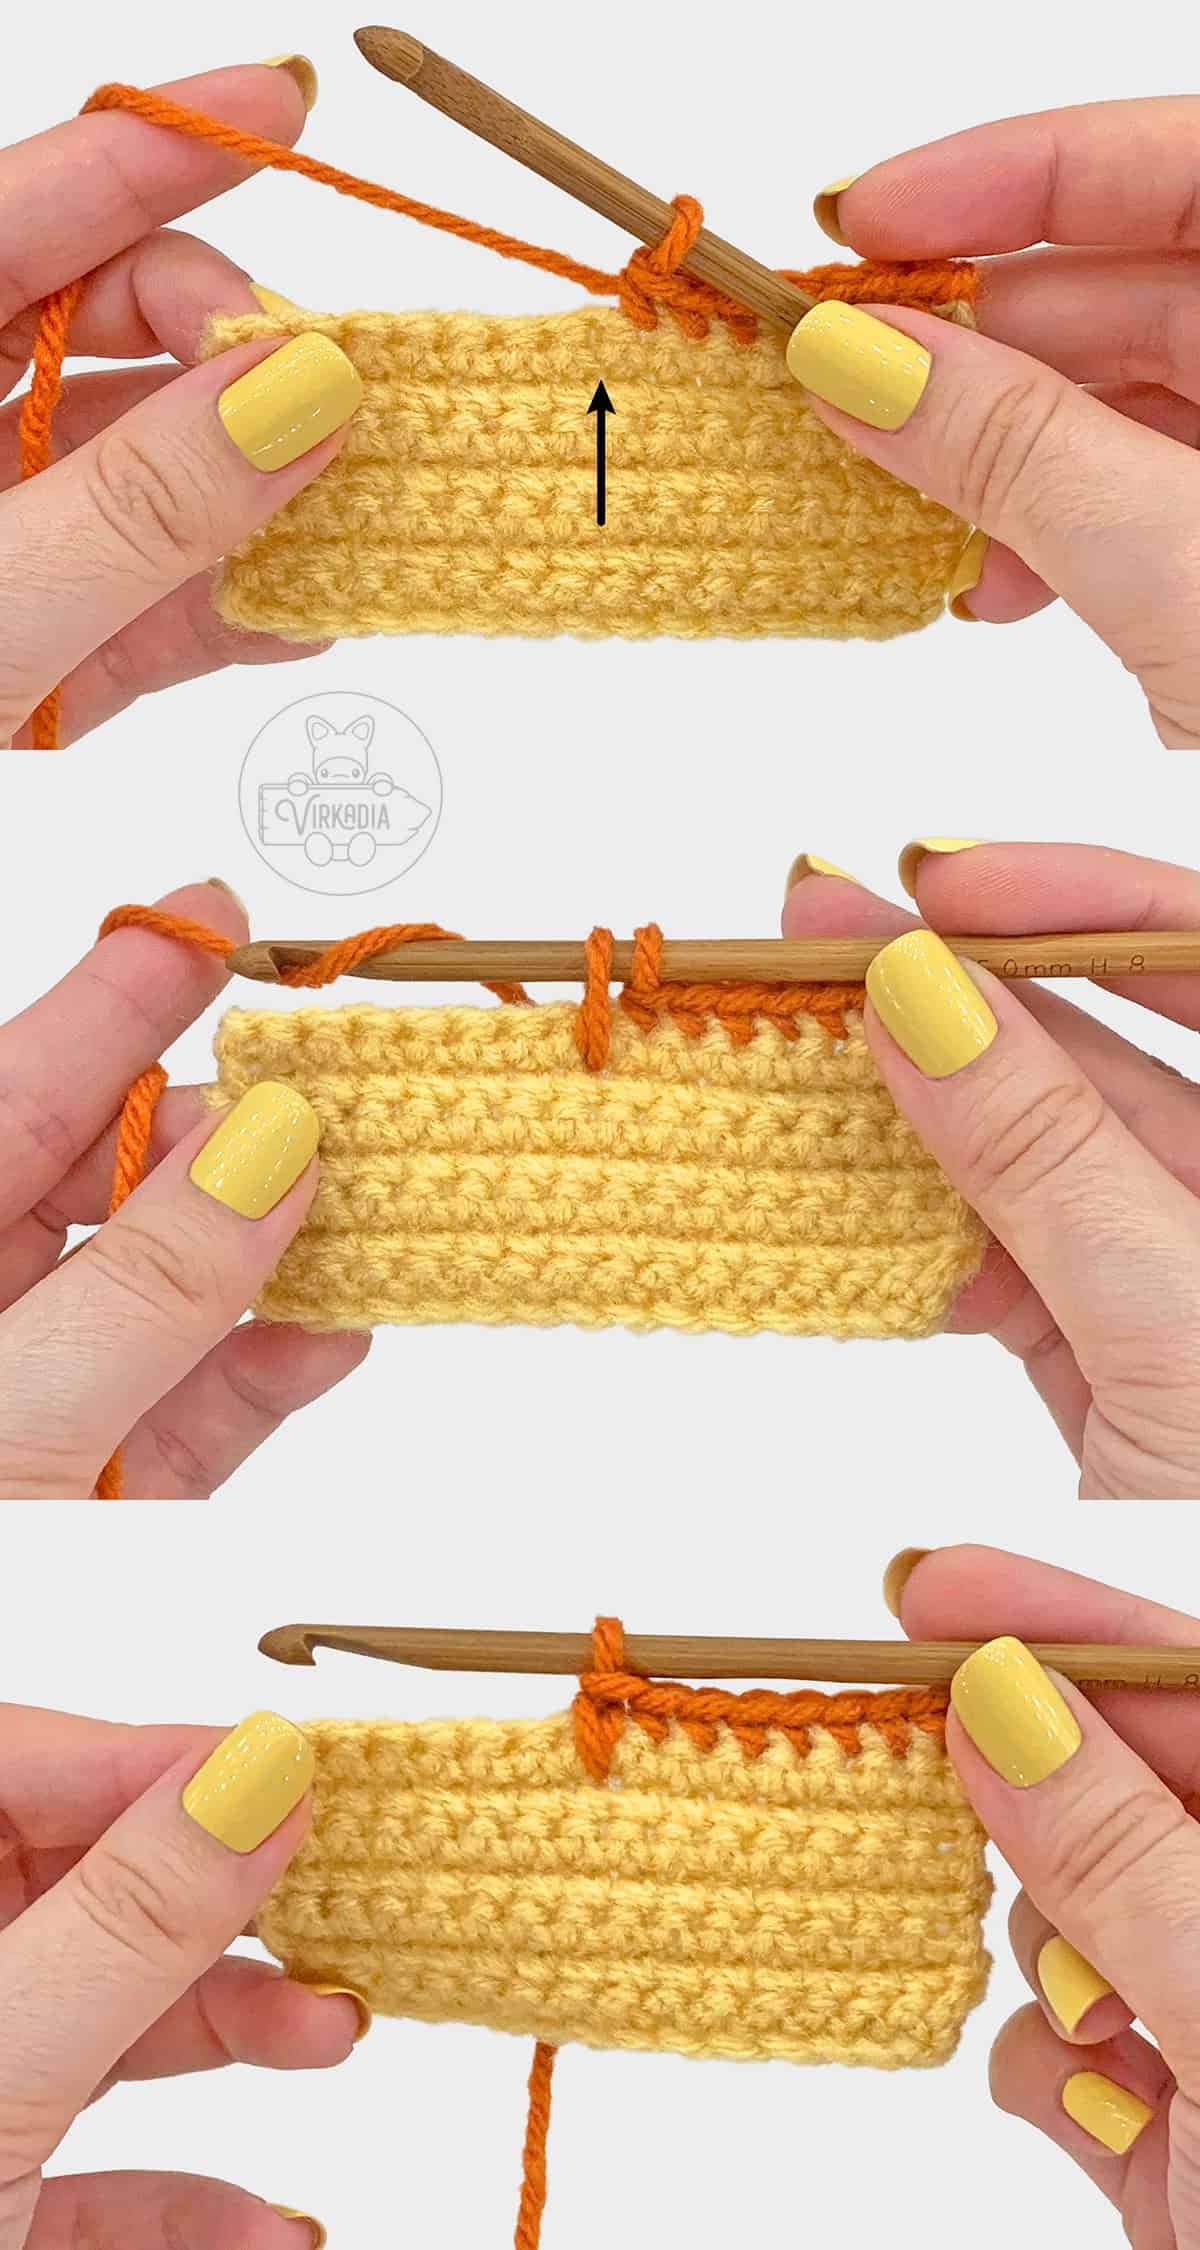
When working in the round, unless otherwise stated, each round is joined at the end with a slip stitch into the first stitch of the round, followed by one or more chain stitches.
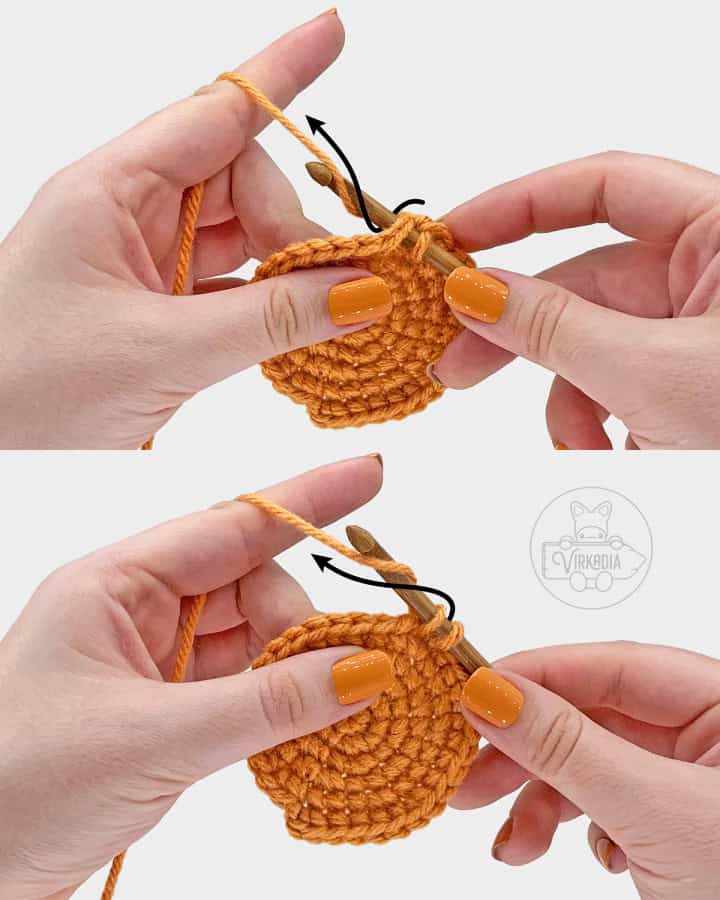
For a cleaner seam, and to ensure that these stitches are not accidentally worked into later, tighten both the slip stitch and chain as shown below.
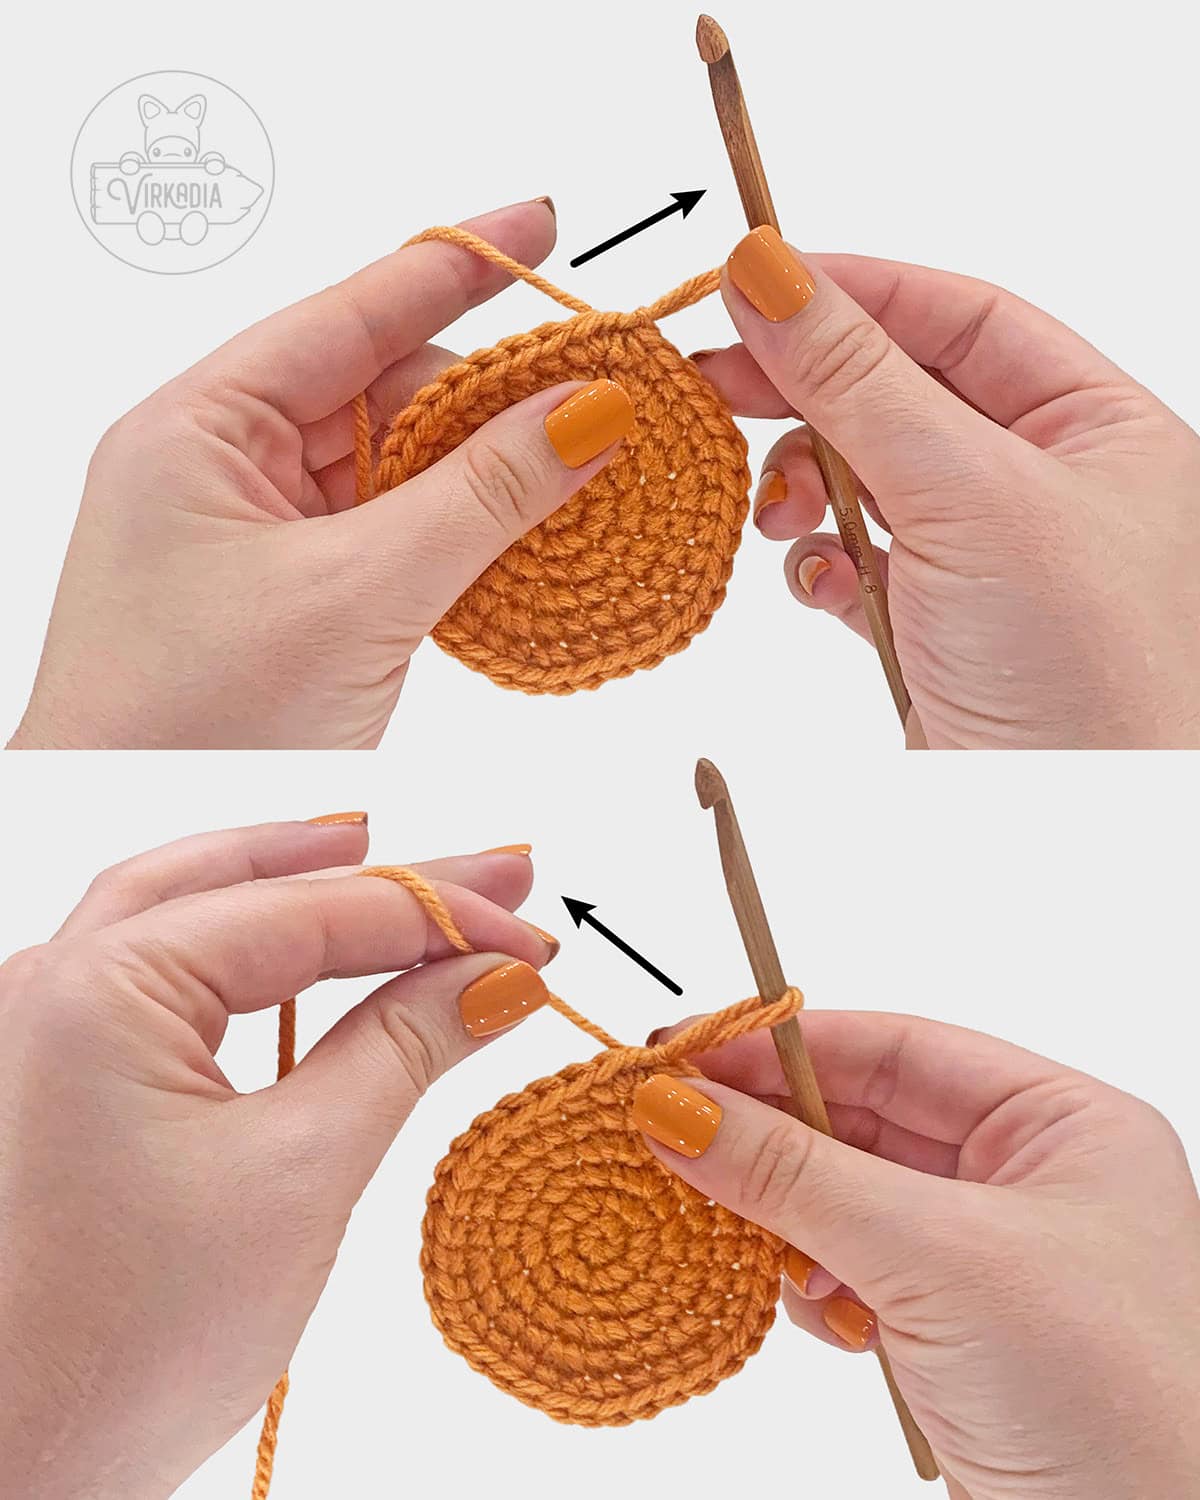
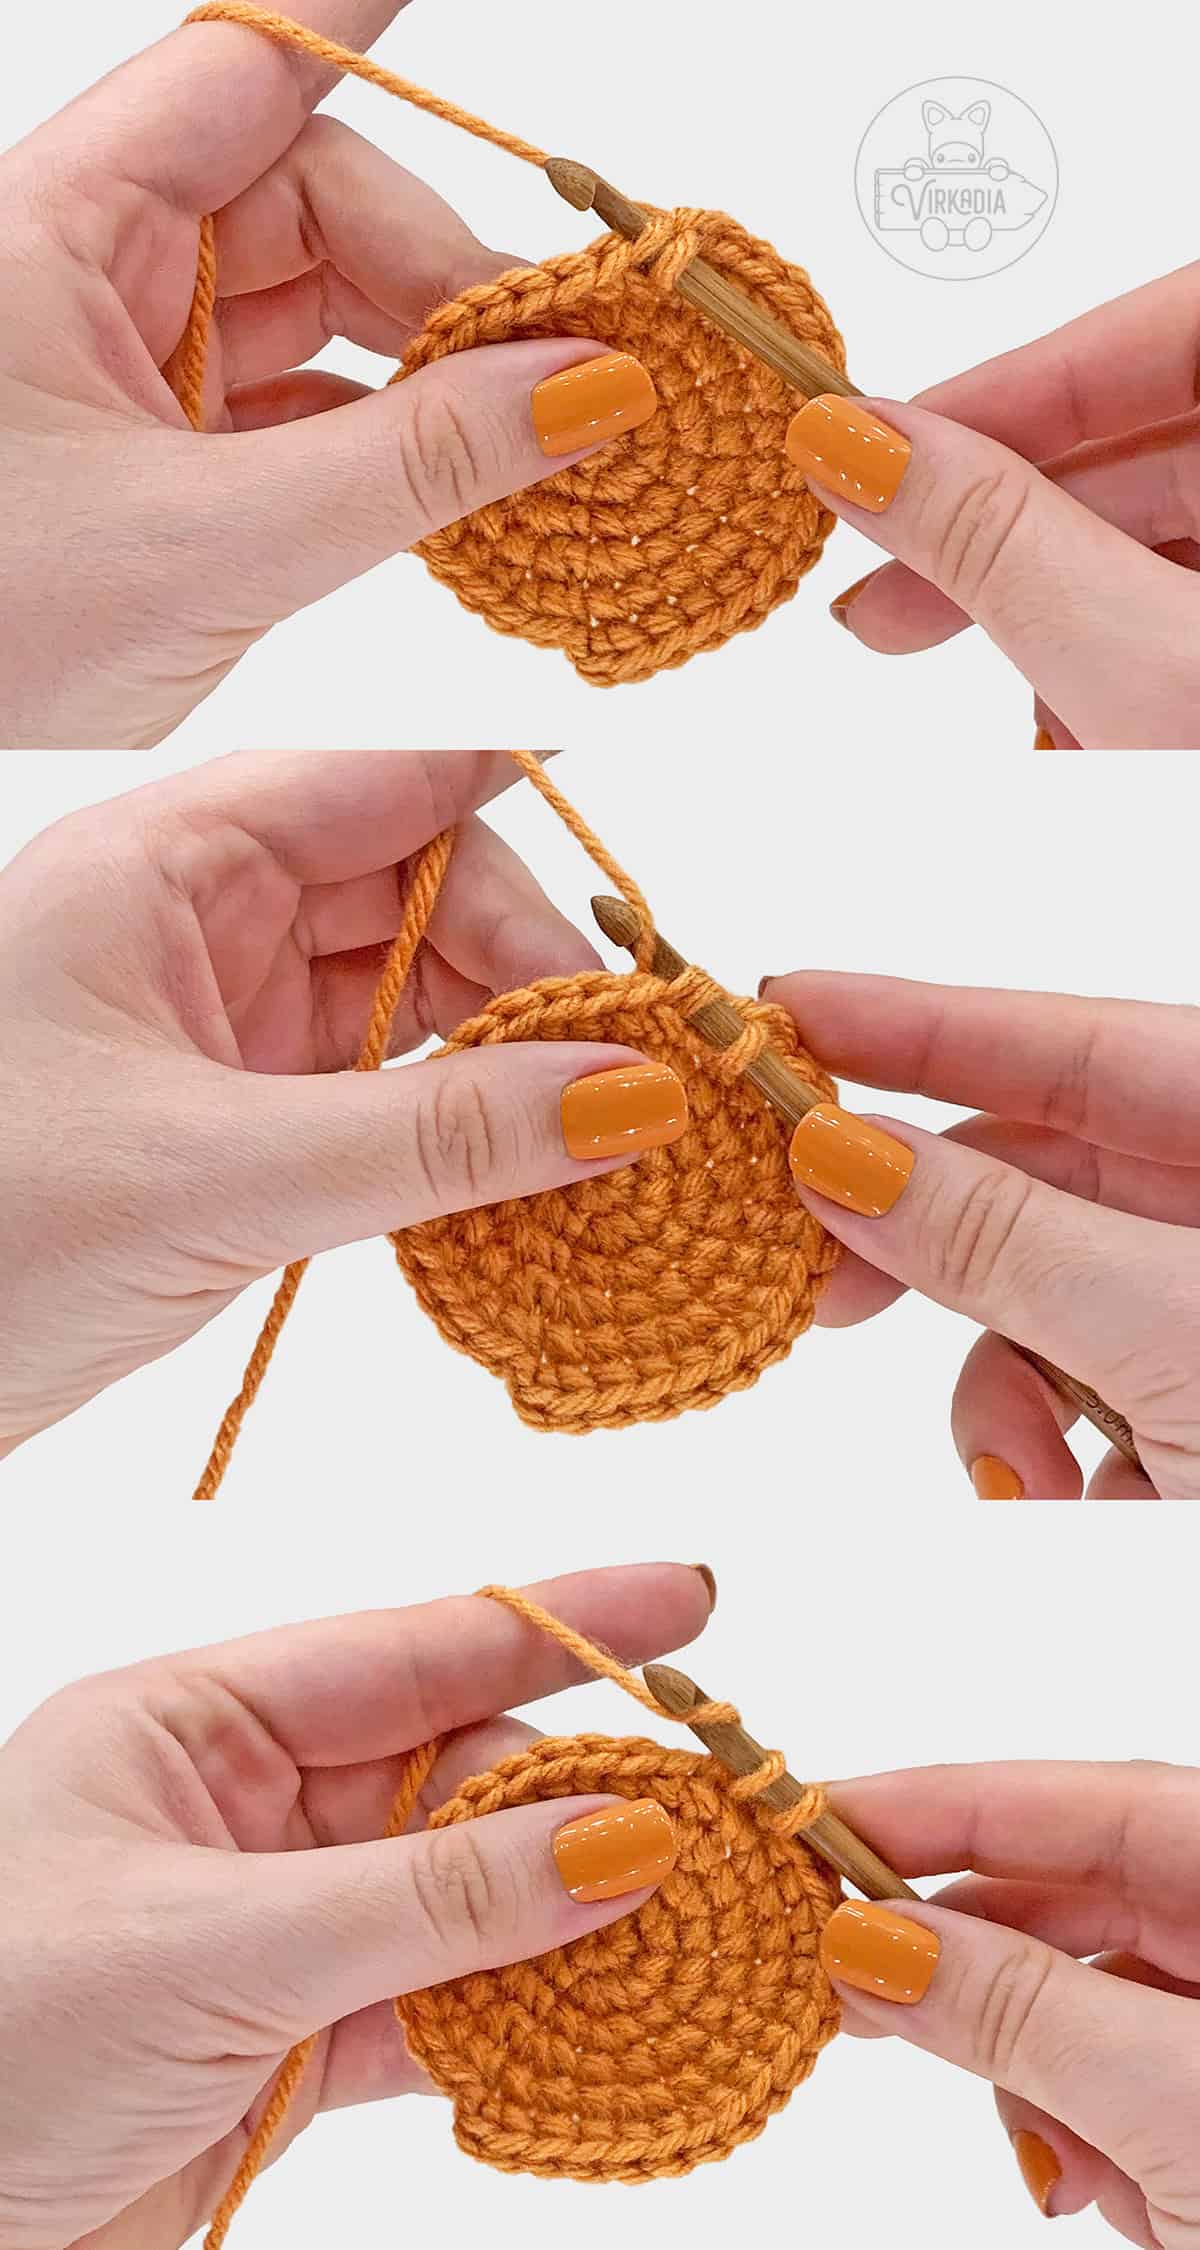
Hold your working loop firmly on your hook and pull up with your hook until your slip stitch is tight. Then, pull back on your working tail until your loop is back to fitting snugly around your hook.
Repeat these steps with the following one or more chain stitches before your next round, as well.
Unless otherwise instructed, the first stitch of your next round will always be worked into the same stitch as your joining slip stitch has been worked into.
2 Double Crochet Cluster:
A double crochet cluster is a series of double crochet stitches that are worked only partially, and then finished off together as one stitch at the end.
For a 2 double crochet cluster (2dc-CL), you will be working only 2 partial double crochets before finishing them off together, as seen below.
This stitch is worked similarly to a double crochet decrease. The main difference, however, is that cluster stitches are worked entirely into one stitch or space and therefore do not decrease your stitch count.
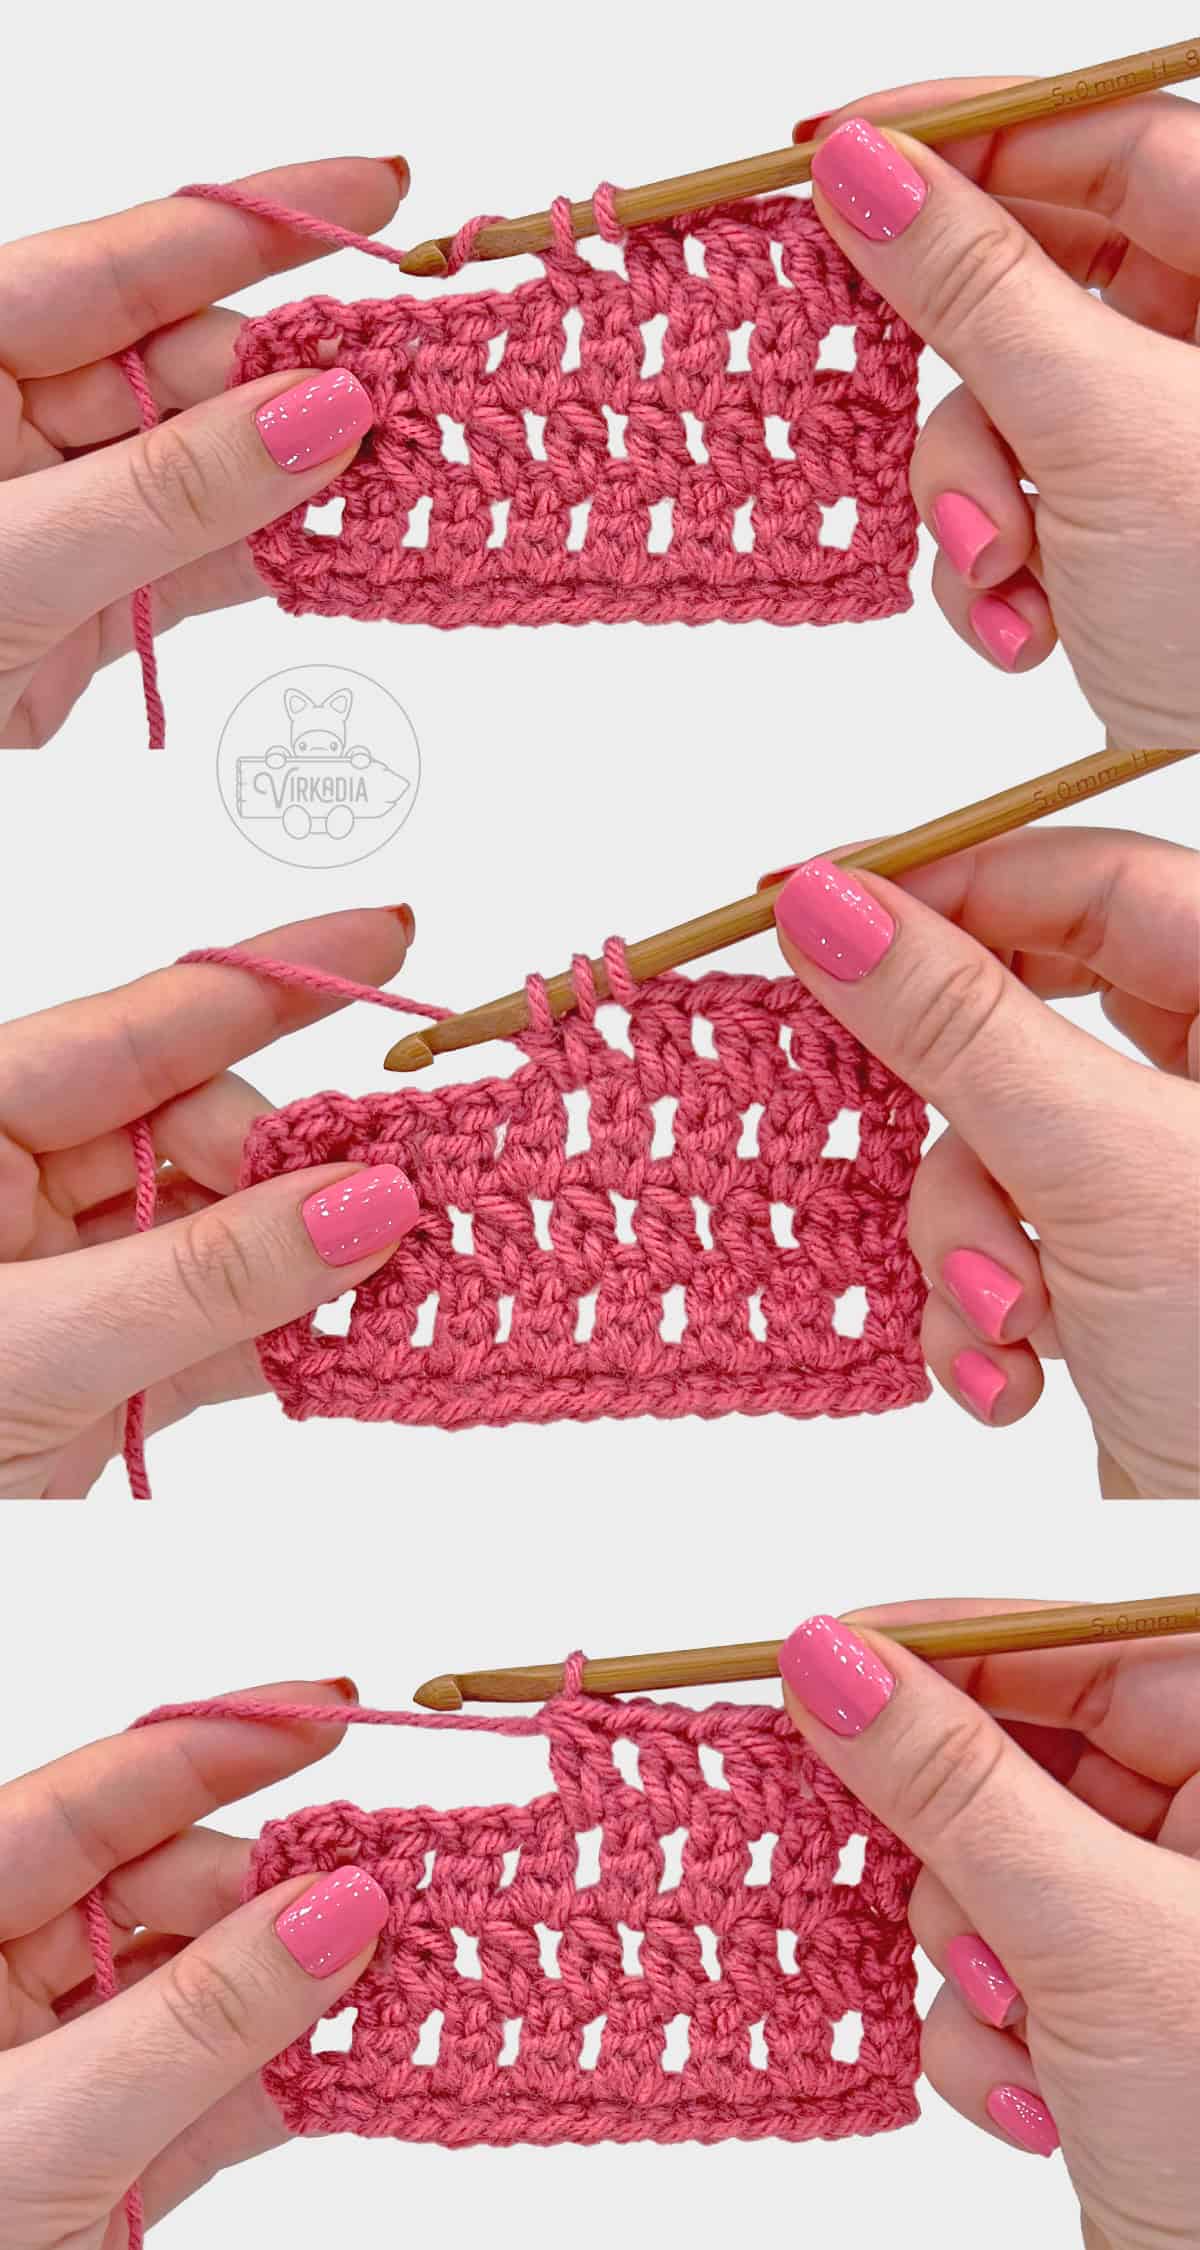
Yarn over and insert your hook into the next stitch or chain space. Yarn over and pull through, then yarn over and pull through the first 2 loops on your hook only.
Again, yarn over and insert your hook into the same stitch or chain space as before. Yarn over and pull through, then yarn over and pull through the first 2 loops on your hook only.
Lastly, yarn over and pull through all 3 loops on your hook to complete your 2 double crochet cluster.
Changing Colors Mid-Round:
The following color changing technique is used in any pattern where you are switching to a new yarn color in the middle of a row or round.
In other words, this method is not used for color changes between rows, such as when working stripes.
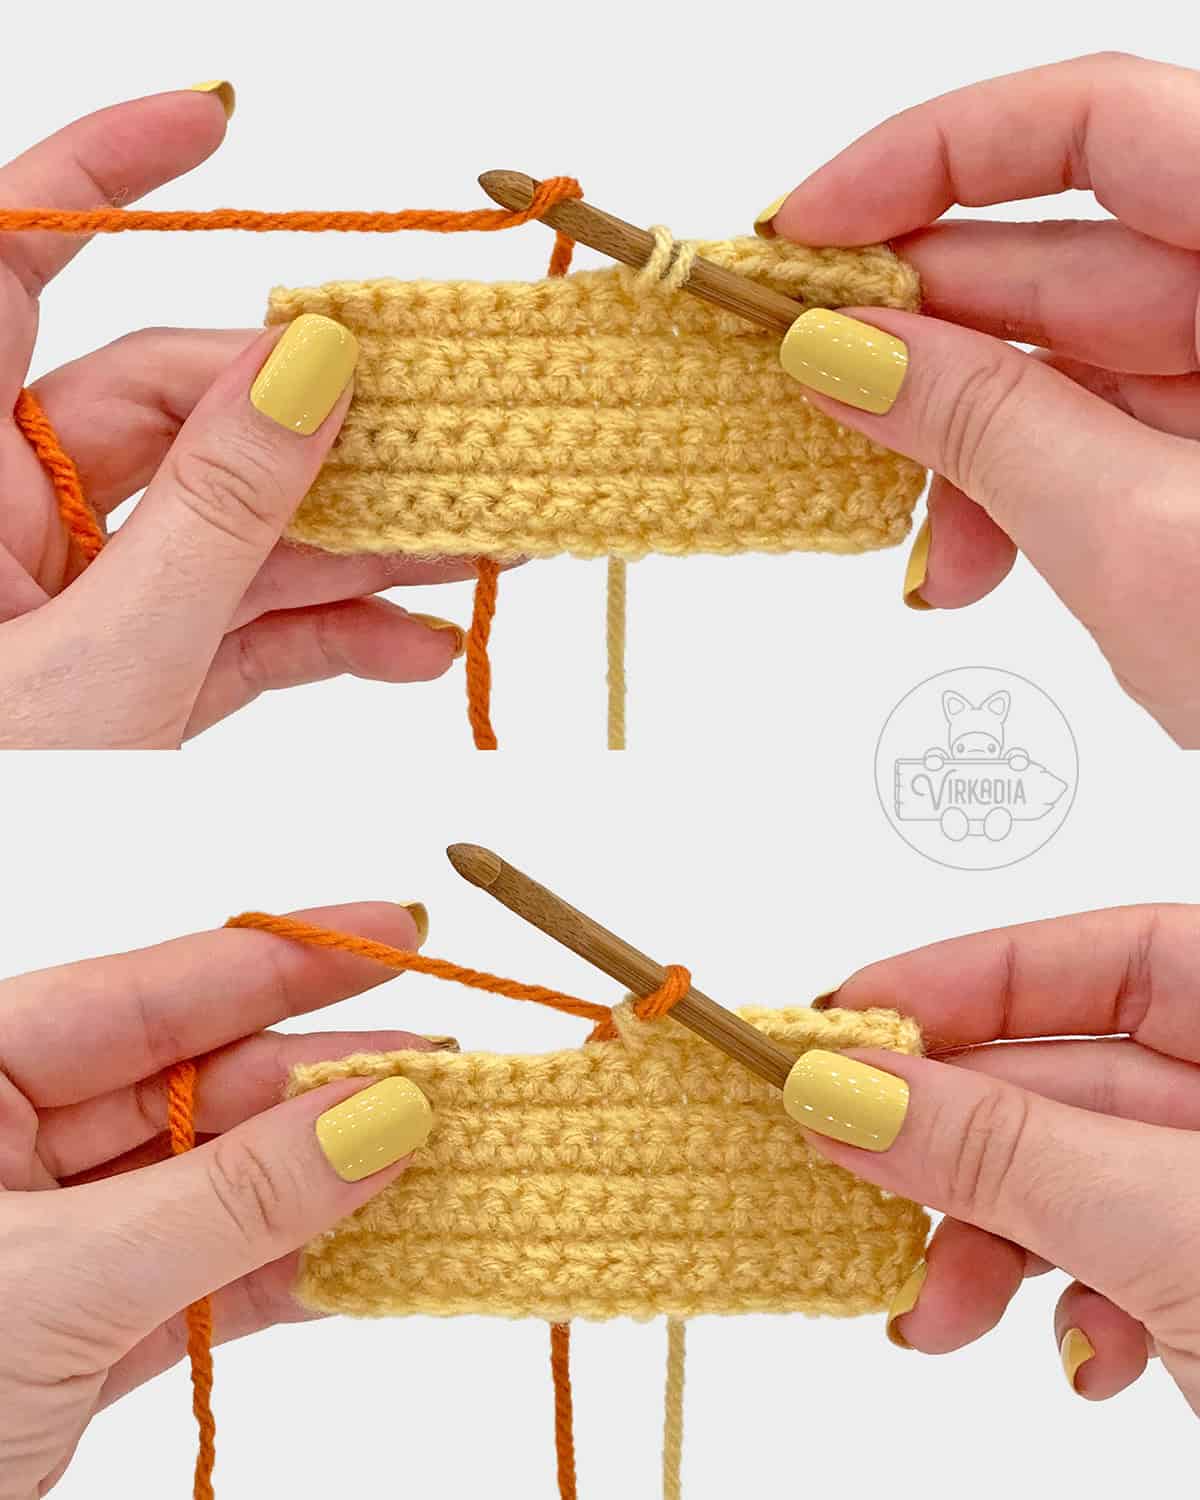
This color changing method begins in the stitch immediately before the stitch that you want to be a different color. Begin this stitch as normal by inserting into the next stitch, yarning under, and pulling through.
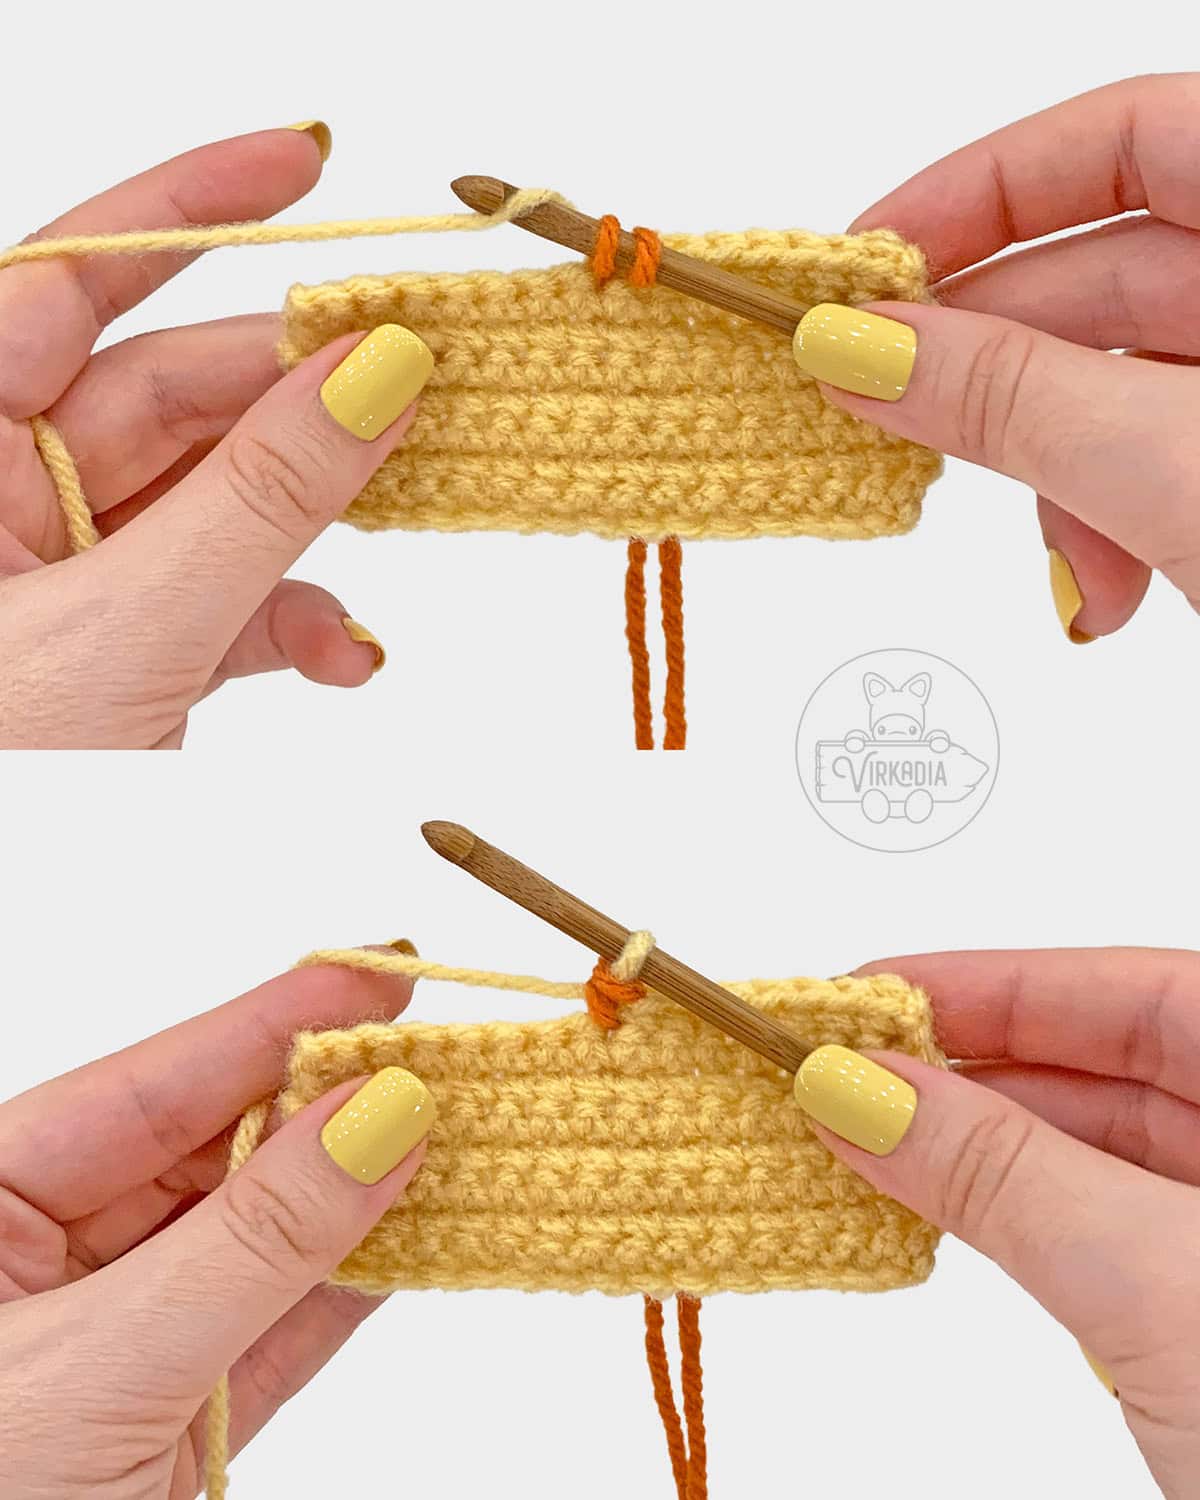
Before the last pull through, drop your current color and instead grab the color you want to change to. Yarn over this new color and pull through both loops.
Depending on your pattern, after dropping a color, you may not need to cut it off. Instead, you may allow your yarn to ‘float’ in the back, or interior, of your work until you are ready to pick it up again, or work over them as you go.
Just be careful not to let these strands be pulled too tight when you pick them back up! If your piece is being stuffed, each strand will need to be loose enough to accommodate expanding slightly when you stuff it.
Alternatively, you may also create a moderate amount of slack in your yarn between dropping it and picking it back up. Later, you may then cut these strands and tie them together in pairs to secure your color changes.
Choose whichever method works best for you!
For patterns that have you changing colors for only 1 stitch at a time. Repeat these steps again on the next stitch, but this time switching back to your first color, as seen below.
Front Post Double Crochet:
A front post double crochet stitch is created the same way as a traditional double crochet, except that the double crochet is worked around the post of another stitch in the row below, rather than into the top loops of that stitch.
To begin your front post double crochet, locate your stitch in the row below that your new stitch will be worked around. This stitch will most often be another double crochet, and therefore is what will be used in this example tutorial.
Instead of working into the top two loops of the stitch, as you would for a normal double crochet, you will instead be working your stitch around the vertical body of the double crochet itself.
Yarn over, then insert your hook, from right to left for righties (or left to right for lefties) underneath the vertical body of the double crochet in the row below.
With your hook, exit on the opposite side of the double crochet. The vertical body of your double crochet should now be laying over top of your hook.
Yarn over, then pull through a new loop underneath the body of the double crochet until your hook is back on the right side (or left side, for lefties).
You should now have three loops on your hook. Complete your double crochet as normal by yarning over and pulling through two loops, two times.
Puff Stitch:
All Virkadia crochet patterns use a puff stitch comprised of 4 pull-throughs, as seen below.

Yarn over and insert your hook into the next stitch or chain space. Yarn over and pull through, then stretch your new loop up to the full height of your stitch.
Yarn over and insert your hook into the same stitch or chain space as before. Again, yarn over and pull through, then stretch your new loop up to the full height of your stitch.
Repeat these last steps (YO, insert, YO and pull through, stretch loop) 2 more times, for a total of 9 loops on your hook.
Lastly, yarn over and pull through all 9 loops and chain 1 to secure your puff stitch.
Please note that this last chain stitch is a part of the puff stitch only. It will not count as a separate stitch in total stitch counts.
Additionally, any chain stitches that immediately follow a puff stitch in the pattern should be treated as a separate sequence that does not include this chain stitch in that count.
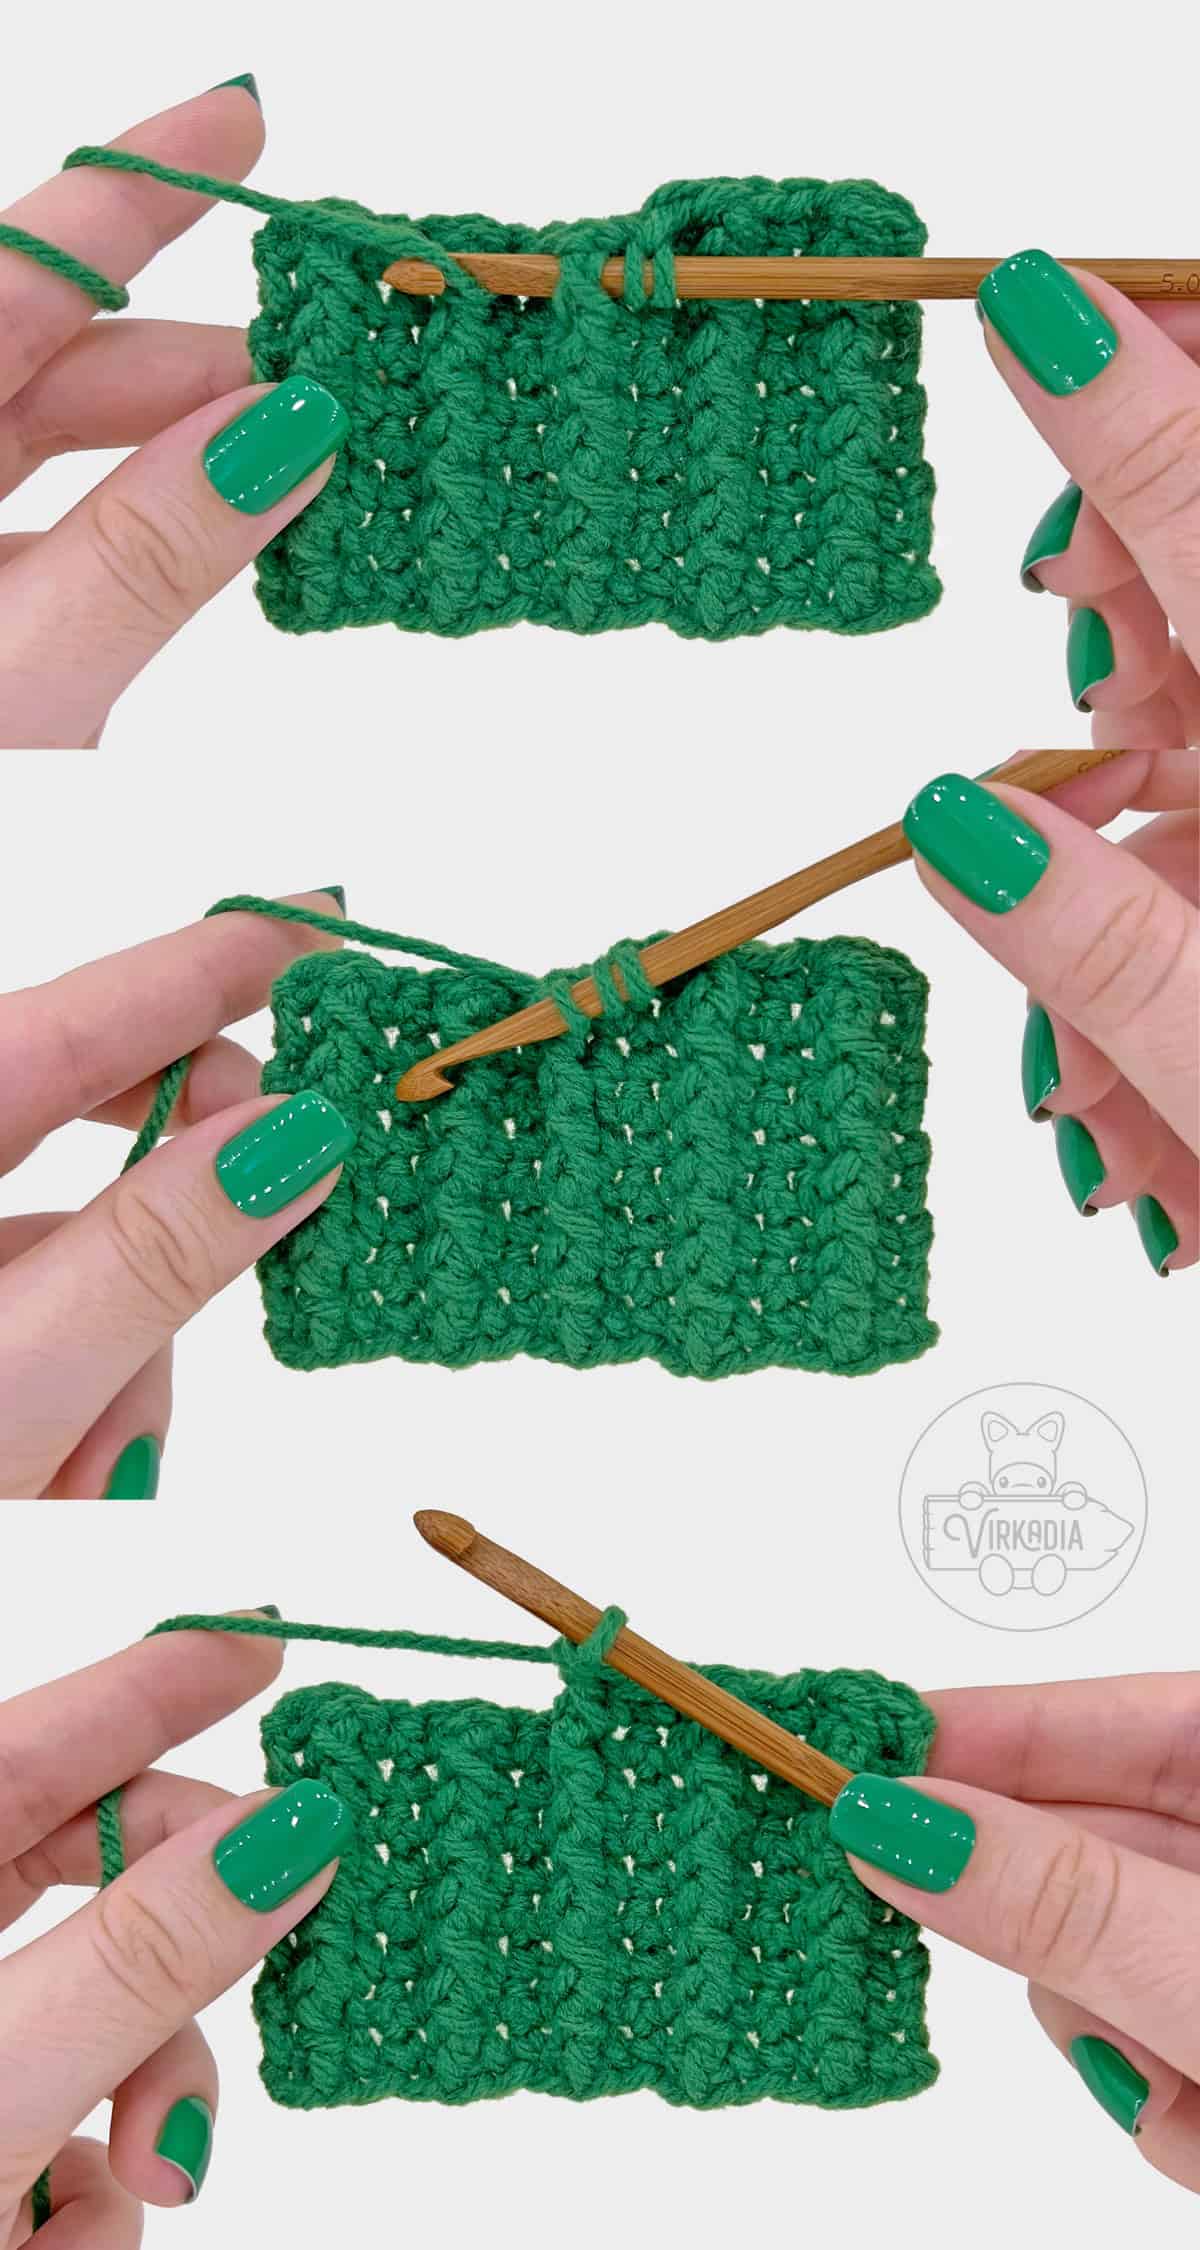
Small Popcorn Stitch:
All Virkadia crochet patterns use a variation of the popcorn stitch that utilizes only 3 double crochet stitches, instead of the more common 5 double crochet, as seen below.
Begin by working 3 double crochet into the next stitch. Then, pull up your working loop (large enough that your last stitch will not be accidentally pulled undone) and remove your hook.
Next, insert your hook, from front to back, through the top of the first double crochet you’ve made in the 3 double crochet sequence. Now, pull your working loop from the third double crochet through the top of the first double crochet.
Lastly, pull your working tail so that your working loop fits back snugly around your hook and continue to your next stitch.
Spike Stitch:
The difference between a single crochet and a spike stitch is simply where the stitch is worked into.
The example below uses a variation of the single crochet spike stitch that is worked only 1 row beneath the current row, however, please refer to your specific pattern for how many rows down your piece calls for.
Locate your next stitch, but instead of working into the top of your current row, insert your hook 1 or more rows down from where you would normally insert. Yarn over and pull through.
Pull your new loop up to the height of your current row. Then, finish your single crochet as normal by yarning over and pulling through both loops to complete.
Some patterns may call for you to work 2 spike stitches into the same stitch, such as the Turkey Leg Cutie. To do this, repeat these steps 1 more time, into the same stitch, before continuing, as seen below.