Striped into this free crochet peppermint scarf pattern are all the merriest moments of the winter season—mittens and coats emerging from closets, the temperature falling as quickly as the flakes of snow outside, and the air as cool against your cheeks as the taste of peppermint is on your tongue.
While you patiently wait for the first flakes to fall, there’s no better way to celebrate the snowiest season than with this free crochet peppermint scarf pattern!
So, without further ado, here is the pattern for the Peppermint Scarf, complete with red and white stripes and wrapper-like ruffles!!
Pattern Information | Free Crochet Peppermint Scarf
This free crochet peppermint scarf pattern has a difficulty rating of intermediate.
The finished dimensions of the scarf without the end ruffles are 59.5 inches (height) by 7 inches (width).* The optional ruffles add an extra 2.5 inches of length to each end.
You may also make your pieces larger or smaller by increasing or decreasing your yarn weight and/or hook size, respectively.
*Finished dimensions are calculated from a model using medium weight yarn, a size I-9 (5.5 mm) crochet hook, and the following gauge: 13 dc x 8 rows = 4 inches.
And don’t forget to add your project on Ravelry!
Supplies:
- Size I-9 (5.5 mm) crochet hook
- Medium (4) weight yarn in 2 colors:
- Yarn A – red (example uses Red Heart Super Saver: Cherry Red)
- Yarn B – white (example uses Red Heart Super Saver: Soft White)
- Yarn needle
- Scissors
- Stitch markers (optional)
Terminology:
This free crochet peppermint scarf pattern uses English (US) terminology:
- st (sts) = stitch (stitches)
- ch = chain stitch
- sl st = slip stitch
- dc = double crochet
- dc2tog = double crochet 2 together (over the span of 2 stitches)
- dc3tog = double crochet 3 together (over the span of 3 stitches)
- dc4tog = double crochet 4 together (over the span of 4 stitches)
- tch = turning chain
- sk = skip
Please note that this pattern is written so that each crochet stitch abbreviation is attached to a number, such as 1dc, 2dc, etc. This number denotes how many of that stitch is to be worked into the same stitch.
In other words, 1dc = one double crochet, whereas 2dc = two double crochet worked into one stitch, also known as an increase.
You can learn more about how to read Virkadia patterns on our Pattern Help FAQ page!
Special Stitch Instructions:
This pattern is worked back-and-forth, with each row ending with a turning chain before the next row, except when changing colors.
The turning chain—abbreviated as ‘tch’— will sometimes be worked into at the end of the next round, and sometimes will be skipped.
To avoid confusion, stitch counts at the end of each row will not include the turning chain, since it does not always count as a stitch.
When working into the turning chain, insert your hook into the top, or 3rd, chain and complete your stitch as normal.
For best results, try working under 2 loops (the top loop and the ‘back bar’ of the chain) to minimize the size of the hole.
The first stitch of the next row will always be worked into the last double crochet worked at the end of the last row, immediately after your next turning chain.
Pattern Instructions | Free Crochet Peppermint Scarf
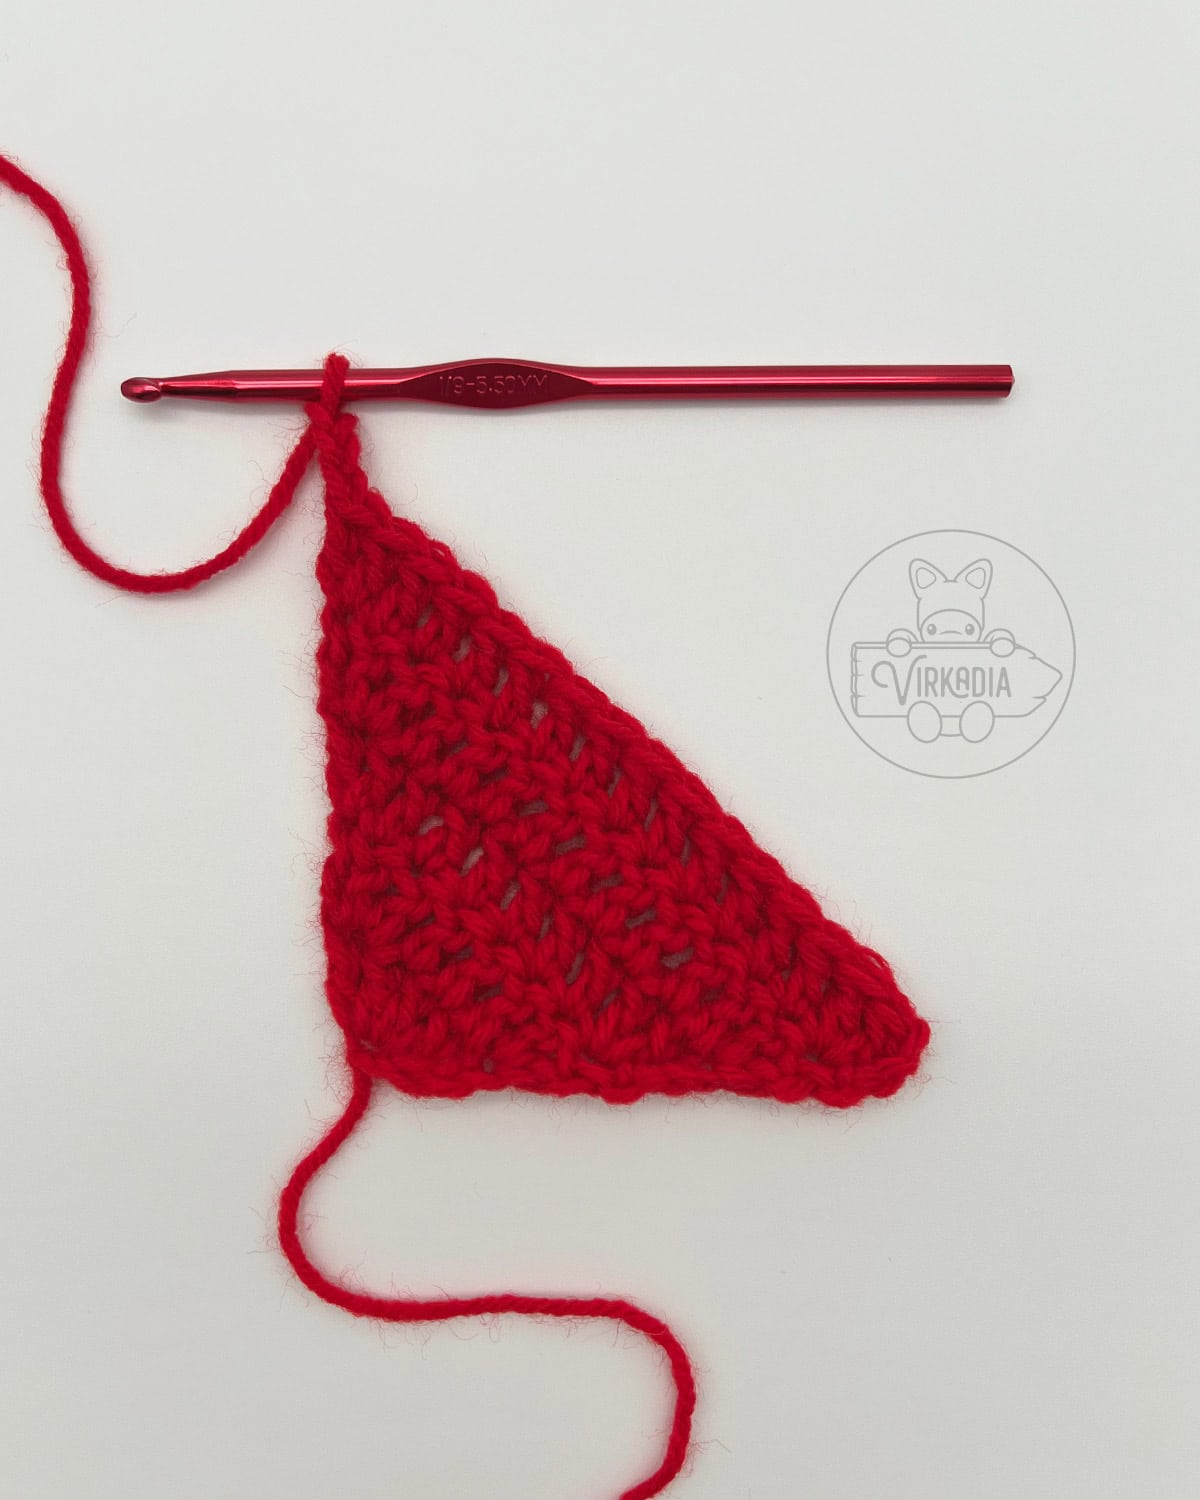
Crochet Peppermint Scarf – Rows 1 to 10:
With yarn A (red), chain 4.
Row 1: 4dc into 4th ch from hook, ch 3, turn (4).
Row 2: 2dc into next st, 1dc into each of next 3 sts, 2dc into tch, ch 3, turn (7).
Row 3: 2dc into next st, 1dc into each of next 6 sts, 2dc into tch, ch 3, turn (10).
Row 4: 2dc into next st, 1dc into each of next 9 sts, 2dc into tch, ch 3, turn (13).
Row 5: 2dc into next st, 1dc into each of next 12 sts, 2dc into tch, ch 3, turn (16).
Row 6: 2dc into next st, 1dc into each of next 15 sts, 2dc into tch, ch 3, turn (19).
Row 7: 2dc into next st, 1dc into each of next 18 sts, 2dc into tch, ch 3, turn (22).
Row 8: 2dc into next st, 1dc into each of next 21 sts, 2dc into tch, ch 3, turn (25).
Row 9: 2dc into next st, 1dc into each of next 24 sts, 2dc into tch, ch 3, turn (28).
Row 10: 2dc into next st, 1dc into each of next 27 sts, 2dc into tch (31).
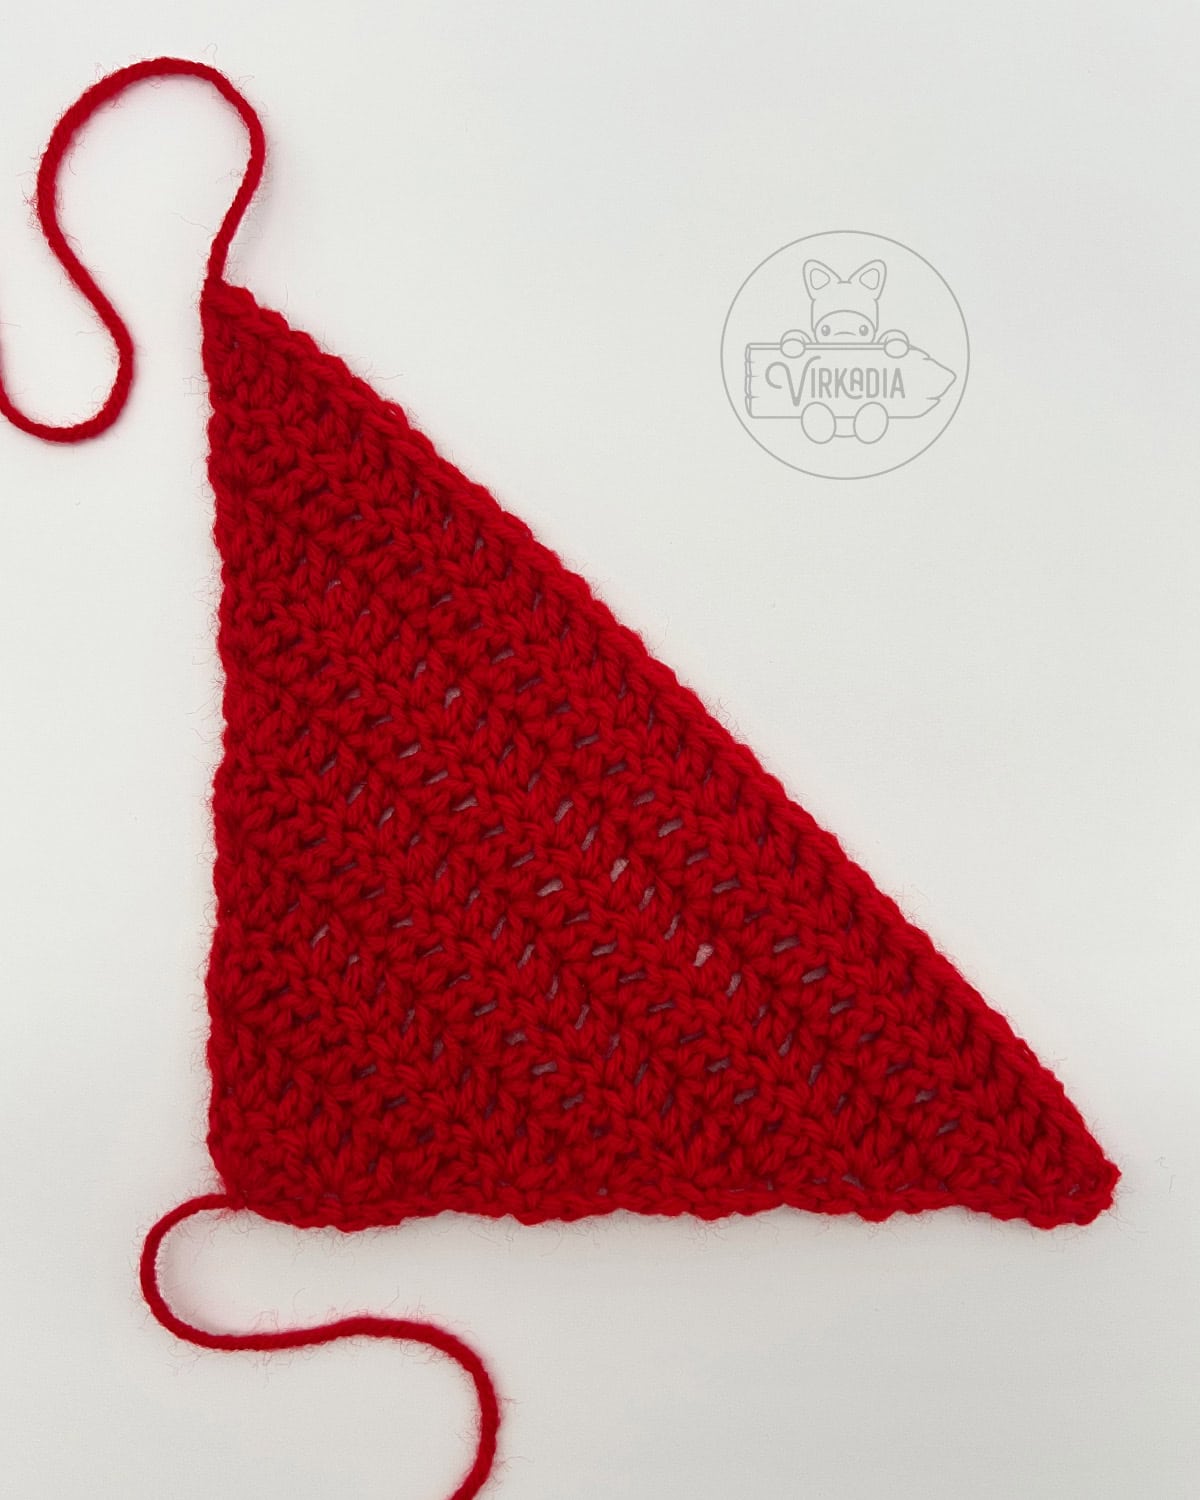
Do not turn your work. Fasten off yarn A (red) and weave all tails.
Crochet Peppermint Scarf – Rows 11 to 30:
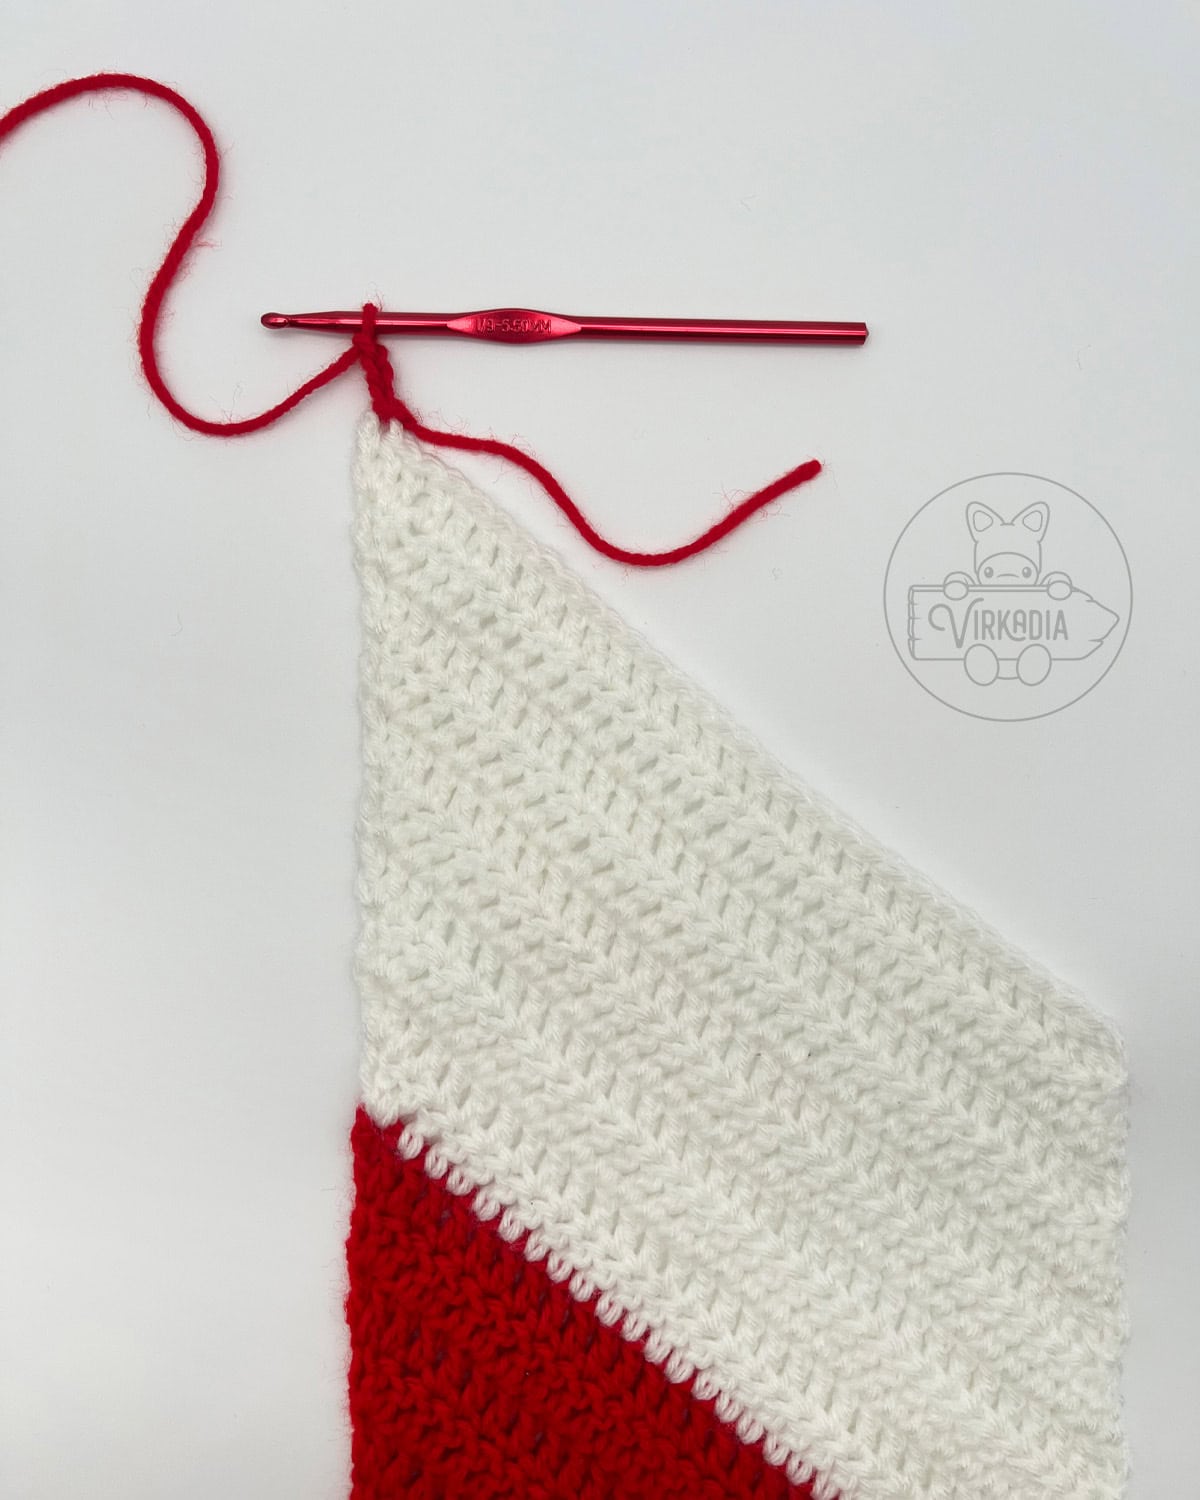
With yarn B (white), make a slip knot on your hook.
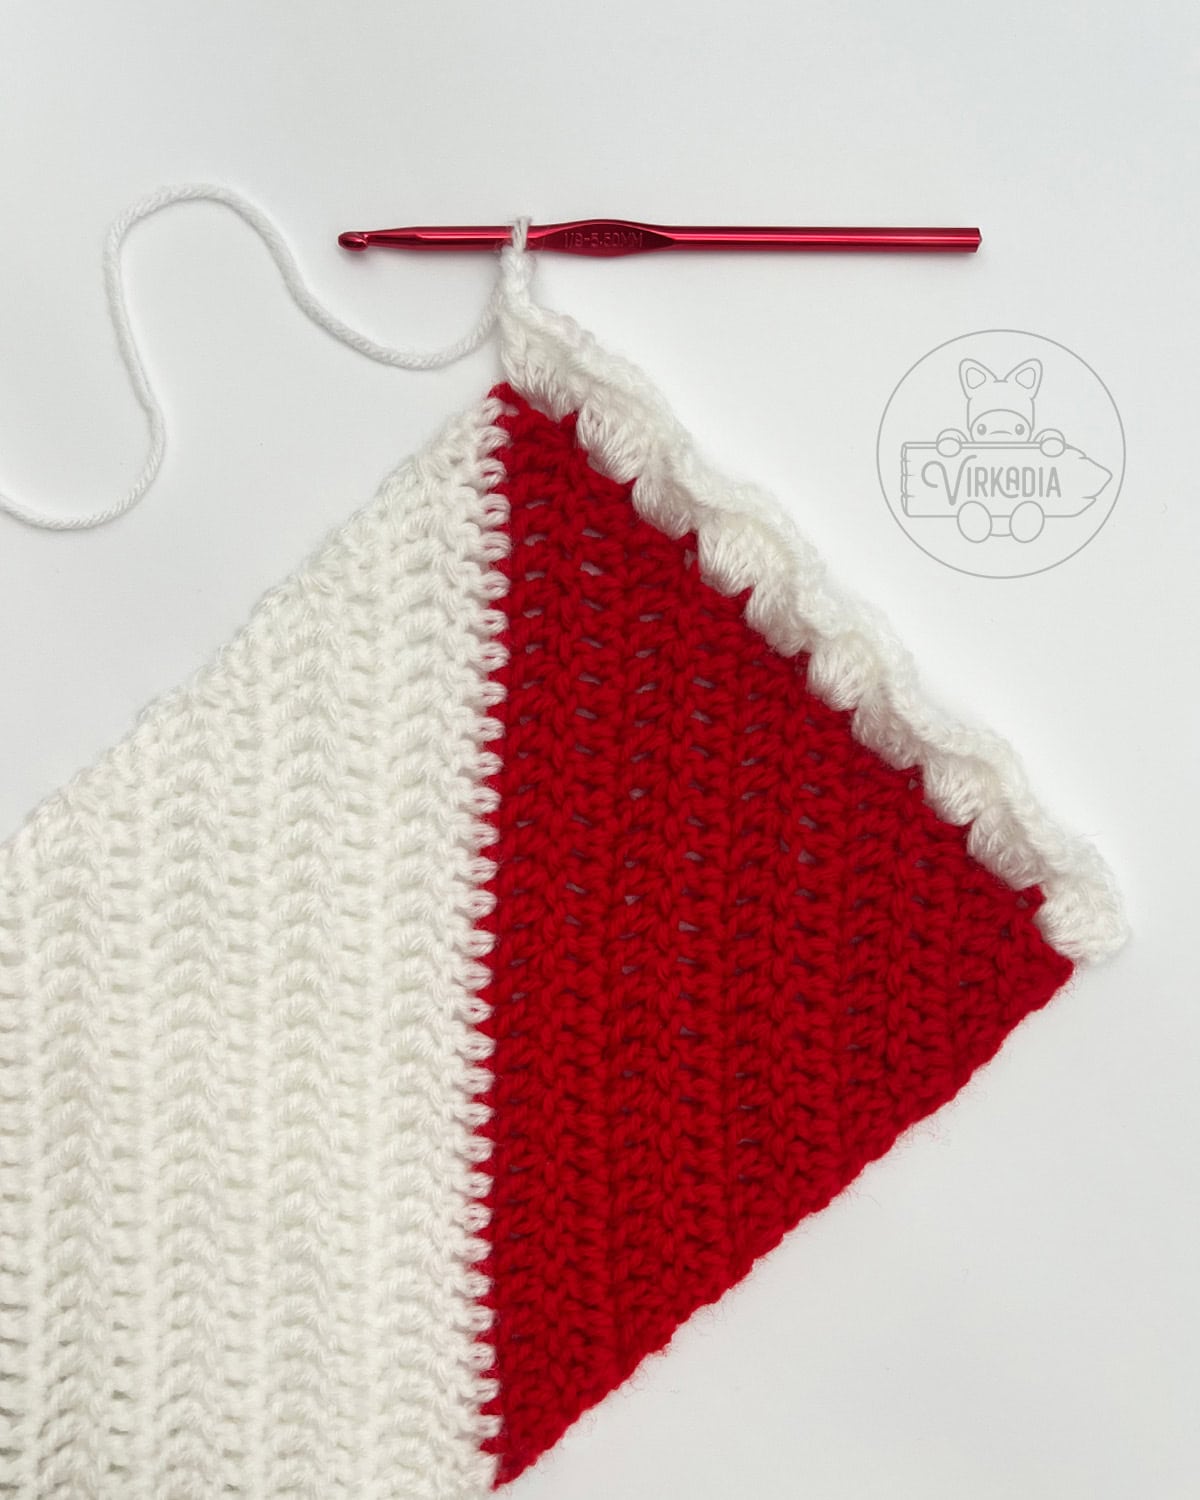
With your new color, slip stitch into the last double crochet that you worked in row 10, as seen below, then turn your work as normal.
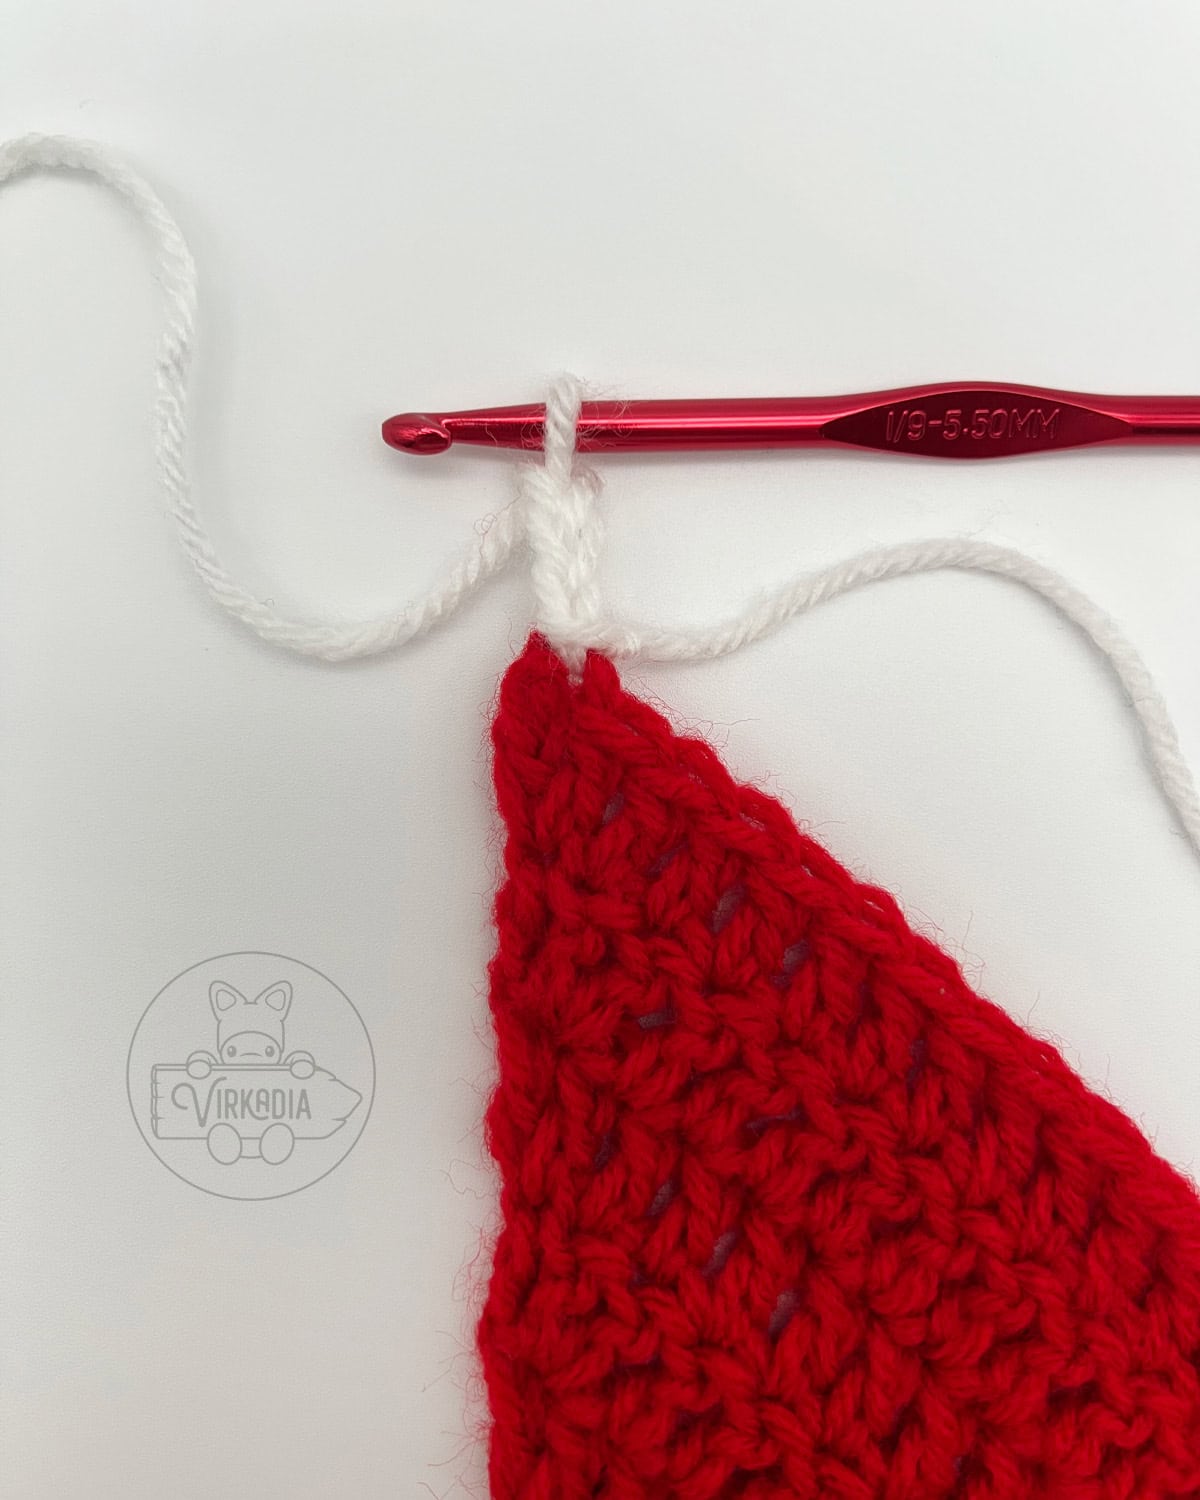
You will begin your next row by working your first two stitches over top of the slip stitch you have just made.
For best results, work into the last double crochet from row 10, as if the slip stitch is not there, effectively hiding the slip stitch inside of your new stitches.
Row 11: 2dc into next st, 1dc into each of next 27 sts, dc3tog over next 3 sts, sk tch, ch 3, turn (30).
Row 12: dc2tog over next 2 sts, 1dc into each of next 28 sts, 2dc into tch, ch 3, turn (31).
Row 13: 2dc into next st, 1dc into each of next 27 sts, dc3tog over next 3 sts, sk tch, ch 3, turn (30).
Row 14: dc2tog over next 2 sts, 1dc into each of next 28 sts, 2dc into tch, ch 3, turn (31).
Row 15: 2dc into next st, 1dc into each of next 27 sts, dc3tog over next 3 sts, sk tch, ch 3, turn (30).
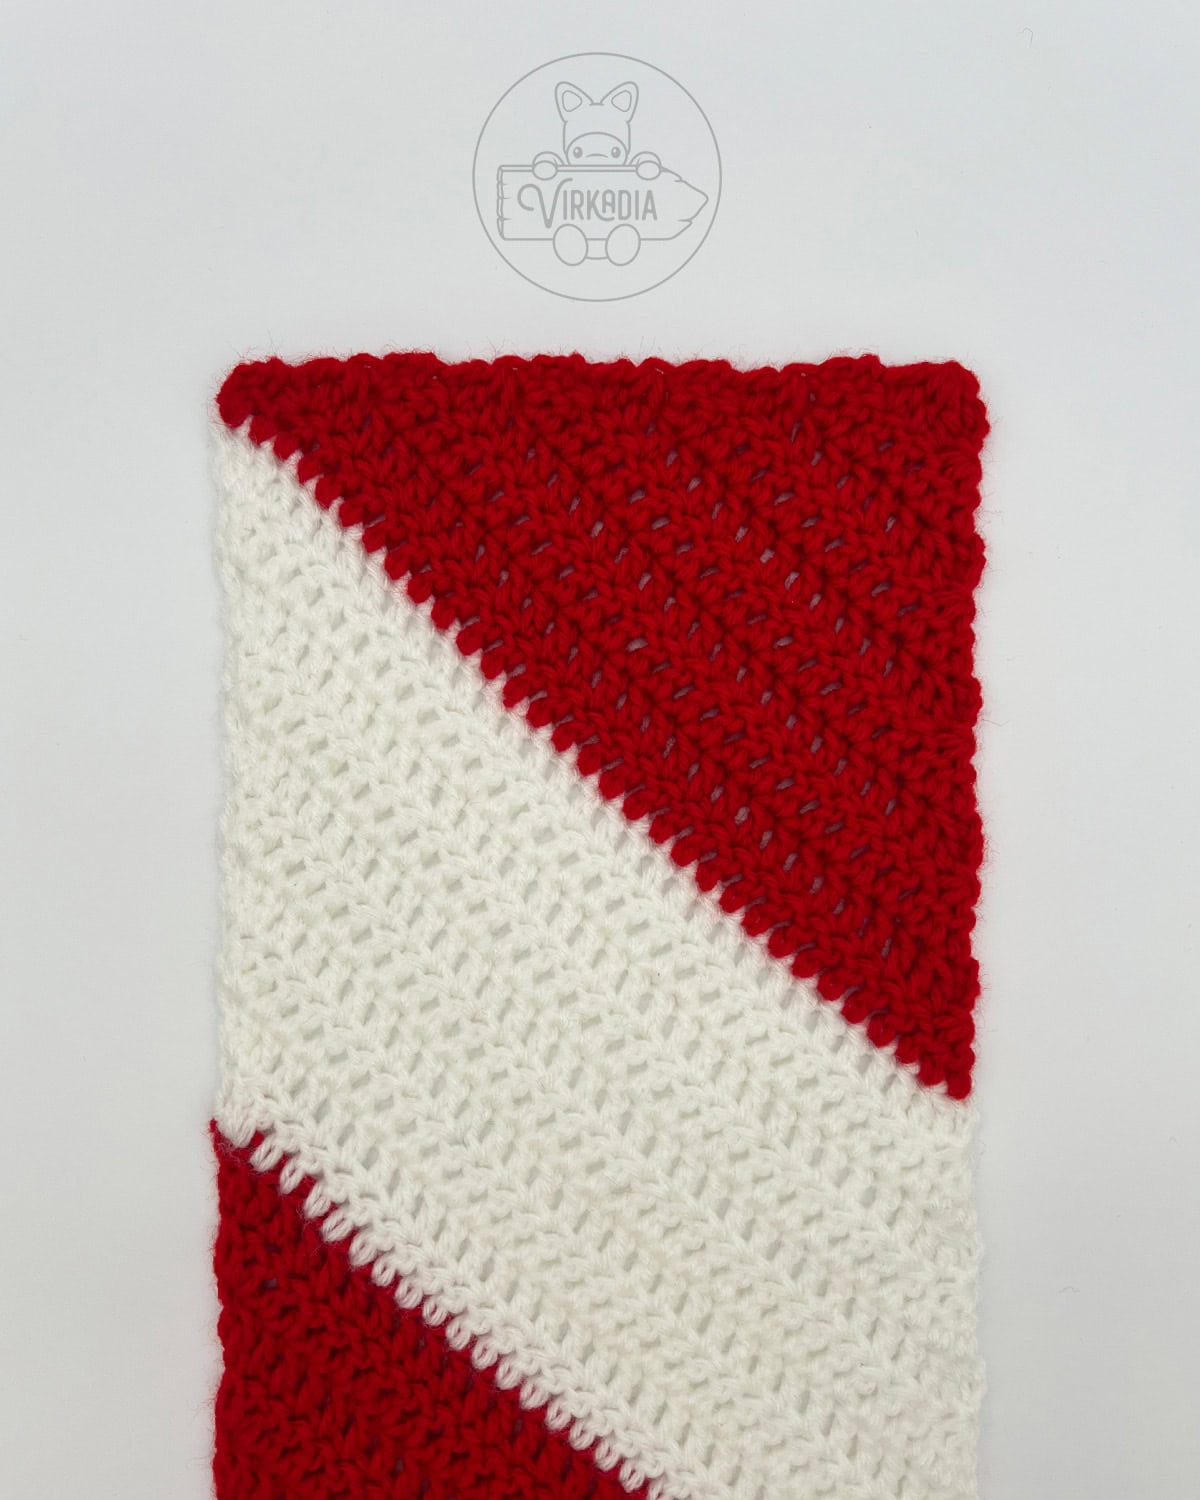
At this point, you should be able to see your scarf lengthening upwards into a rectangular shape, as seen below.
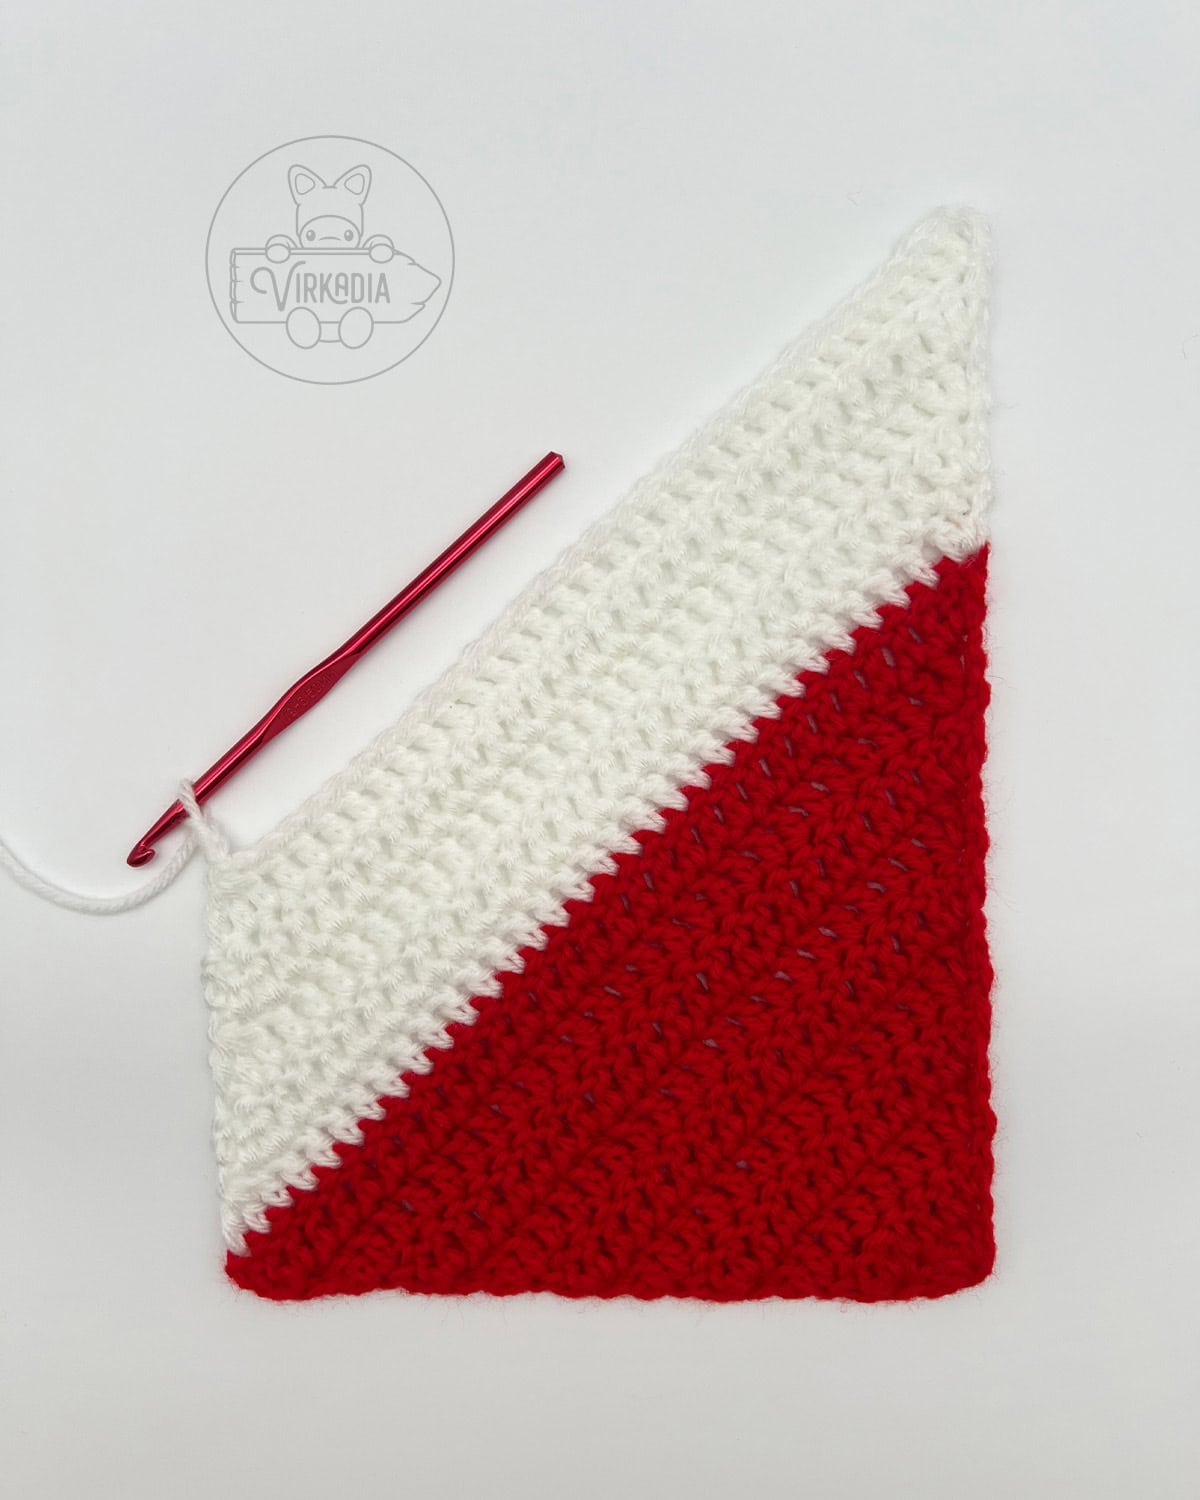
Your stitch counts should be fluctuating up and down each row by one stitch, and all of your increases should be on the same side of your scarf.
Likewise, your decreases should all be on the opposite side of your scarf, and the turning chain is skipped on each decreasing side, as well.
Row 16: dc2tog over next 2 sts, 1dc into each of next 28 sts, 2dc into tch, ch 3, turn (31).
Row 17: 2dc into next st, 1dc into each of next 27 sts, dc3tog over next 3 sts, sk tch, ch 3, turn (30).
Row 18: dc2tog over next 2 sts, 1dc into each of next 28 sts, 2dc into tch, ch 3, turn (31).
Row 19: 2dc into next st, 1dc into each of next 27 sts, dc3tog over next 3 sts, sk tch, ch 3, turn (30).
Row 20: dc2tog over next 2 sts, 1dc into each of next 28 sts, 2dc into tch (31).
Do not turn your work. Fasten off yarn B (white) and weave in all tails.
Join yarn A (red) with a slip stitch into your last double crochet of row 20, then turn your work.
Rows 21 to 30 (10 rows): repeat rows 11 to 20.
Do not turn your work. Fasten off yarn A (red) and weave in all tails.
Join yarn B (white) with a slip stitch into your last double crochet of row 30, then turn your work.
Rows 31 to 40 (10 rows): repeat rows 11 to 20.
Fasten off yarn B (white) and weave in all tails.
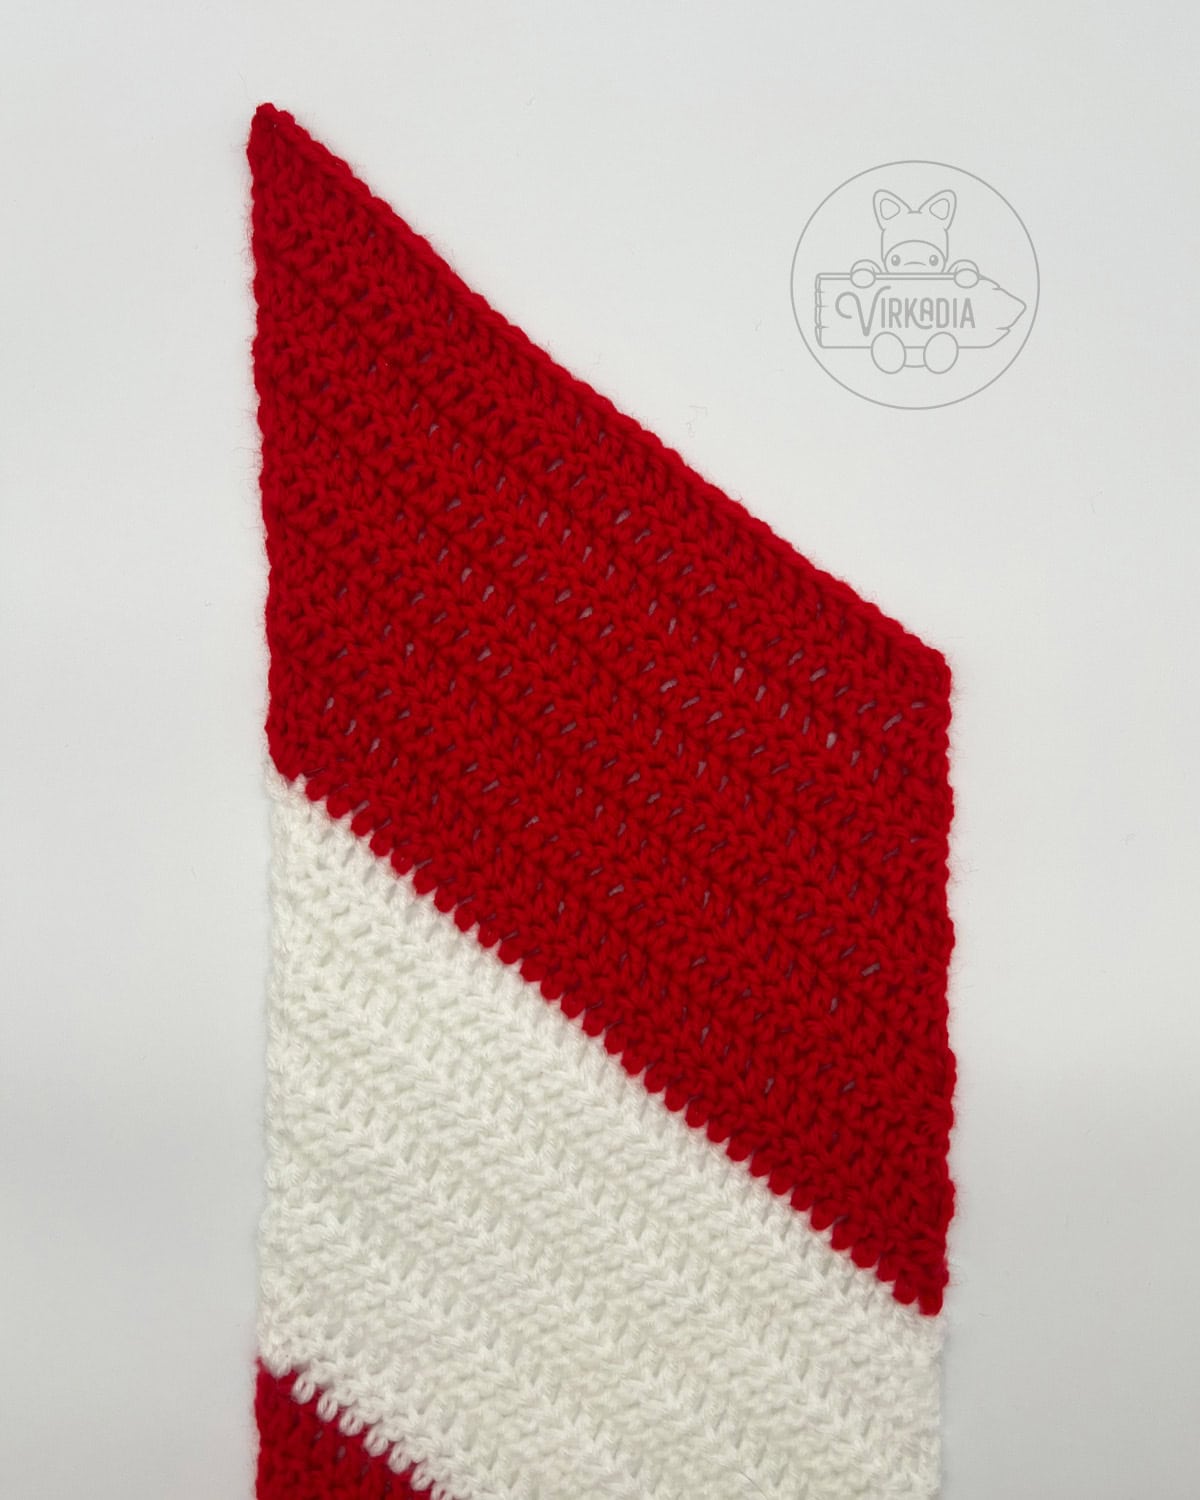
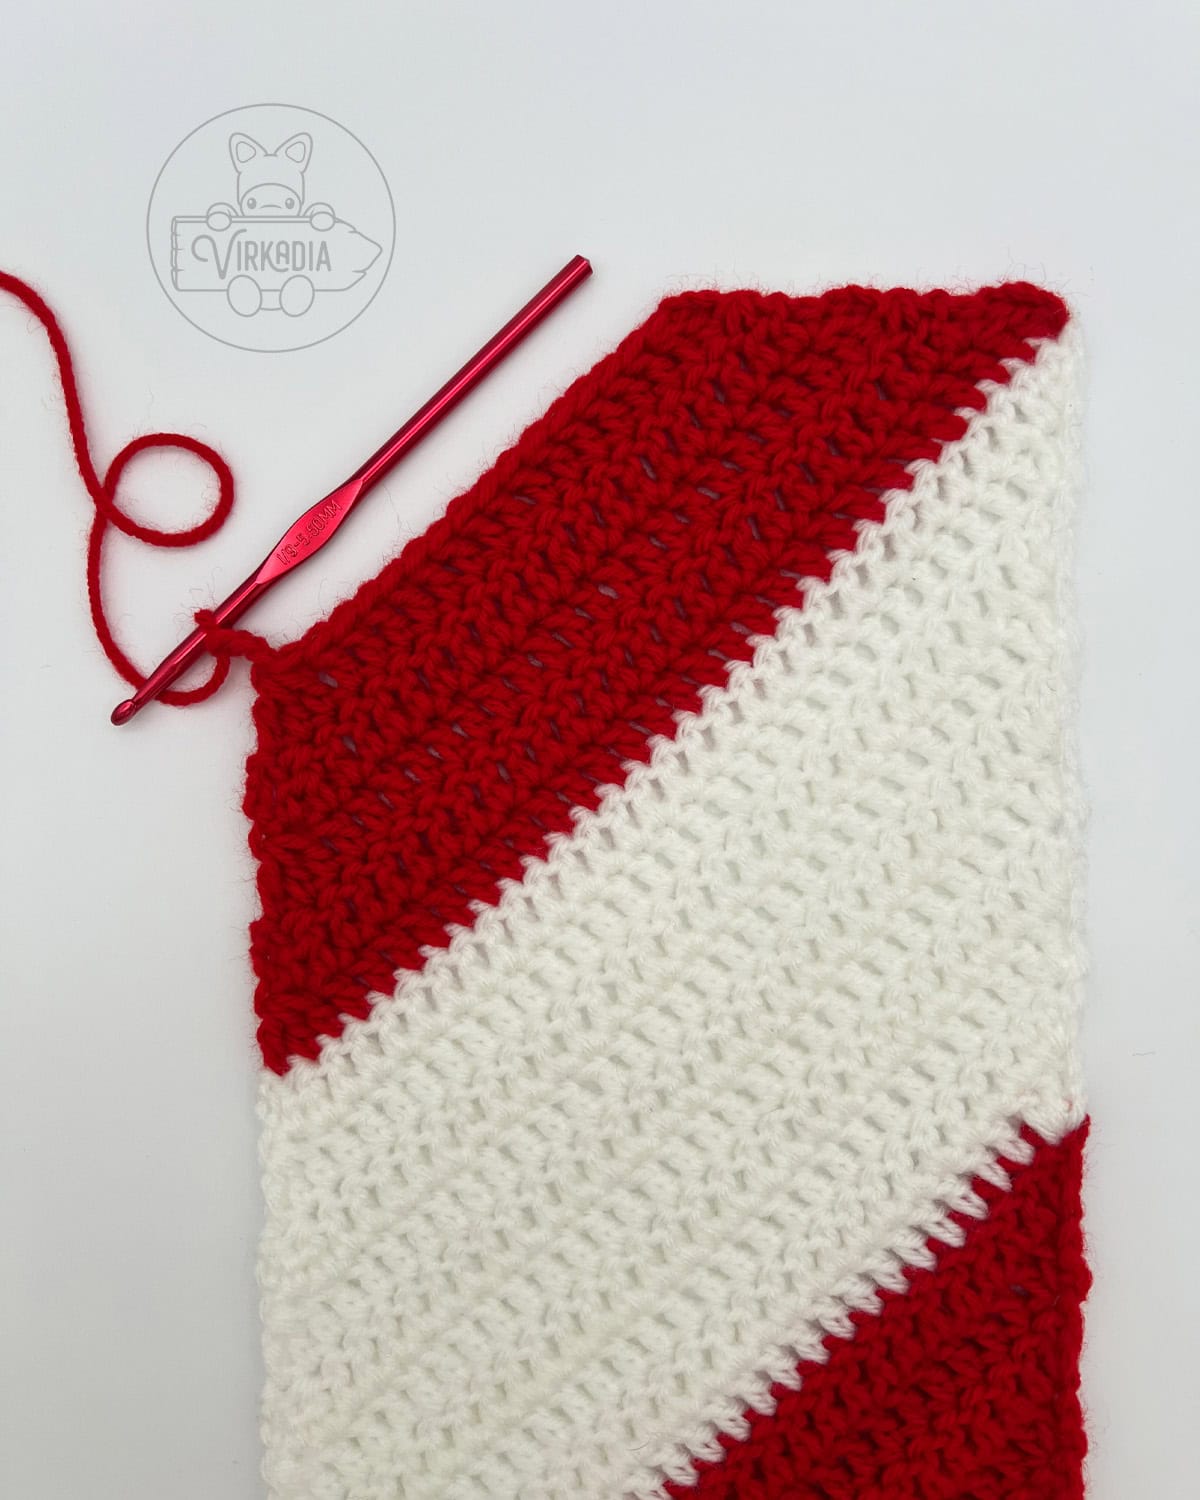
Keep lengthening your scarf by repeating rows 21 to 40 (one white stripe, one red stripe), continuing to change colors every 10 rows.
The example peppermint scarf repeats rows 21 to 40, two more times, for a total of eight stripes (including the first corner stripe).
Your scarf should end on a stripe of yarn B (white) before continuing to row 81.
For row 81, join yarn A (red) with a slip stitch into your last double crochet of row 80, then turn your work.
Row 81: dc2tog over next 2 sts, 1dc into next 26 sts, dc3tog over next 3 sts, sk tch, ch 3, turn (28).
Row 82: dc2tog over next 2 sts, 1dc into next 23 sts, dc3tog over next 3 sts, sk tch, ch 3, turn (25).
Row 83: dc2tog over next 2 sts, 1dc into next 20 sts, dc3tog over next 3 sts, sk tch, ch 3, turn (22).
Row 84: dc2tog over next 2 sts, 1dc into next 17 sts, dc3tog over next 3 sts, sk tch, ch 3, turn (19).
Row 85: dc2tog over next 2 sts, 1dc into next 14 sts, dc3tog over next 3 sts, sk tch, ch 3, turn (16).
Row 86: dc2tog over next 2 sts, 1dc into next 11 sts, dc3tog over next 3 sts, sk tch, ch 3, turn (13).
Row 87: dc2tog over next 2 sts, 1dc into next 8 sts, dc3tog over next 3 sts, sk tch, ch 3, turn (10).
Row 88: dc2tog over next 2 sts, 1dc into next 5 sts, dc3tog over next 3 sts, sk tch, ch 3, turn (7).
Row 89: dc2tog over next 2 sts, 1dc into next 2 sts, dc3tog over next 3 sts, sk tch, ch 3, turn (4).
Row 90: dc4tog, sk tch (1).
Fasten off yarn A (red) and weave in all tails.
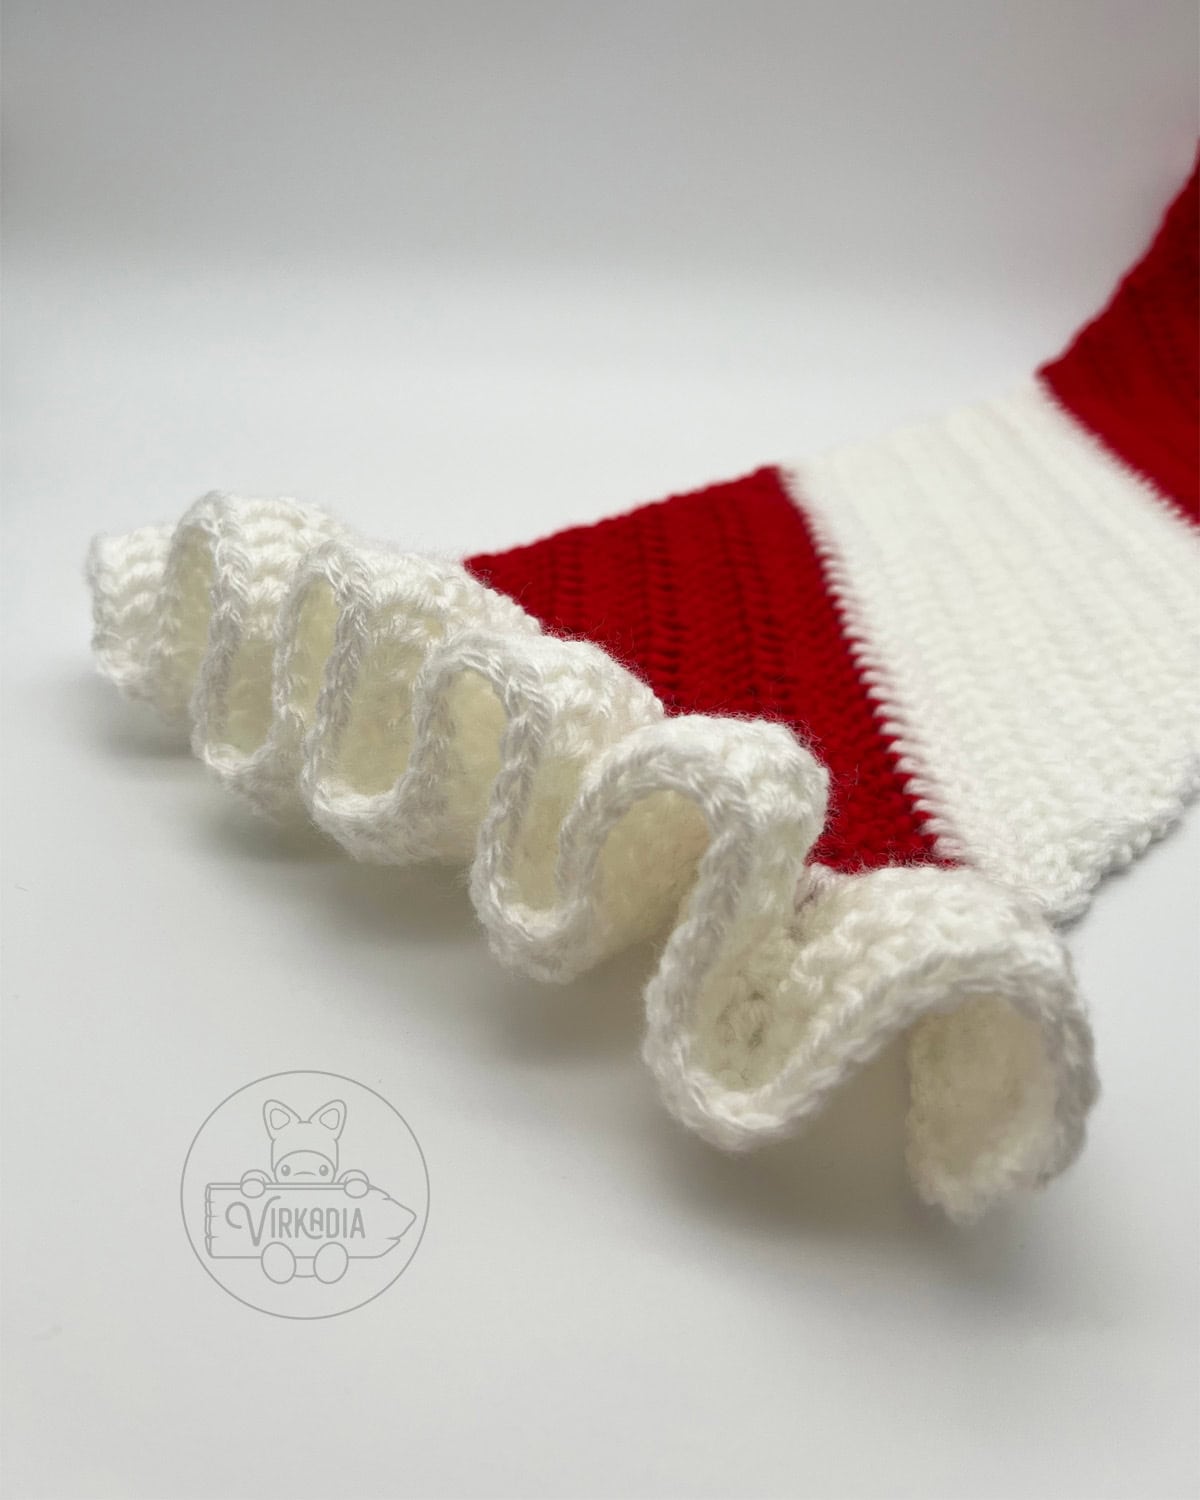
Adding Ruffles (Optional):
To add ruffles onto the ends of your scarf, you will be working into the side edges of rows 1 to 10 at the bottom of the scarf, and rows 81 to 90 at the top.
Row 1 will be worked around the outermost double crochet or turning chain in each row along the top or bottom edge, for a total of ten spaces across.
With yarn B (white), join your yarn with a slip stitch around the last stitch along the top of bottom edge of the scarf, chain 3, then turn your work.
Row 1: 4dc around same st, 5dc around each of next 9 sts, ch 3, turn (49).
Row 2: 1dc into next st, 2dc into each of next 48 sts, 2dc into tch, ch 3, turn (99).
Row 3: 1dc into each of next 99 sts, 1dc into tch, ch 3, turn (100).
Row 4: dc2tog over next 2 sts, 1dc in each of next 95 sts, dc3tog over next 3 sts, sk tch, ch 3, turn (97).
Row 5: dc2tog over next 2 sts, 1dc in each of next 92 sts, dc3tog over next 3 sts, sk tch (94).
Fasten off yarn and weave in all tails.
Repeat rows 1 to 5 on the opposite end to complete your peppermint scarf.
Conclusion | Free Crochet Peppermint Scarf
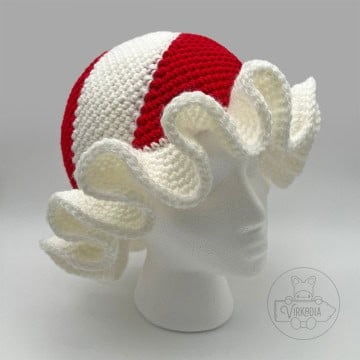
And with that, you’re done the free crochet Peppermint Scarf pattern! If you enjoyed this pattern, be sure to check out its companion pattern: the Peppermint Hat!
You can also explore the Cutie Collections and the Pocket Pets archives for our original and free amigurumi patterns, or our Home Decor Patterns for other homemade household goodies!
If you’re looking to cozy up with a longer project, check out our Clothing Patterns, or assemble your own designs from one of our Granny Square Patterns!
And don’t forget to browse our downloadable, ad-free patterns in our Etsy store!
Follow Virkadia on Instagram to stay updated on all new and upcoming patterns, crochet content, and amigurumi adventures! Thank you for all of your support!


Hey hey, I'm Joey Diehl!
I am the fiber artist behind Virkadia! I have a BFA in Fibers & Material Studies and have been crocheting for over 20 years. I have designed, photographed, and written dozens of original crochet patterns that I am honored to have been shared to hundreds of thousands of readers.

Leave a Reply