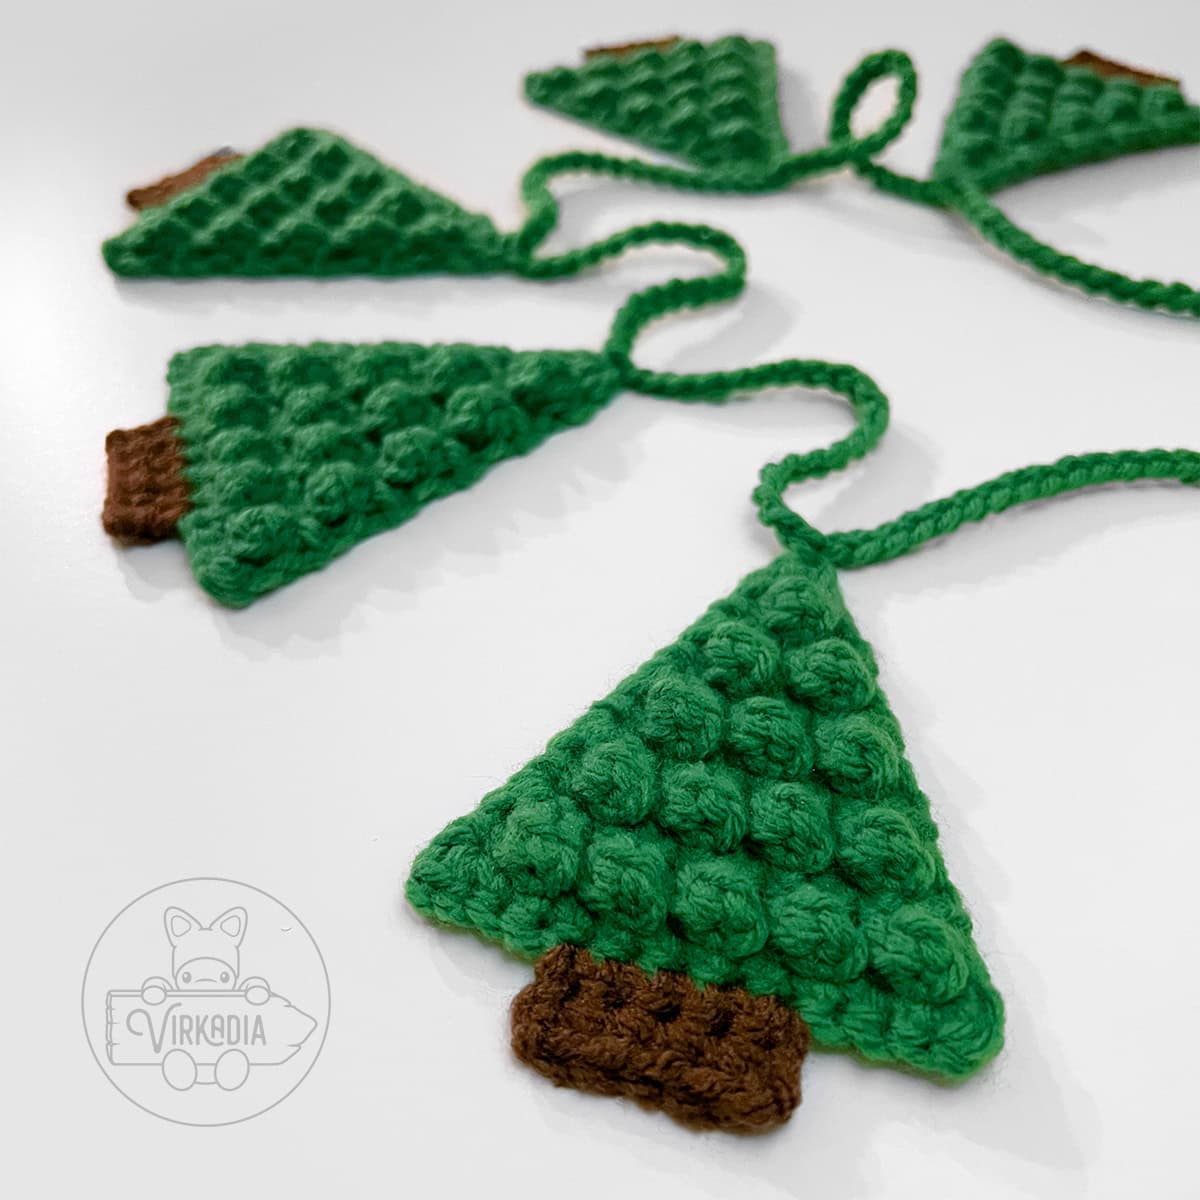
Needled into this free crochet pine tree garland pattern are all the merry moments of holidays approaching—the chilly sting of winter’s welcome on your cheeks as you hunt down the perfect pine tree, the relief of a warm fireplace on your icy mitten-trapped fingers, and the return voyage of so many storage bins waiting to unleash their dusty decor upon the season!
While the embers of a yule log crackle from the fireplace, warm up your idle fingers with this free crochet pine tree garland pattern!

Pattern Information | Free Crochet Pine Tree Garland
This free crochet pine tree garland pattern has a difficulty rating of intermediate.
The finished dimensions of each pine tree motif are 4 inches (height) by 3.25 inches (width).*
The finished length of the example garland is 31 inches wide, but this pattern includes instructions for customizing your garland to any length that you desire!
*Finished dimensions are calculated from a model using medium weight yarn, a size H-8 (5 mm) crochet hook, and the following gauge: 18 sc x 21 rows = 4 inches.
And don’t forget to add your project on Ravelry!
Supplies:
- Size H-8 (5 mm) crochet hook
- Medium (4) weight yarn in 2 colors:
- Yarn A – green (example uses Mainstays: Green V)
- Yarn B – brown (example uses Loops & Threads Classic: Mocha)
- Yarn needle
- Scissors
- Stitch markers (optional)
Terminology:
This free crochet pine tree garland pattern uses English (US) terminology:
- st (sts) = stitch (stitches)
- ch = chain stitch
- sc = single crochet
- hdc = half double crochet
- dc = double crochet
- pc = (small) popcorn stitch*
- sk = skip
Please note that this pattern is written so that each crochet stitch abbreviation is attached to a number, such as 1sc, 2sc, etc. This number denotes how many of that stitch is to be worked into the same stitch.
In other words, 1sc = one single crochet, whereas 2sc = two single crochet worked into one stitch, also known as an increase.
You can learn more about how to read Virkadia patterns on our Pattern Help FAQ page!
*Be sure to read through the special instructions for the popcorn stitch before beginning, as it may be unique for this crochet pine tree garland pattern.
Special Stitch Instructions:
Please review our special stitch instructions on our Stitch Tutorials FAQ page before beginning, as some techniques may be helpful for this pattern.
Small Popcorn Stitch:
This free crochet pine tree garland pattern uses a variation of the popcorn stitch that utilizes only 3 double crochet stitches, instead of the more common 5 double crochet, as seen below.
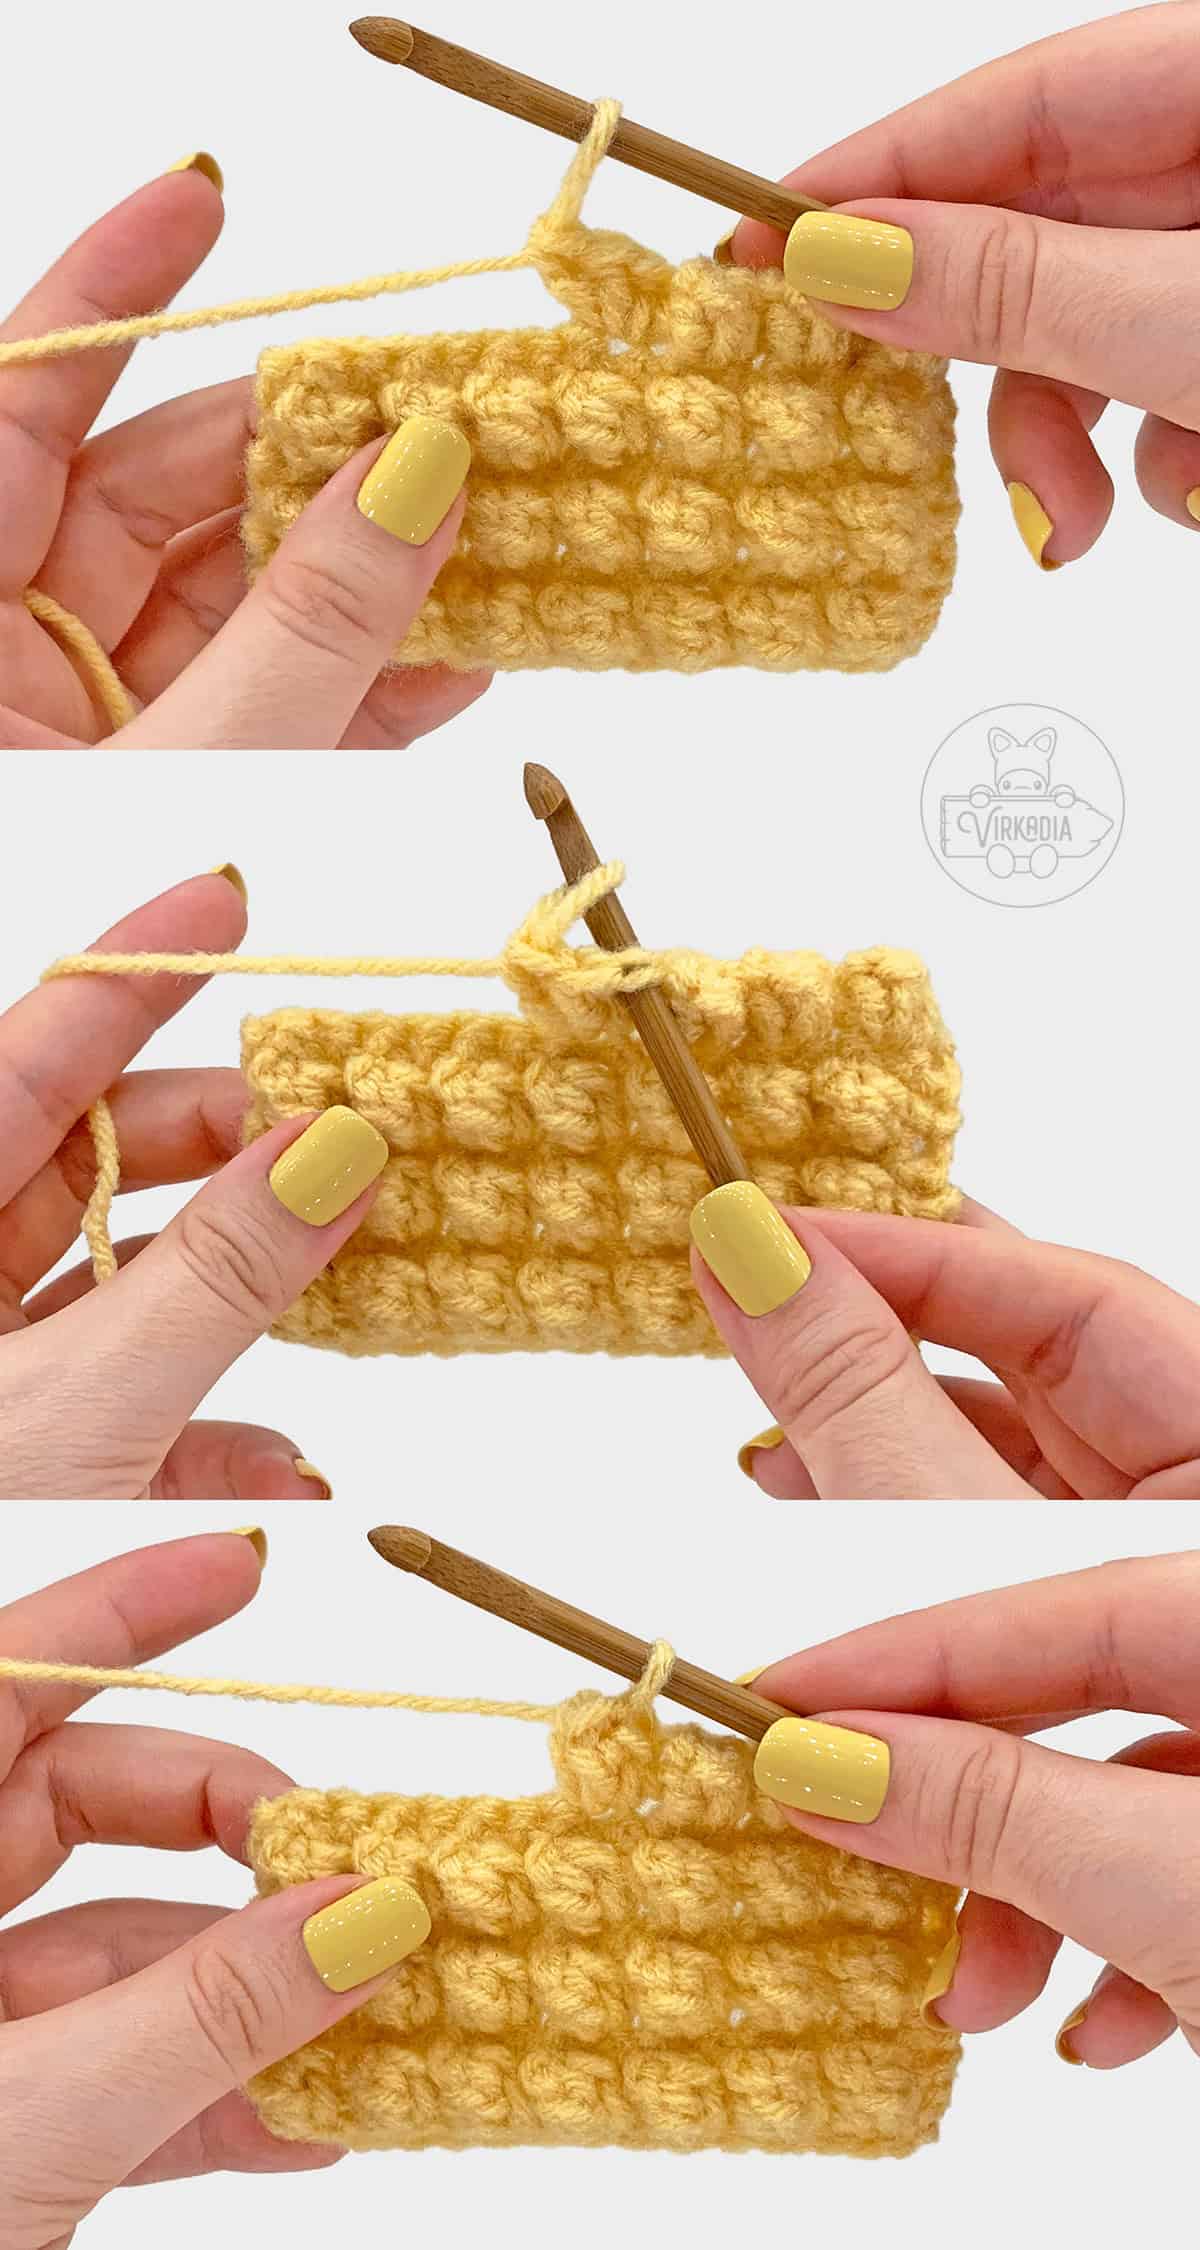
Begin by working 3 double crochet into the next stitch. Then, pull up your working loop (large enough that your last stitch will not be accidentally pulled undone) and remove your hook.
Next, insert your hook, from front to back, through the top of the 1st double crochet you’ve made in the 3 double crochet sequence. Now, pull your working loop from the 3rd double crochet through the top of the 1st double crochet.
Lastly, pull your working tail so that your working loop fits back snugly around your hook and continue to your next stitch.
Pattern Instructions | Free Crochet Pine Tree Garland
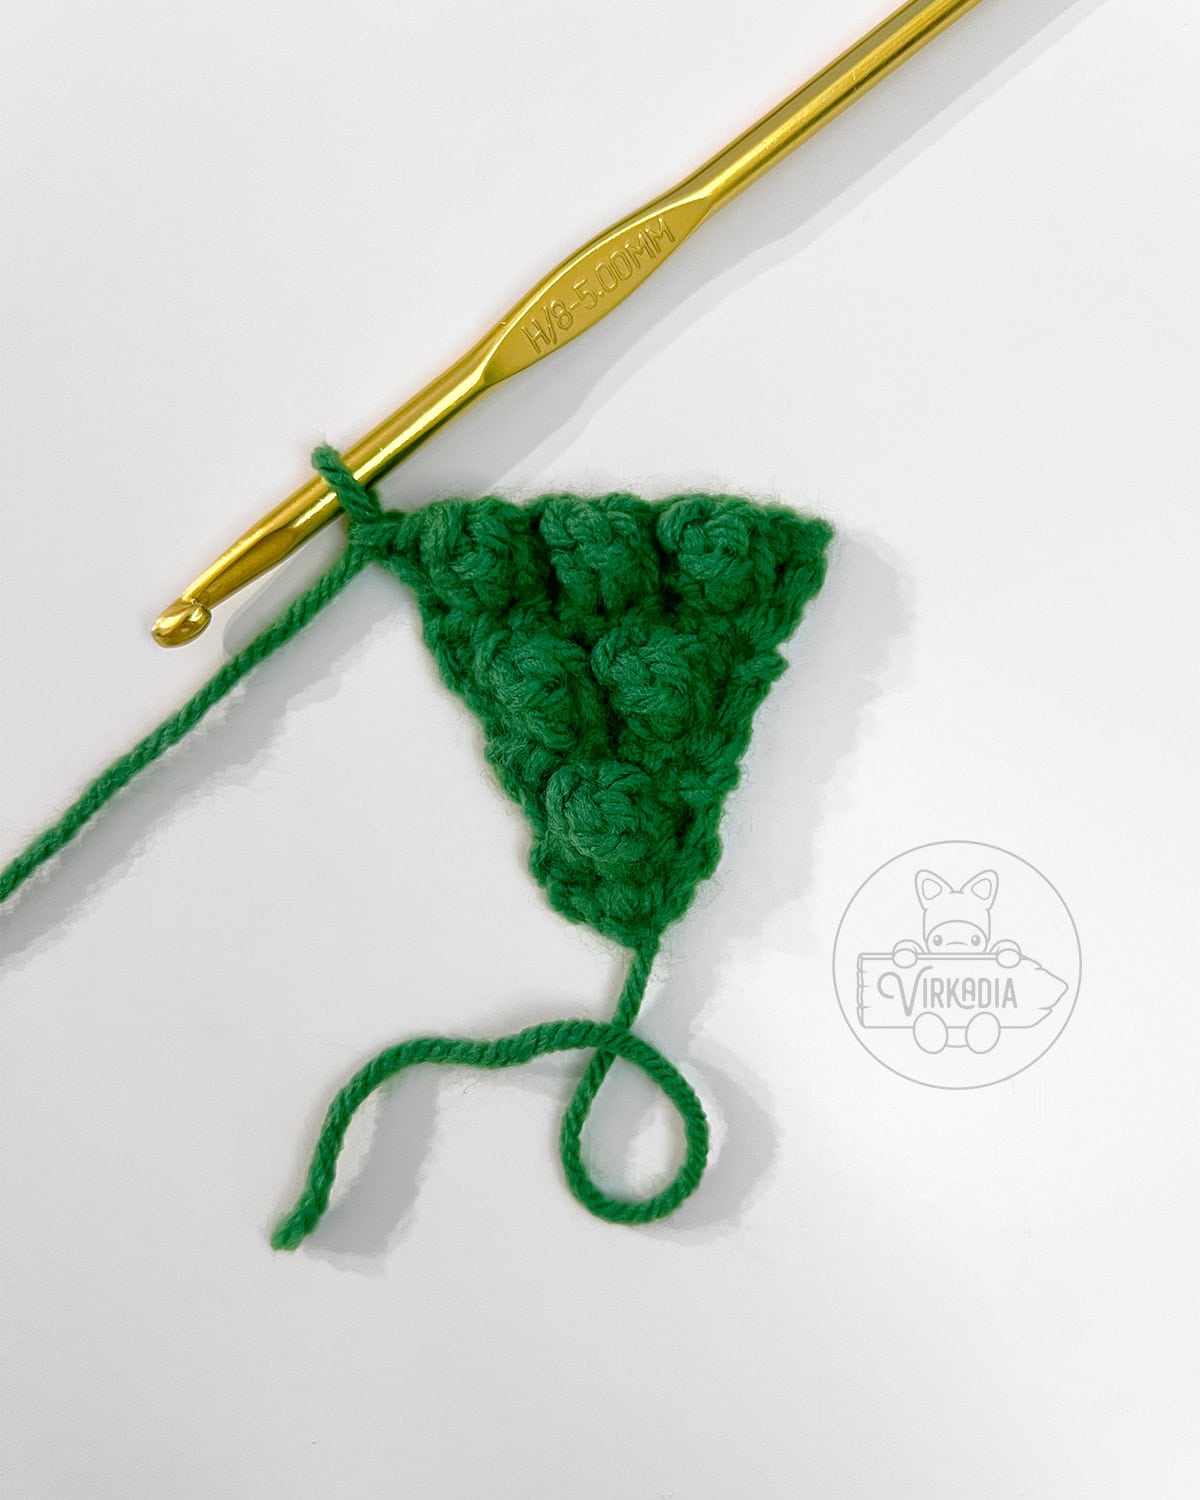
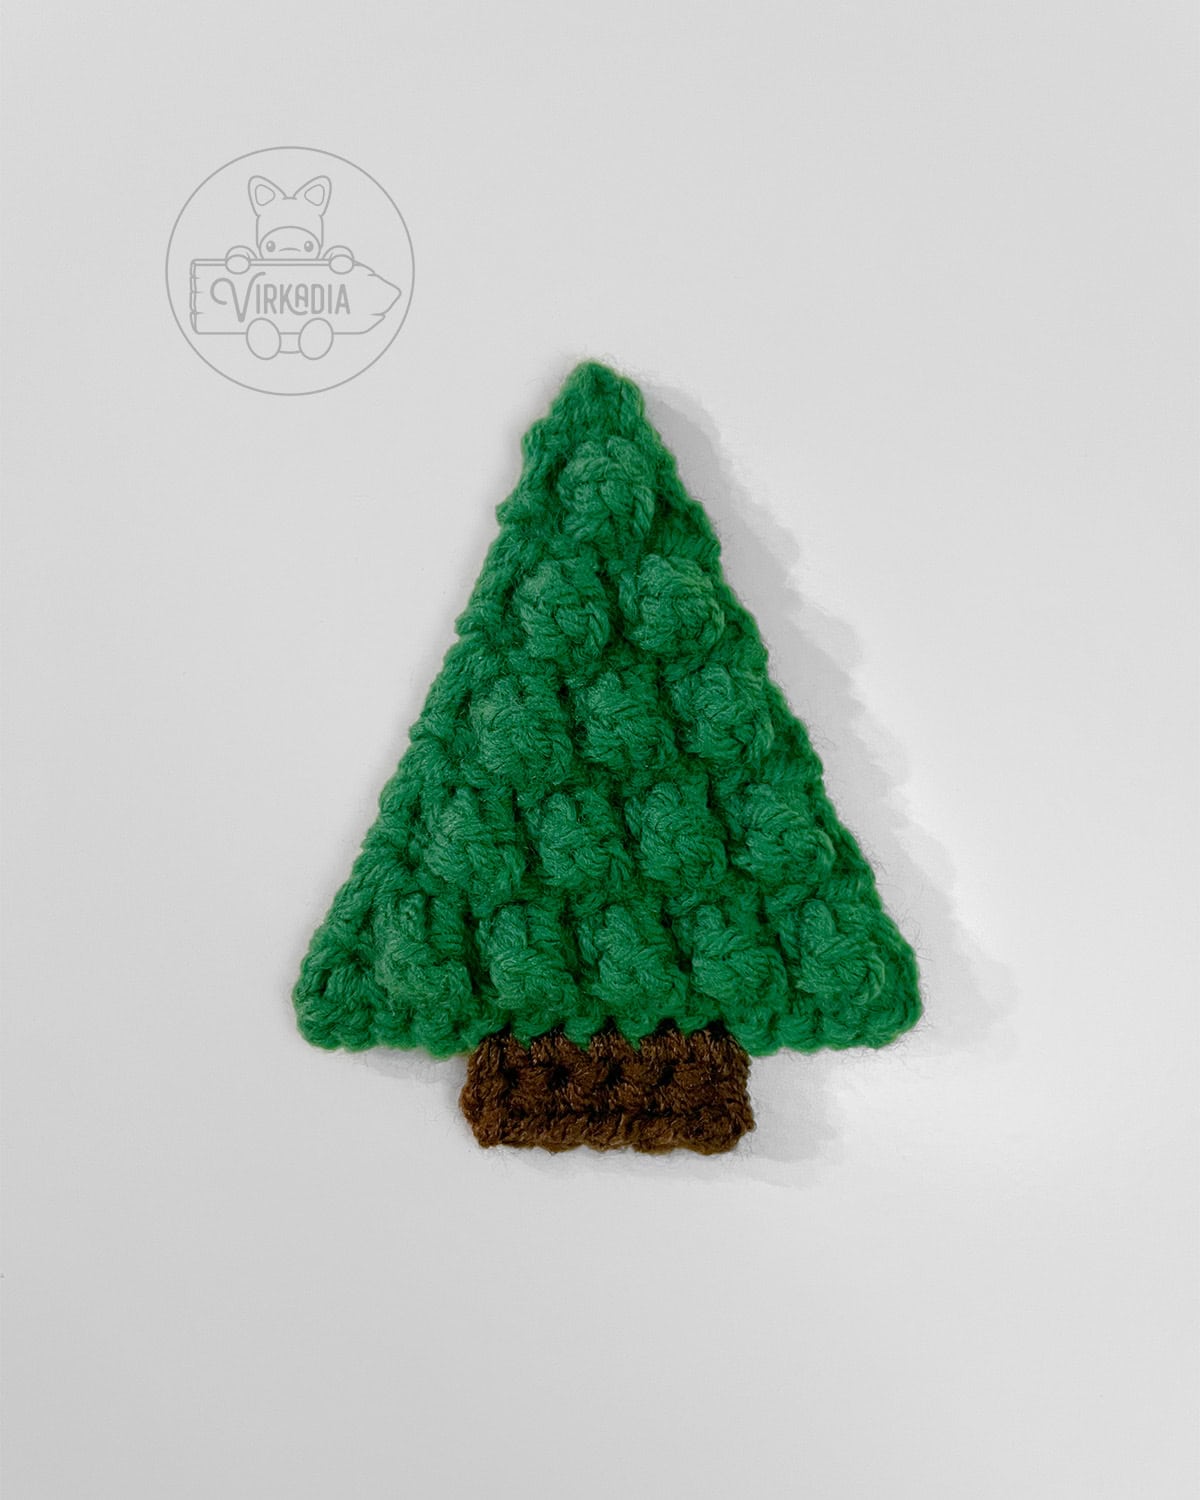
Crochet Pine Tree Motif – Rounds 1 to 11:
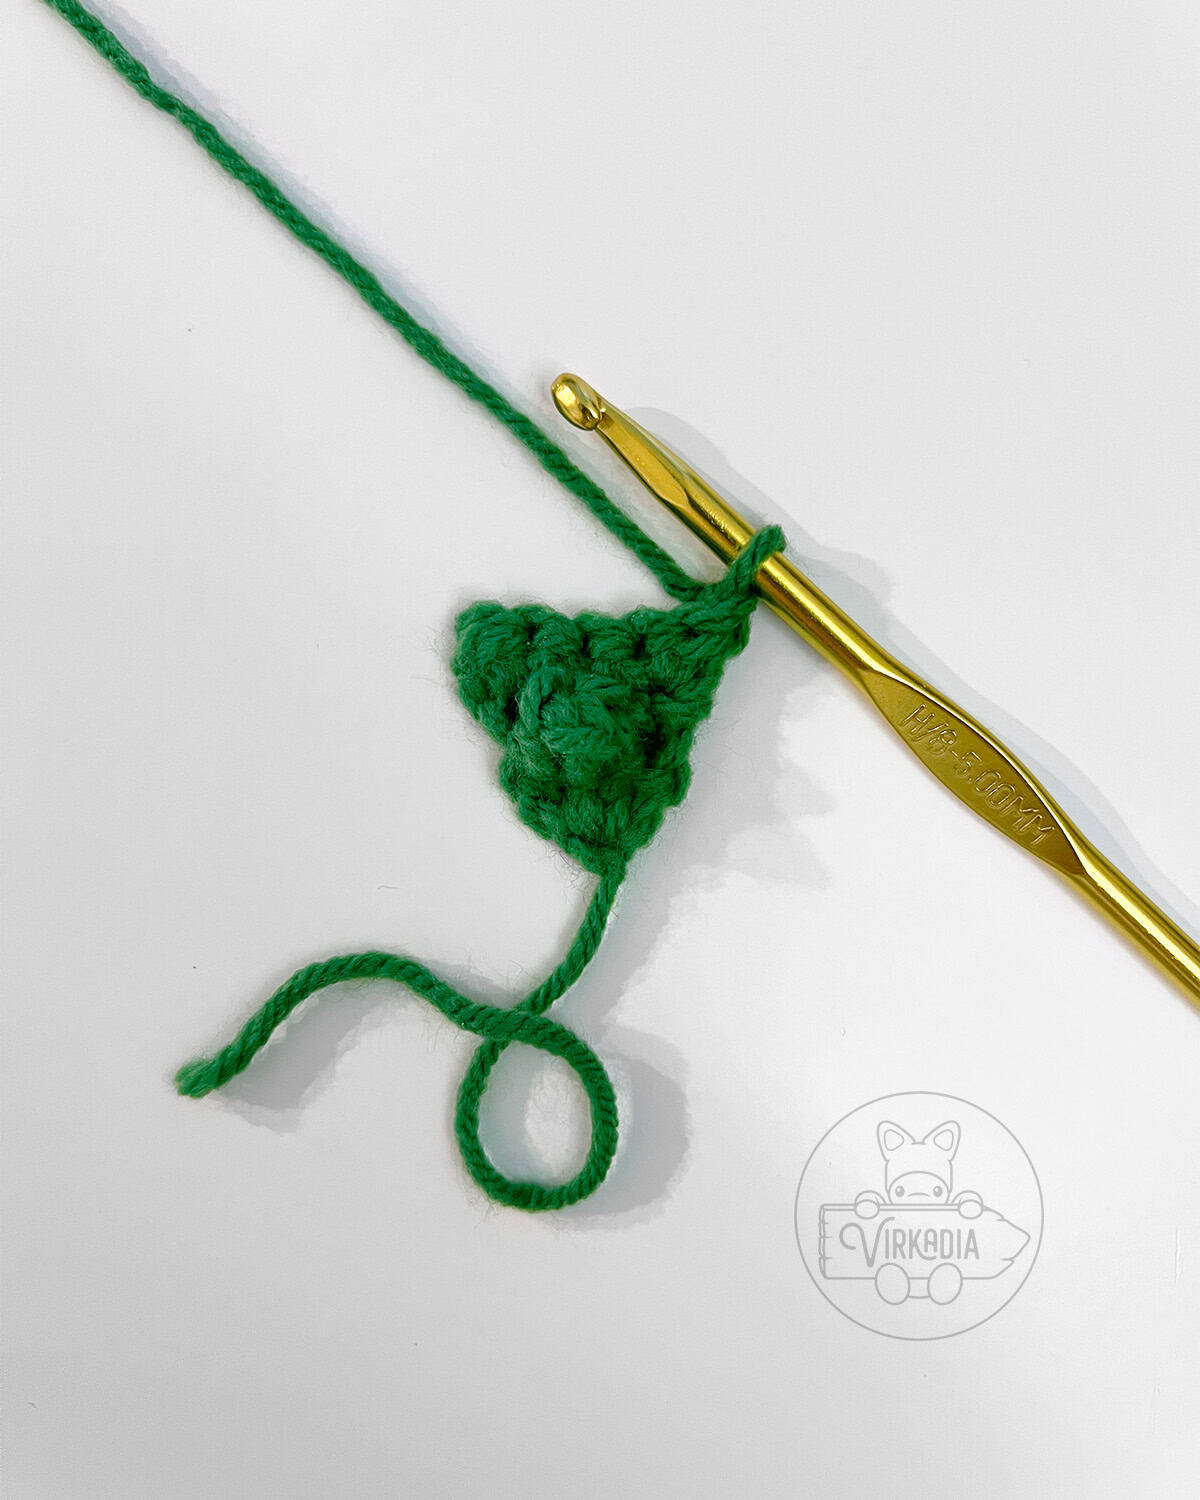
With yarn A (green), leave a short tail for weaving in and chain 4.
The last 3 chains will count as your first double crochet in row 1.
Row 1: 2dc into 4th ch from hook, ch 1, turn (3).
Row 2: 1sc into next st, 1pc into next st, 1sc into top of ch 3, ch 1, turn (3).
Row 3: (1hdc, 1sc) into next st, 1sc into next st, (1sc, 1hdc) into next st, ch 1, turn (5).
Row 4: 1sc into next st, [1pc into next st, 1sc into next st] 2 times, ch 1, turn (5).
Row 5: (1hdc, 1sc) into next st, 1sc into each of next 3 sts, (1sc, 1hdc) into next st, ch 1, turn (7).
Row 6: 1sc into next st, [1pc into next st, 1sc into next st] 3 times, ch 1, turn (7).
Row 7: (1hdc, 1sc) into next st, 1sc into each of next 5 sts, (1sc, 1hdc) into next st, ch 1, turn (9).
Row 8: 1sc into next st, [1pc into next st, 1sc into next st] 4 times, ch 1, turn (9).
Row 9: (1hdc, 1sc) into next st, 1sc into each of next 7 sts, (1sc, 1hdc) into next st, ch 1, turn (11).
Row 10: 1sc into next st, [1pc into next st, 1sc into next st] 5 times, ch 1, turn (11).
Row 11: (1hdc, 1sc) into next st, 1sc into each of next 9 sts, (1sc, 1hdc) into next st, do not turn (13).
Fasten off yarn A and leave a short tail for weaving in.
Then, continue to round 12 of your crochet pine tree garland below to add a stump onto your motif.
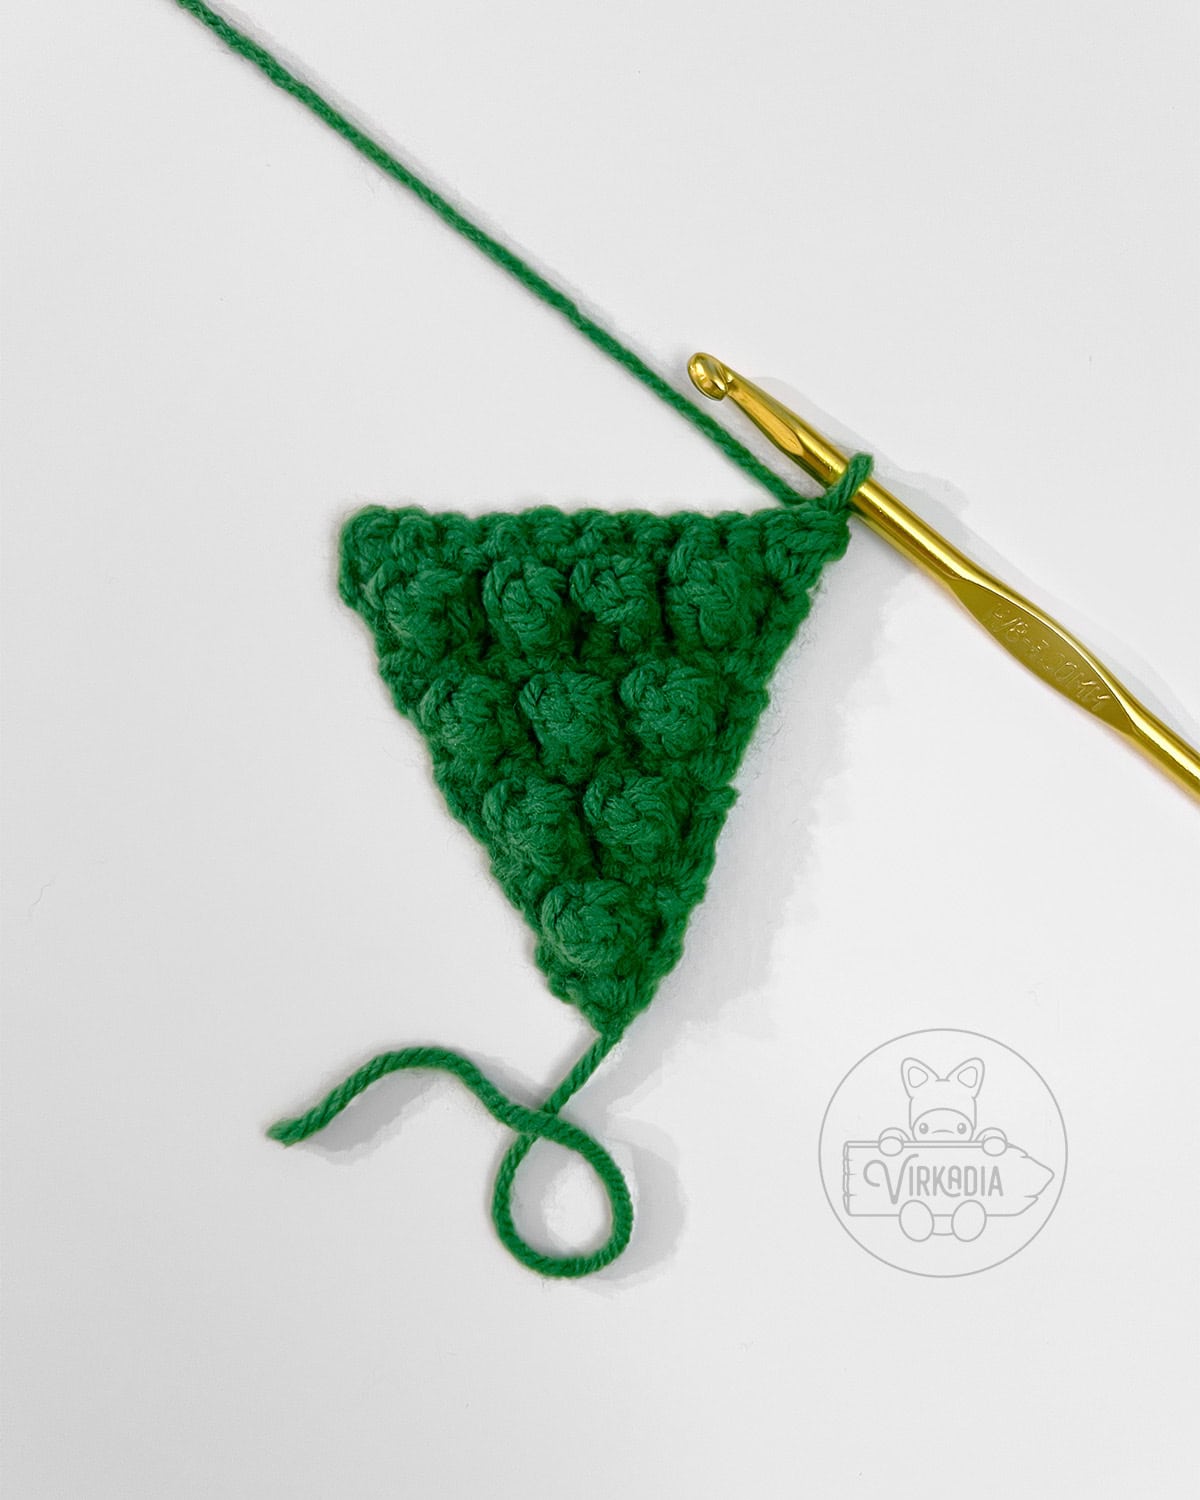
Crochet Pine Tree Stump – Rounds 12 to 13:
Without turning your work, join yarn B (brown) by inserting your hook into the 5th stitch of row 11.
Leave a short tail for weaving in, then pull up a loop of yarn B and ch 1.
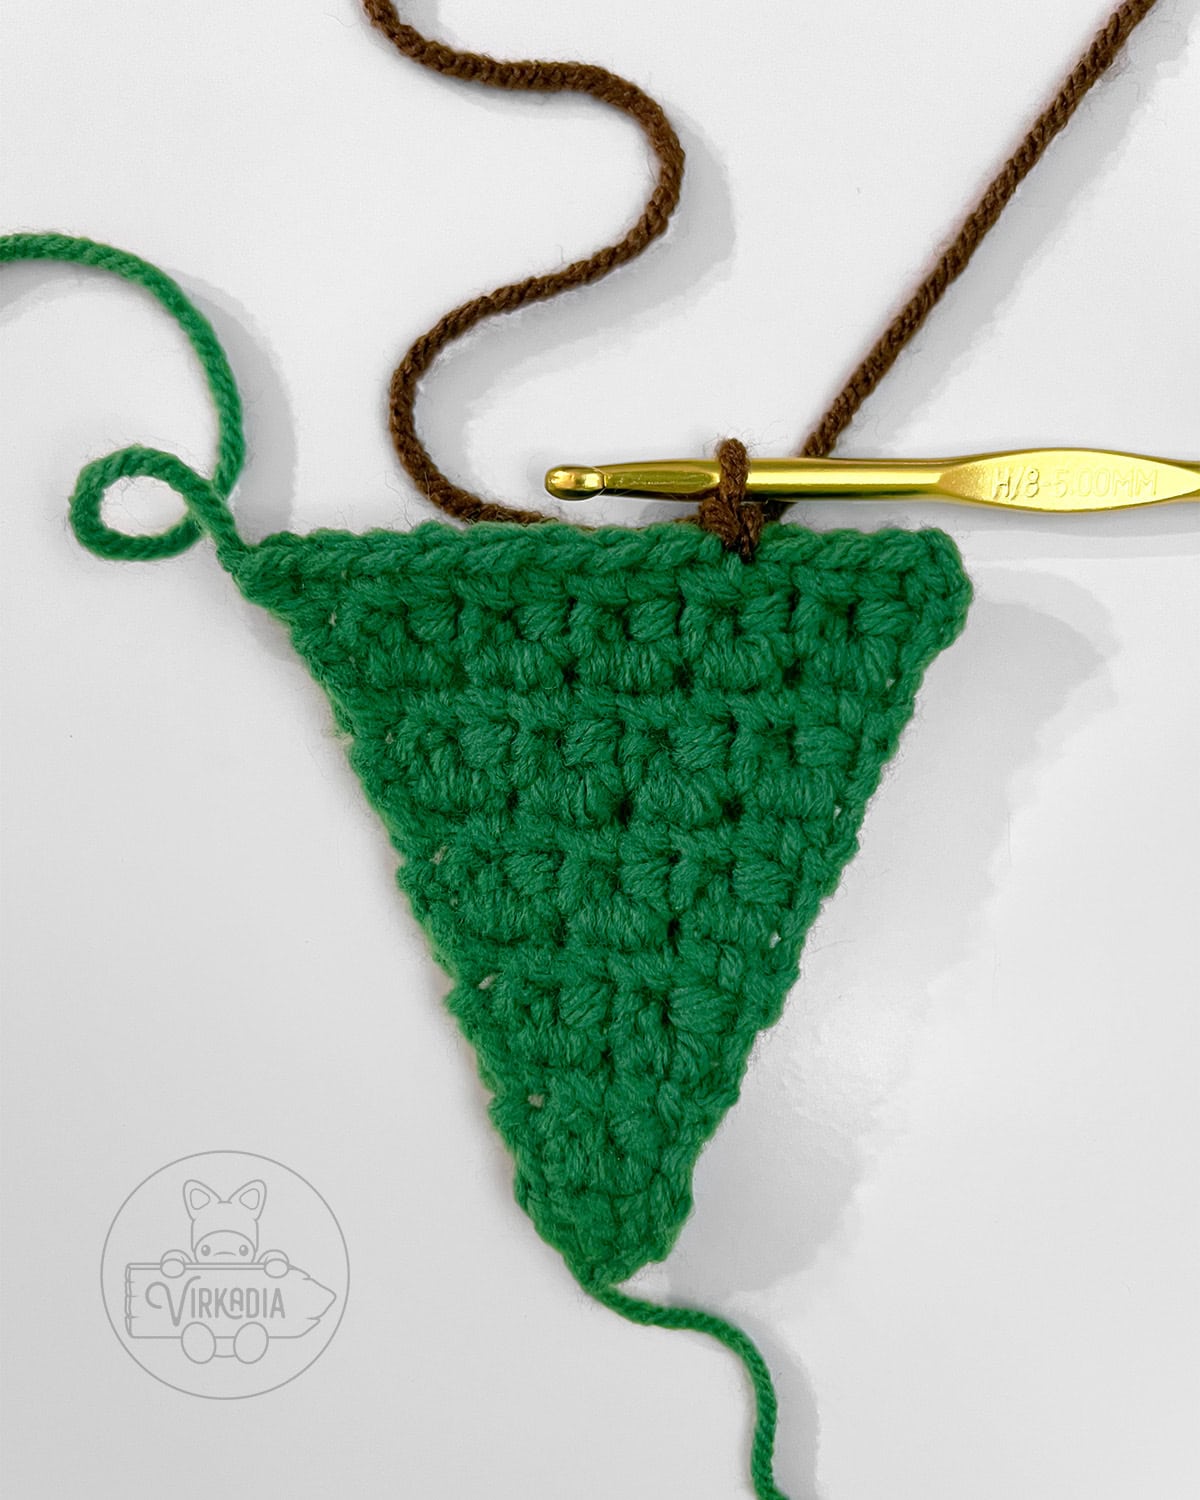
Continue to row 12 as normal, working only a partial row onto the bottom of your crochet pine tree garland motif.
Row 12: 1sc into each of next 5 sts, sk last 4 sts, ch 1, turn (5).
Row 13: 1sc into each of next 5 sts (5).
Fasten off yarn B and leave a short tail for weaving in.
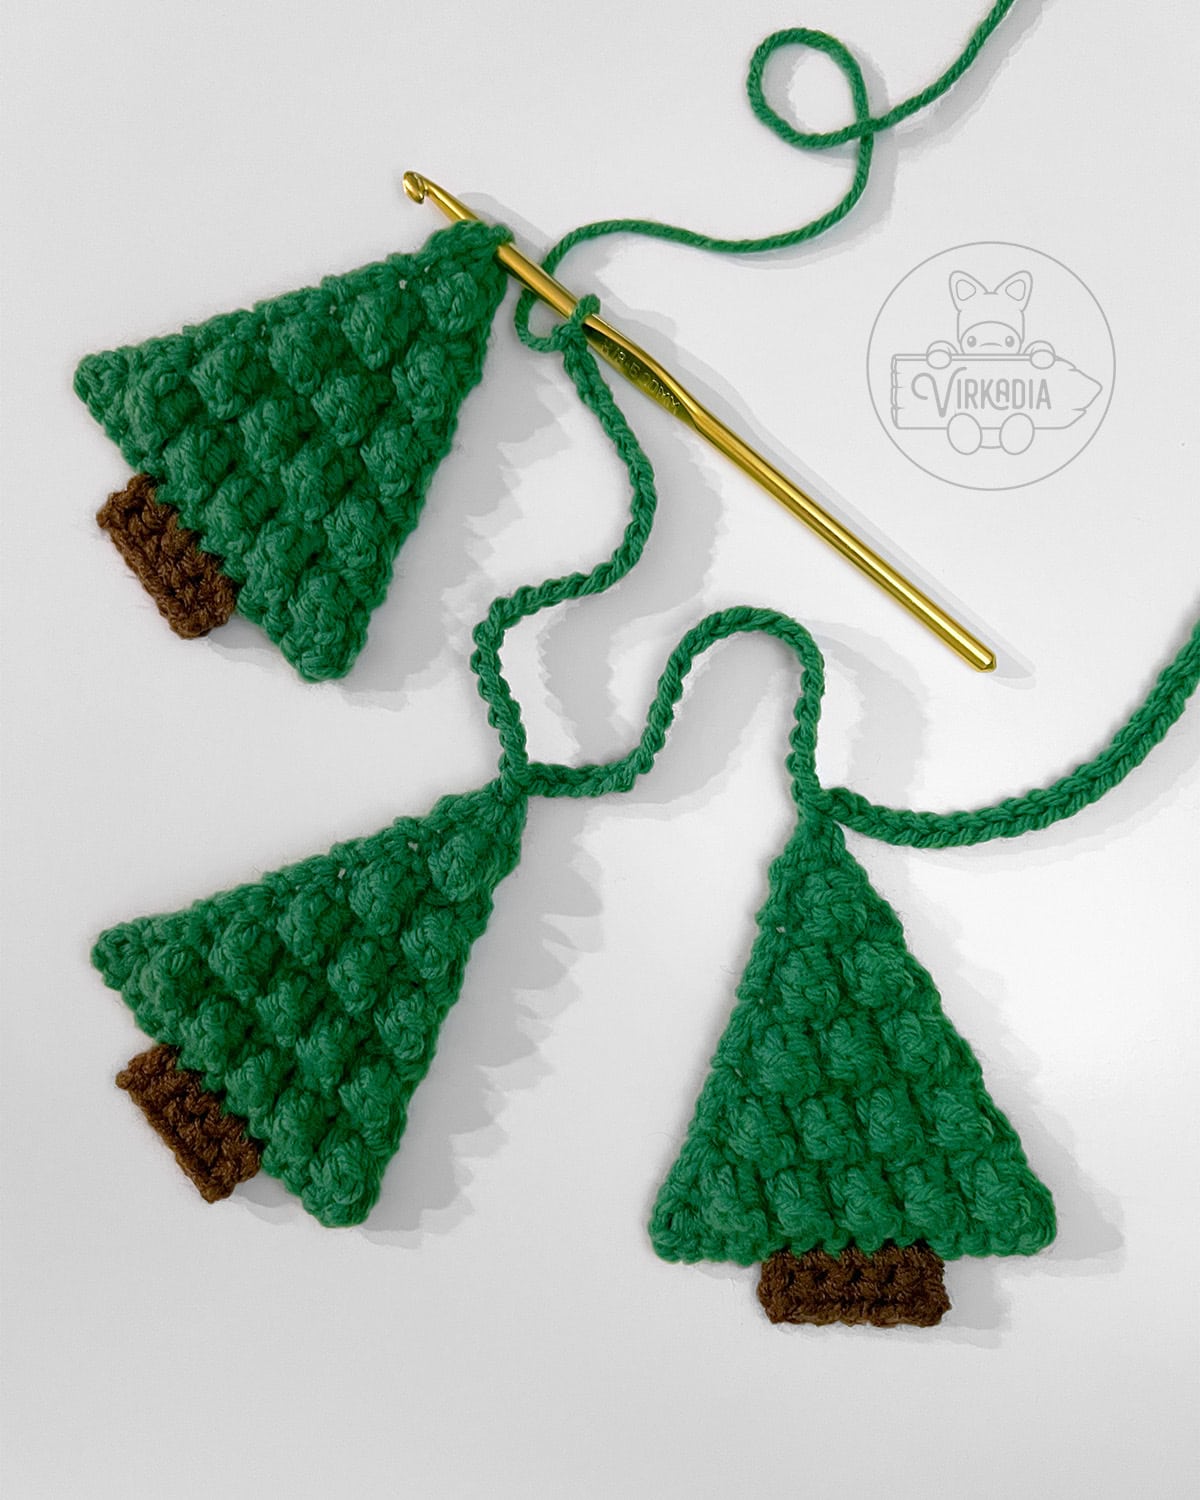
Weave in all 4 tails to finish off your crochet pine tree garland motif.
Next, repeat all instructions from the beginning, 4 more times, for a total of 5 pine tree motifs.
Alternatively, if you would like to customize your pine trees to be double-side, you may instead multiply your desired amount of motifs by 2.
Then divide your motifs into pairs, match them with their flat sides together, and sew around the circumference.
Then, follow the instructions below for attaching your motifs into your garland.
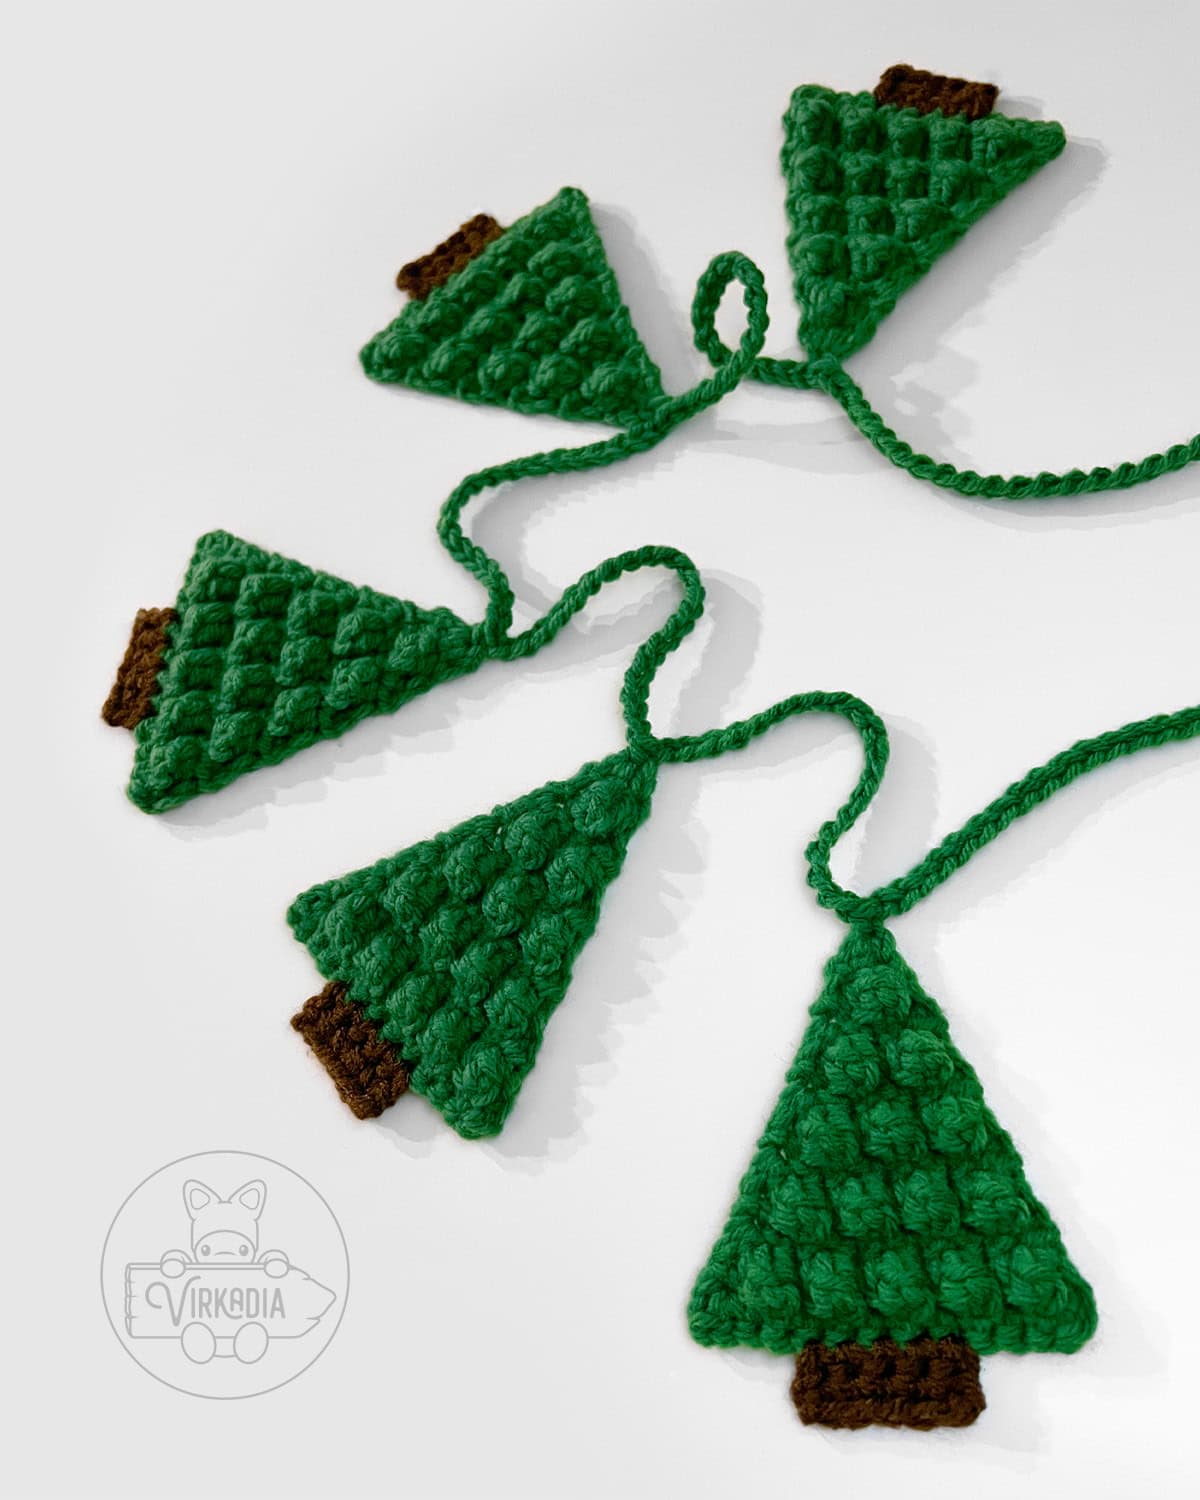
Attaching Crochet Pine Tree Garland:
Once you have all of your crochet pine tree garland motifs finished, you may begin attaching them together onto your garland string.
The example garland uses 5 pine tree motifs, however, you may use more or fewer pieces, for a longer or shorter garland, respectively!
In order to attach each pine tree to the garland, you will be working 1 single crochet into the top of each piece, into the other side of the same chain you’ve worked row 1 of each motif into.
With yarn A (green), work row 1 below to attach your pine tree motifs together into a garland.
If you plan to use your beginning and end tails to tie up your garland, be sure to leave some tail at the beginning of your work.
Row 1: ch 20, [1sc into top of next pine tree, ch 20] 5 times (125).
The pattern given above is for the example garland, which consists of 5 pine tree motifs.
To make the garland longer, simply repeat the bracketed sequence in the pattern once more for each additional motif that you’d like to attach.
Once all of your motifs are attached and your garland reaches your desired length, fasten off yarn A and leave a tail for either tying or sewing.
For a more refined look, you may also experiment with blocking or starching your motifs! This will help create uniformity between all of your pine trees!
Finally, you may use your beginning and end tails to tie up your garland, or weave them into your chain for a more finished look. Choose whichever method works best for you!
Conclusion | Free Crochet Pine Tree Garland
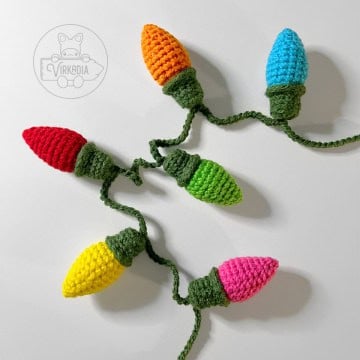
And with that, you’re done the free Crochet Pine Tree Garland pattern! If you enjoyed this pattern, be sure to check out some of our other Christmas home decor patterns, such as our Minimalist Christmas Tree Set and our Christmas Bauble Ornament Set!
You can also explore the Cutie Collections and the Pocket Pets archives for our original and free amigurumi patterns, or our Home Decor Patterns for other homemade household goodies!
If you’re looking to cozy up with a longer project, check out our Clothing Patterns, or assemble your own designs from one of our Granny Square Patterns!
And don’t forget to browse our downloadable, ad-free patterns in our Etsy store!
Follow Virkadia on Instagram to stay updated on all new and upcoming patterns, crochet content, and amigurumi adventures! Thank you for all of your support!

Hey hey, I'm Joey Diehl!
I am the fiber artist behind Virkadia! I have a BFA in Fibers & Material Studies and have been crocheting for over 20 years. I have designed, photographed, and written dozens of original crochet patterns that I am honored to have been shared to hundreds of thousands of readers.

Leave a Reply