Bleating from this free crochet lamb pattern are all the springtime scenes of Easter celebrations—trees adorned in delicate pink buds, a lazy wind tousling the edges of a picnic blanket, and nearby meadows blooming into soft and swaying palettes of pastel hues.
While you hunt through the budding flowers for some colorful eggs, there’s no better way to celebrate the rebirth of the earth than with this free lamb amigurumi pattern!
So, without further ado, here is the pattern for the Lamb Pocket Pet, part three of three in the Easter Pocket Pets collection!
Pattern Information | Free Crochet Lamb Amigurumi
Tired of ads? Check out our ad-free PDF download, available for purchase on Etsy!
And don’t forget to add your project on Ravelry!
This free crochet lamb amigurumi pattern has a difficulty rating of intermediate.
The finished dimensions are 5.5 inches (height) by 5 inches (width) by 2.5 inches (depth).*
You may also make your pieces larger or smaller by increasing or decreasing your yarn weight and/or hook size, respectively.
*Finished dimensions are calculated from a model using medium weight yarn, a size H-8 (5 mm) crochet hook, the YU/YO method and the following gauge: 18 sc x 21 rows = 4 inches.
Supplies:
- Size H-8 (5 mm) crochet hook
- Medium (4) weight yarn in 3 colors:
- Yarn A – white (example uses Red Heart Super Saver: Soft White)
- Yarn B – gray (Red Heart Super Saver: Dusty Gray)
- Yarn C – dark gray (Red Heart Super Saver: Charcoal)
- 10 mm black safety eyes (x2)
- Black embroidery floss
- Polyester fiberfill
- Yarn needle
- Scissors
- Stitch markers
Alternate Yarn Supplies:
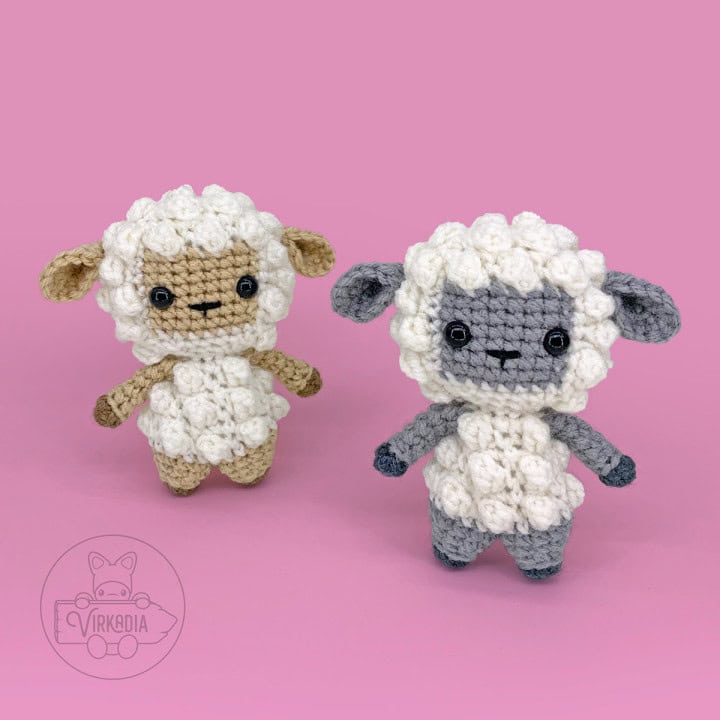
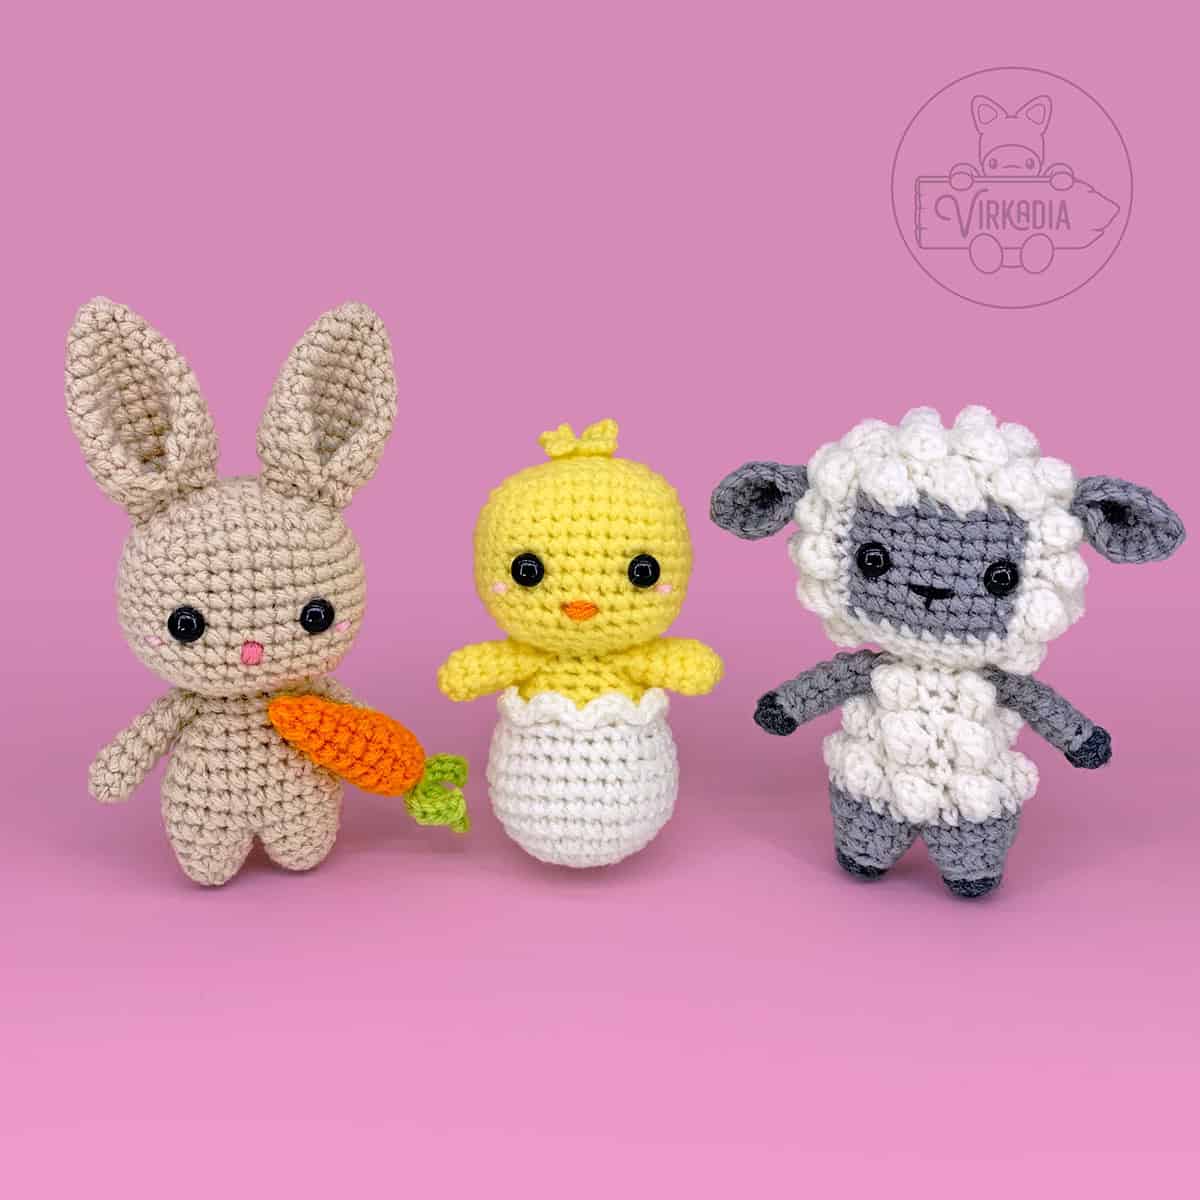
Color Variation 2 (as seen on the left in cover photo):
- Medium (4) weight yarn in 3 colors:
- Yarn A – white (example uses Red Heart Super Saver: Soft White)
- Yarn B – beige (Red Heart Super Saver: Buff)
- Yarn C – brown (Red Heart Super Saver: Cafe Latte)
Terminology:
This free crochet lamb pattern uses English (US) terminology:
- st (sts) = stitch (stitches)
- ch = chain stitch
- sl st = slip stitch
- sc = single crochet
- sc2tog = single crochet 2 together (over the span of 2 stitches), also known as a decrease
- sc3tog = single crochet 3 together (over the span of 3 stitches)
- pc = 1 (small) popcorn stitch*
- sk = skip
*Please read through the special instructions for this stitch before beginning, as it is unique for this crochet lamb pattern.
Please note that this pattern is written so that each crochet stitch abbreviation is attached to a number, such as 1sc, 2sc, etc. This number denotes how many of that stitch is to be worked into the same stitch.
You can learn more about how to read Virkadia patterns on our Pattern Help FAQ page!
Special Stitch Instructions:
Please review our special stitch instructions on our Stitch Tutorials FAQ page before beginning, as some techniques may be unique to this pattern.
You can also watch our amigurumi techniques video tutorial for all of our tips and tricks for improving your project!
This free crochet lamb pattern uses the following special stitch tutorials:
- Single Crochet (YU/YO Method)
- Invisible Decrease
- Joining Rounds
- Changing Colors (Mid-Round)
- Small Popcorn Stitch
This pattern is worked in the round, with each round joined at the end with a slip stitch. Unless otherwise instructed, the first stitch of your next round will always be worked into the same stitch as your joining slip stitch has been worked into.
Be sure to always keep the ‘right side’ of your stitches facing outwards as you work. The right side is the front side of the stitch that is facing you as you are completing each stitch.
Single Crochet (YU/YO Method):
This pattern uses a variation of the traditional single crochet stitch, sometimes referred to as the YU/YO (yarn under/yarn over) method.
Instead of yarning over before pulling through, this method utilizes a yarn under technique on the first pass of each stitch, as seen below.
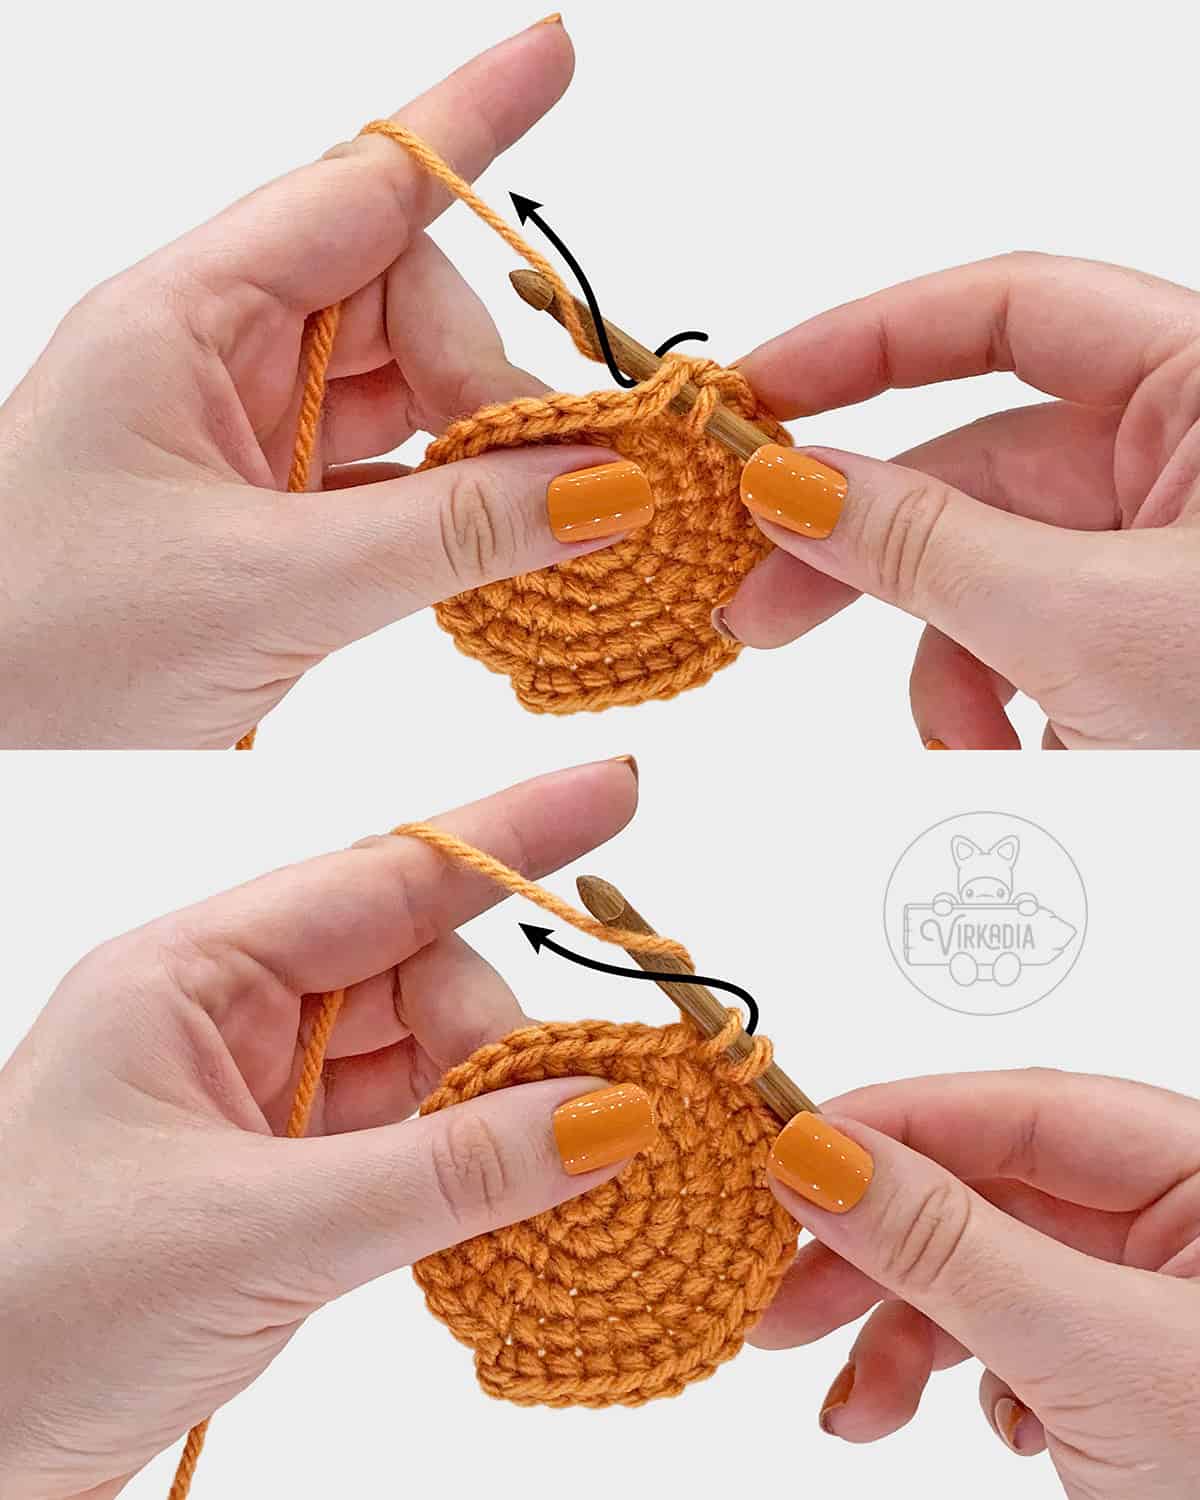
Begin by inserting your hook into the next stitch, then yarn under (not over) as shown above. Pull through the stitch, then yarn over as normal and pull through both loops on your hook to complete your single crochet.
Using the above technique produces a slightly tighter and stiffer fabric than traditional single crochet stitches. This method minimizes holes between stitches, improves shaping, and decreases stitch slanting.
This single crochet method is optional, so choose what works best for you—just be wary that your project may result in having slight cosmetic differences if using the traditional stitch method, such as visible stitch slanting.
Therefore, to prevent the edges of your lamb's face from slanting, the yarn under/ yarn over method is highly recommended for this project.
Changing Colors (Mid-Round):
This free crochet lamb pattern uses a mid-round color changing technique, as seen below, to create its bold face.
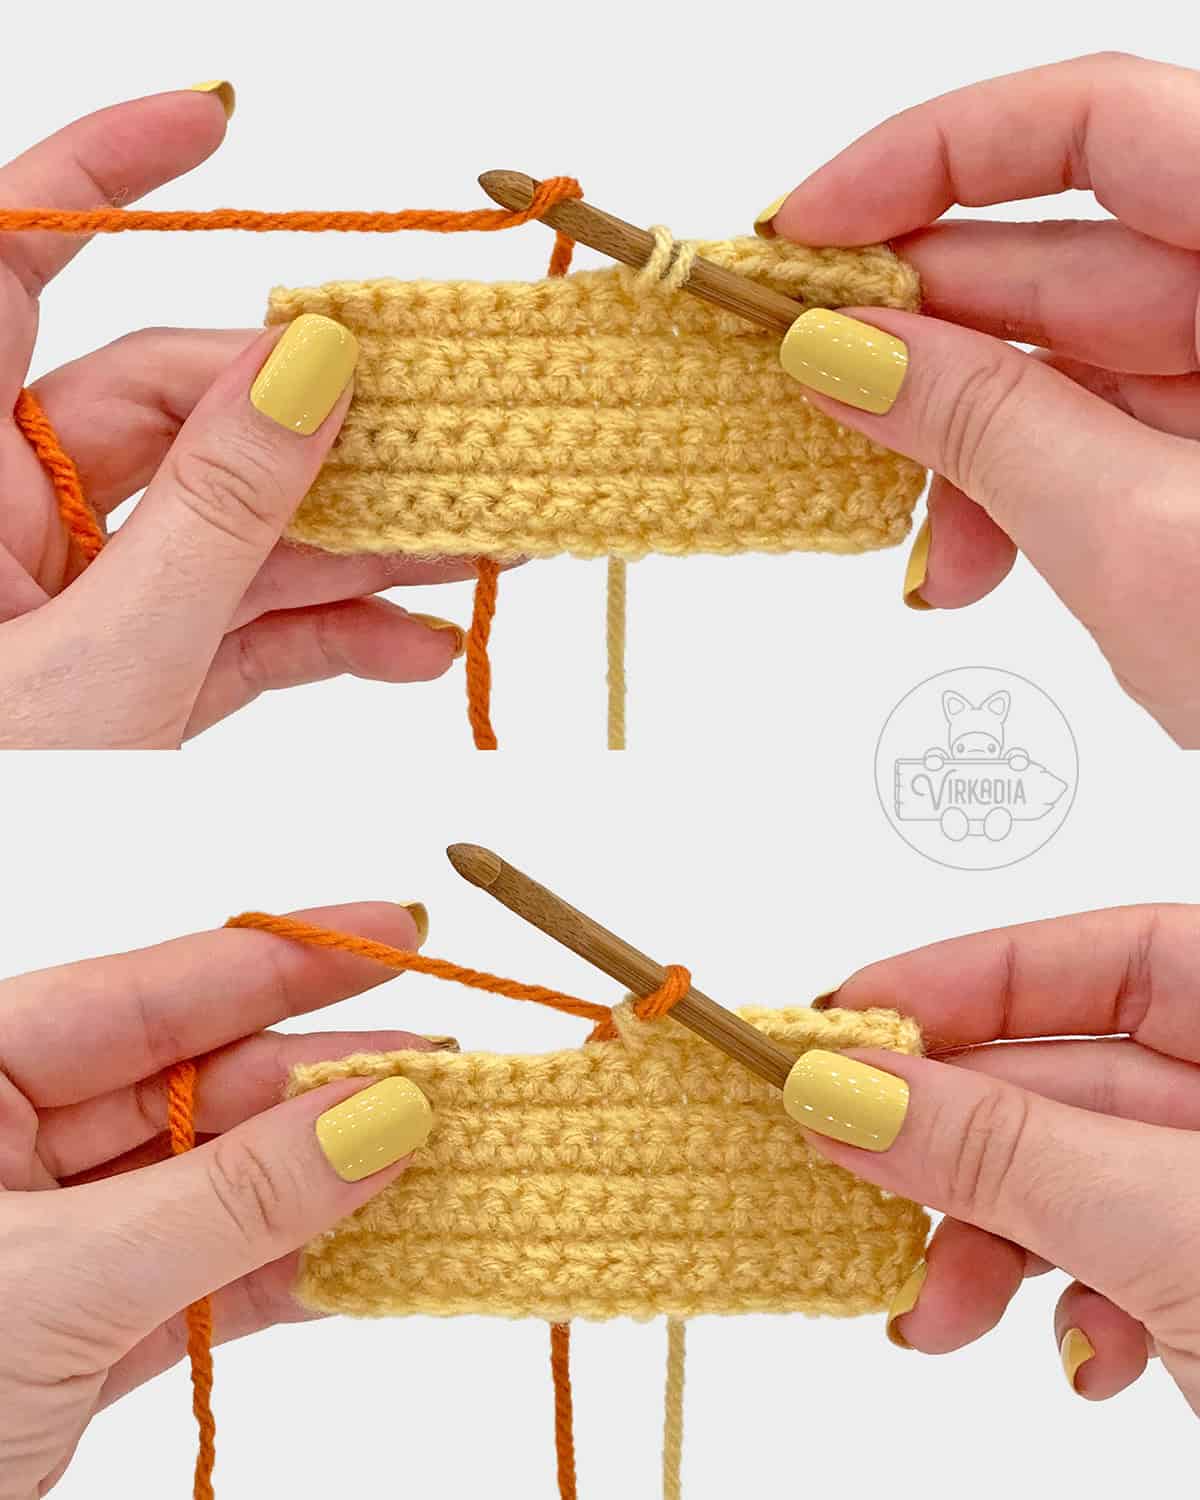
This color changing method begins in the stitch immediately before the stitch that you want to be a different color. Begin this stitch as normal by inserting into the next stitch, yarning under, and pulling through.
Before the last pull through, drop your current color and instead grab the color you want to change to. Yarn over this new color and pull through both loops.
After dropping a color, you do not need to cut it off. Instead, you may allow your yarn to ‘float’ in the back, or interior, of your work until you are ready to pick it up again, or work over them as you go. Just be careful not to let these strands be pulled too tight when you pick them back up!
Alternatively, you may also create a moderate amount of slack in your yarn between dropping it and picking it back up. Later, you may then cut these strands and tie them together in pairs to secure your color changes.
Choose whichever method works best for you!
Small Popcorn Stitch:
This free crochet lamb pattern uses a variation of the popcorn stitch that utilizes only 3 double crochet stitches, instead of the more common 5 double crochet, as seen below.
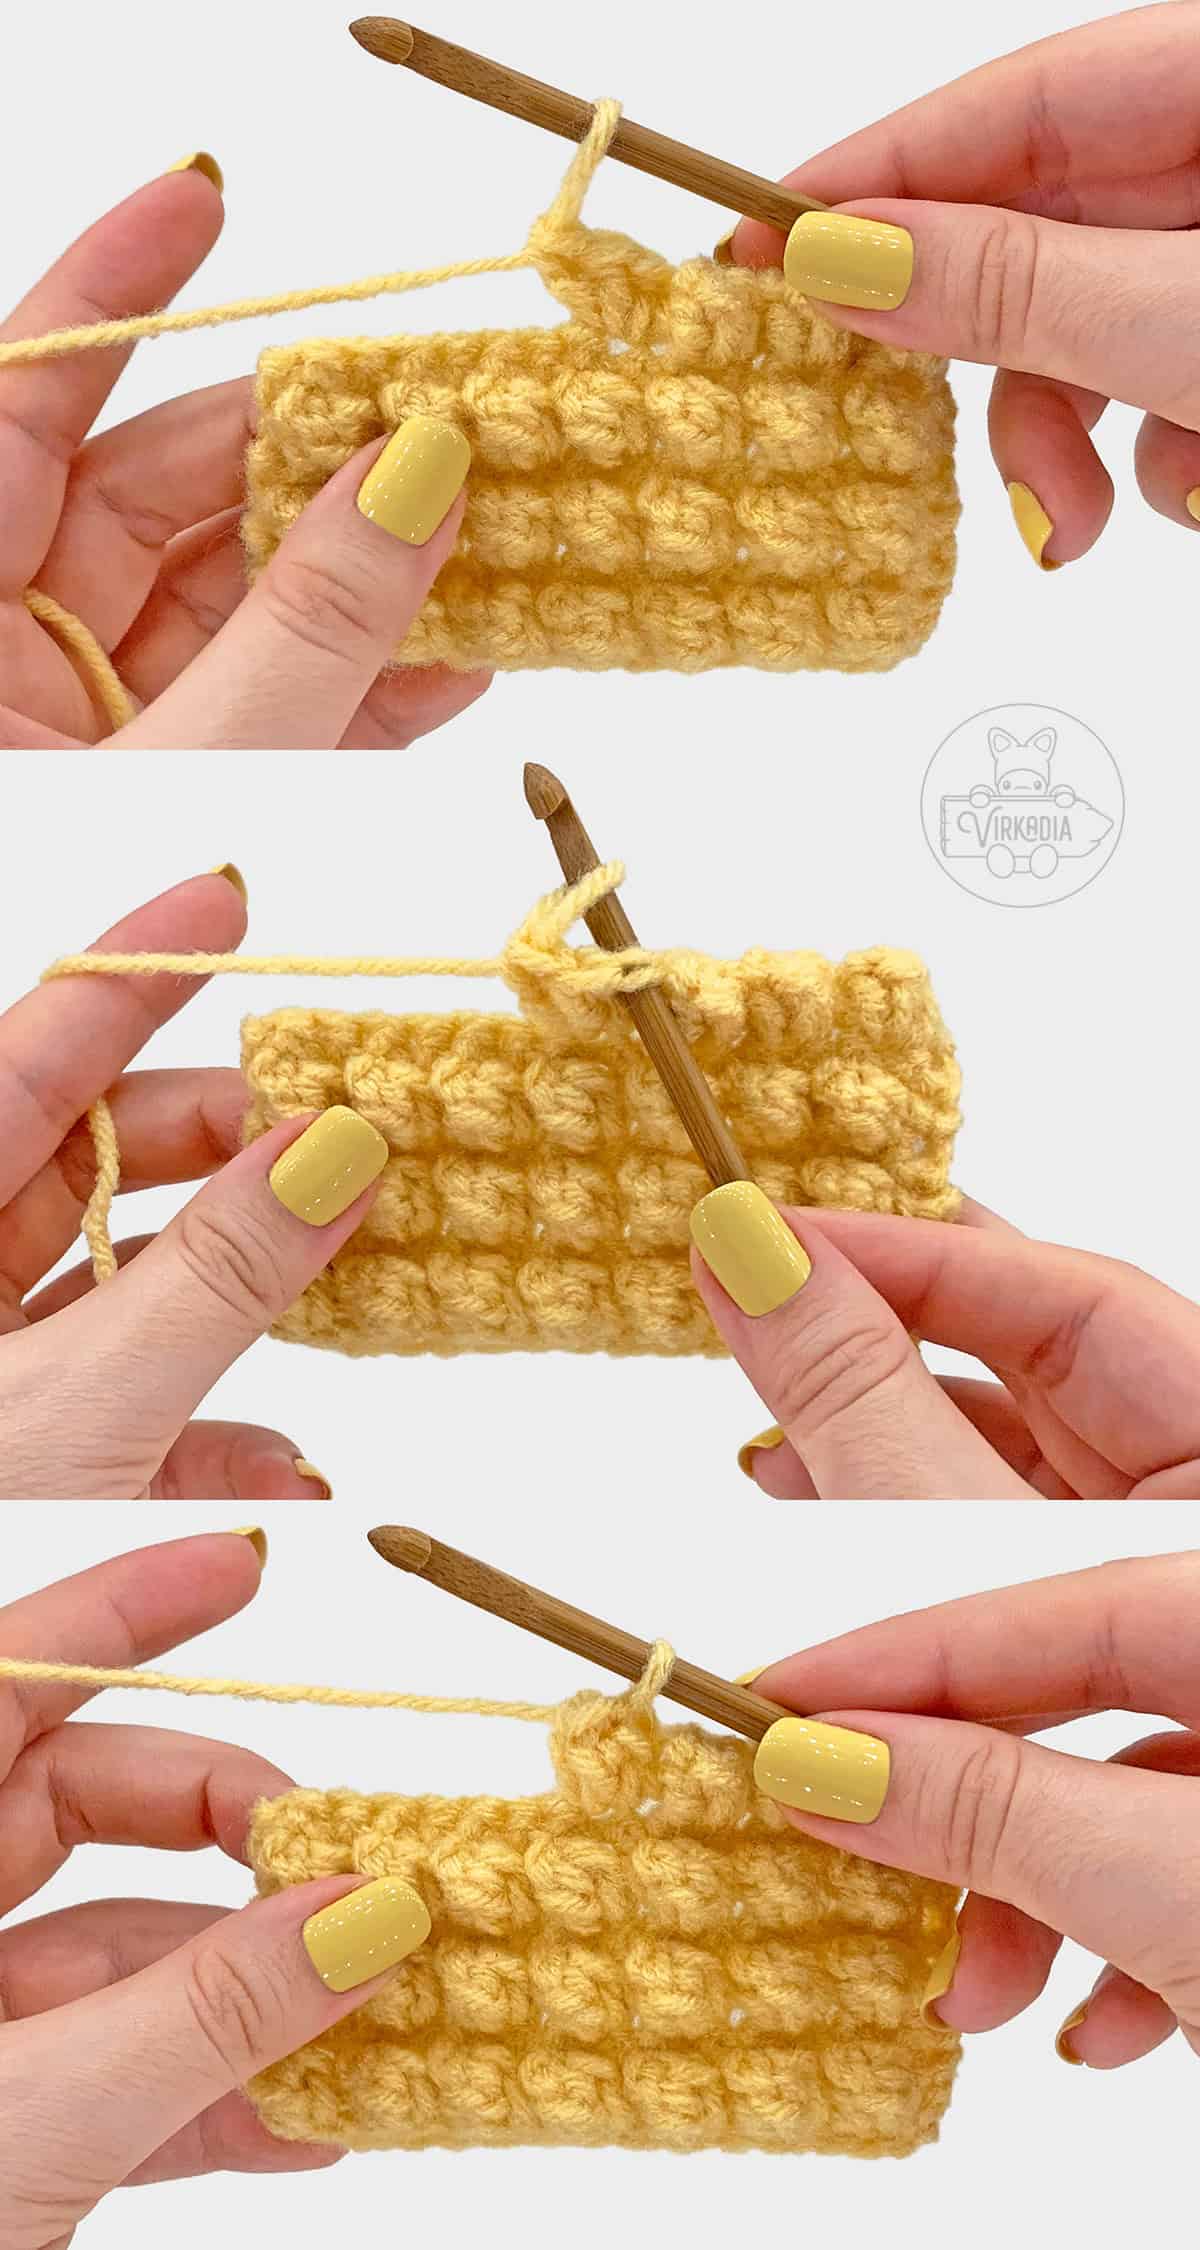
Begin by working 3 double crochet into the next stitch. Then, pull up your working loop (large enough that your last stitch will not be accidentally pulled undone) and remove your hook.
Next, insert your hook, from front to back, through the top of the 1st double crochet you’ve made in the 3 double crochet sequence. Now, pull your working loop from the 3rd double crochet through the top of the 1st double crochet.
Lastly, pull your working tail so that your working loop fits back snugly around your hook and continue to your next stitch.
Pattern Instructions | Free Crochet Lamb Amigurumi
Tired of ads? Check out our ad-free PDF download, available for purchase on Etsy!
And don’t forget to add your project on Ravelry!
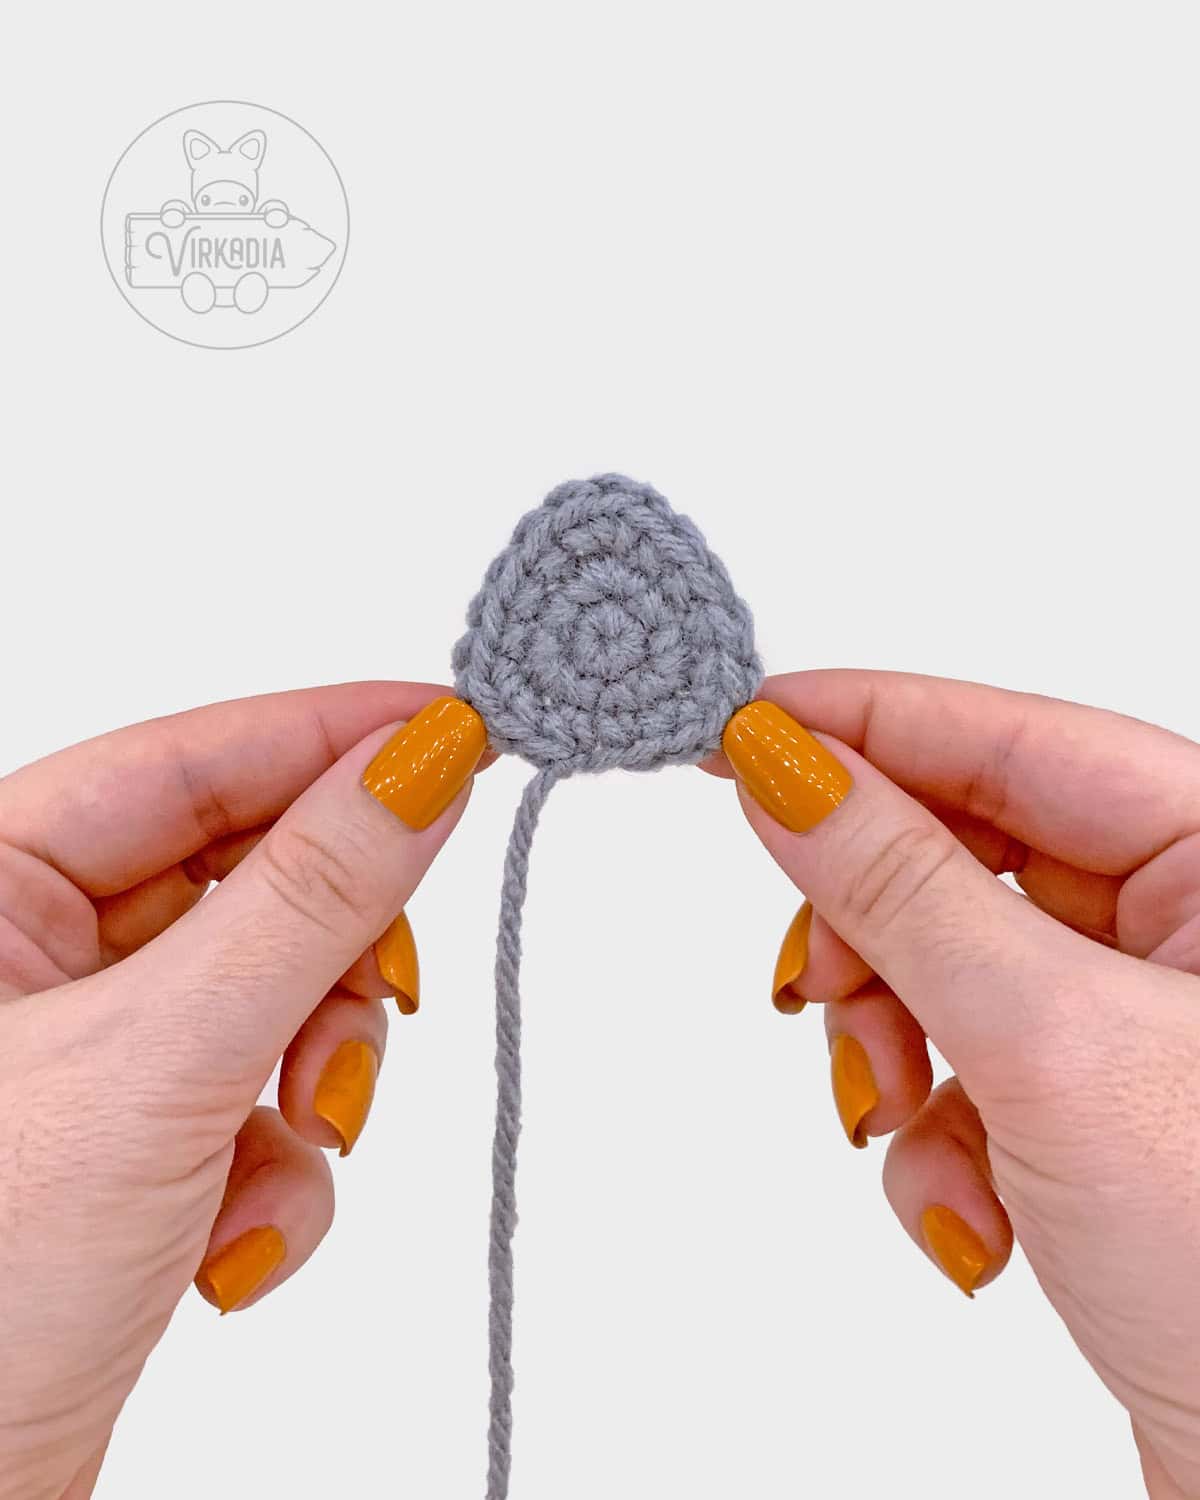
Crochet Lamb Ears – Rounds 1 to 3:
With yarn B (gray), make a magic ring (or ch 4, sl st into 1st st to form ring, ch 1).
Rnd 1: 6sc into ring, sl st into 1st st to join, ch 1 (6).
Rnd 2: [1sc into next st, 3sc into next st] 3 times, join, ch 1 (12).
Rnd 3: [1sc into each of next 2 sts, 3sc into next st, 1sc into next st] 3 times, join (18).
Fasten off yarn B and leave a tail for sewing. Set aside for now.
Repeat rounds 1 to 3 to create a second ear, then continue to round 1 of the head.
Crochet Lamb Head – Rounds 1 to 13:
With yarn A (white), make a magic ring (or ch 4, sl st into 1st st to form ring, ch 1).
Rnd 1: 6sc into ring, sl st into 1st st to join, ch 1 (6).
Rnd 2: [2sc into next st, (1sc, 1pc) into next st] 3 times, join, ch 1 (12).
Rnd 3: [1sc into next st, 2sc into next st] 3 times, [1sc into next st, 3sc into next st, 1sc into next st] 2 times, join, ch 1 (19).
Rnd 4: [2sc into next st, 1pc into next st, 1sc into next st] 3 times, [1sc into next st, 1pc into next st, 3sc into next st, 1pc into next st, 1sc into next st] 2 times, join, ch 1 (26).
Rnd 5: [1sc into each of next 3 sts, 2sc into next st] 3 times, [1sc into each of next 3 sts, 3sc into next st, 1sc into each of next 3 sts] 2 times, join, ch 1 (33).
Rnd 6: [1pc into next st, 1sc into each of next 2 sts] 11 times, join, ch 1 (33).
Rnd 7: 1sc into each of next 20 sts and change to yarn B, 1sc into each of next 8 sts and change to yarn A, 1sc into each of next 5 sts, join, ch 1 (33).

Rnd 8: [1sc into each of next 2 sts, 1pc into next st] 6 times, 1sc into each of next 2 sts and change to yarn B, 1sc into each of next 8 sts and change to yarn A, 1sc into next st, 1pc into next st, 1sc into each of next 2 sts, 1pc into next st, join, ch 1 (33).
Rnd 9: 1sc into each of next 20 sts and change to yarn B, 1sc into each of next 8 sts and change to yarn A, 1sc into each of next 5 sts, join, ch 1 (33).
Rnd 10: [1pc into next st, 1sc into each of next 2 sts] 6 times, 1pc into next st, 1sc into next st and change to yarn B, 1sc into each of next 8 sts and change to yarn A, 1sc into each of next 2 sts, 1pc into next st, 1sc into each of next 2 sts, join, ch 1 (33).
Rnd 11: 1sc into each of next 20 sts and change to yarn B, 1sc into each of next 8 sts and change to yarn A, 1sc into each of next 5 sts, join, ch 1 (33).
Rnd 12: [1sc into each of next 2 sts, 1pc into next st] 6 times, 1sc into each of next 2 sts and change to yarn B, 1sc into each of next 8 sts and change to yarn A, 1sc into next st, 1pc into next st, 1sc into each of next 2 sts, 1pc into next st, join, ch 1 (33).
Rnd 13: sc2tog over next 2 sts, 1sc into each of next 18 sts and change to yarn B, 1sc into each of next 8 sts and change to yarn A, 1sc into each of next 4 sts, 2sc into next st, join, ch 1 (33).
Secure your working loop with a stitch marker and follow the instructions below for adding the ears, eyes, and nose before continuing to round 14.
You may also fasten off yarn B and resolve any loose ends from your color changes on the inside of your piece. You will be finishing the rest of the head with yarn A only.
Attaching Ears:
Retrieve both ears that you’ve set aside earlier. Flip your work so that your beginning rounds face upwards and your last round is on the bottom.
Fold each triangular ear so that the corner stitches on either side of the end tail are aligned together. The corner stitches are the 2nd single crochet in each group of 3 single crochets worked into the same stitch.
Your end tail should now be on one end of this folded edge. Using this tail left over from fastening off, you will now be attaching each ear onto the top of the head.
The openings of the folded ears should face forward with the face. The front of the head should be on the flattest side (between your 3sc increases in rounds 3 to 5), a quarter turn before your joining seam.
Optionally, you may first sew along the folded bottom edge of each ear before attaching to the head, or you may sew the layers together at the same time as attaching to the head. Choose whichever method works best for you!
Align your first ear on one side of the head so that the folded edge lays between rounds 7 and 8.
The folded edge should lay straight along the seam between the rounds, and about 4 stitches away from the seam of the color change or edge of the face, towards the back of the head.
Sew along the entire length of the folded edge of the ear, and secure with a knot on the interior of your piece. Trim any excess length.
Repeat on the other side of the head, with the second ear mirrored with the first.
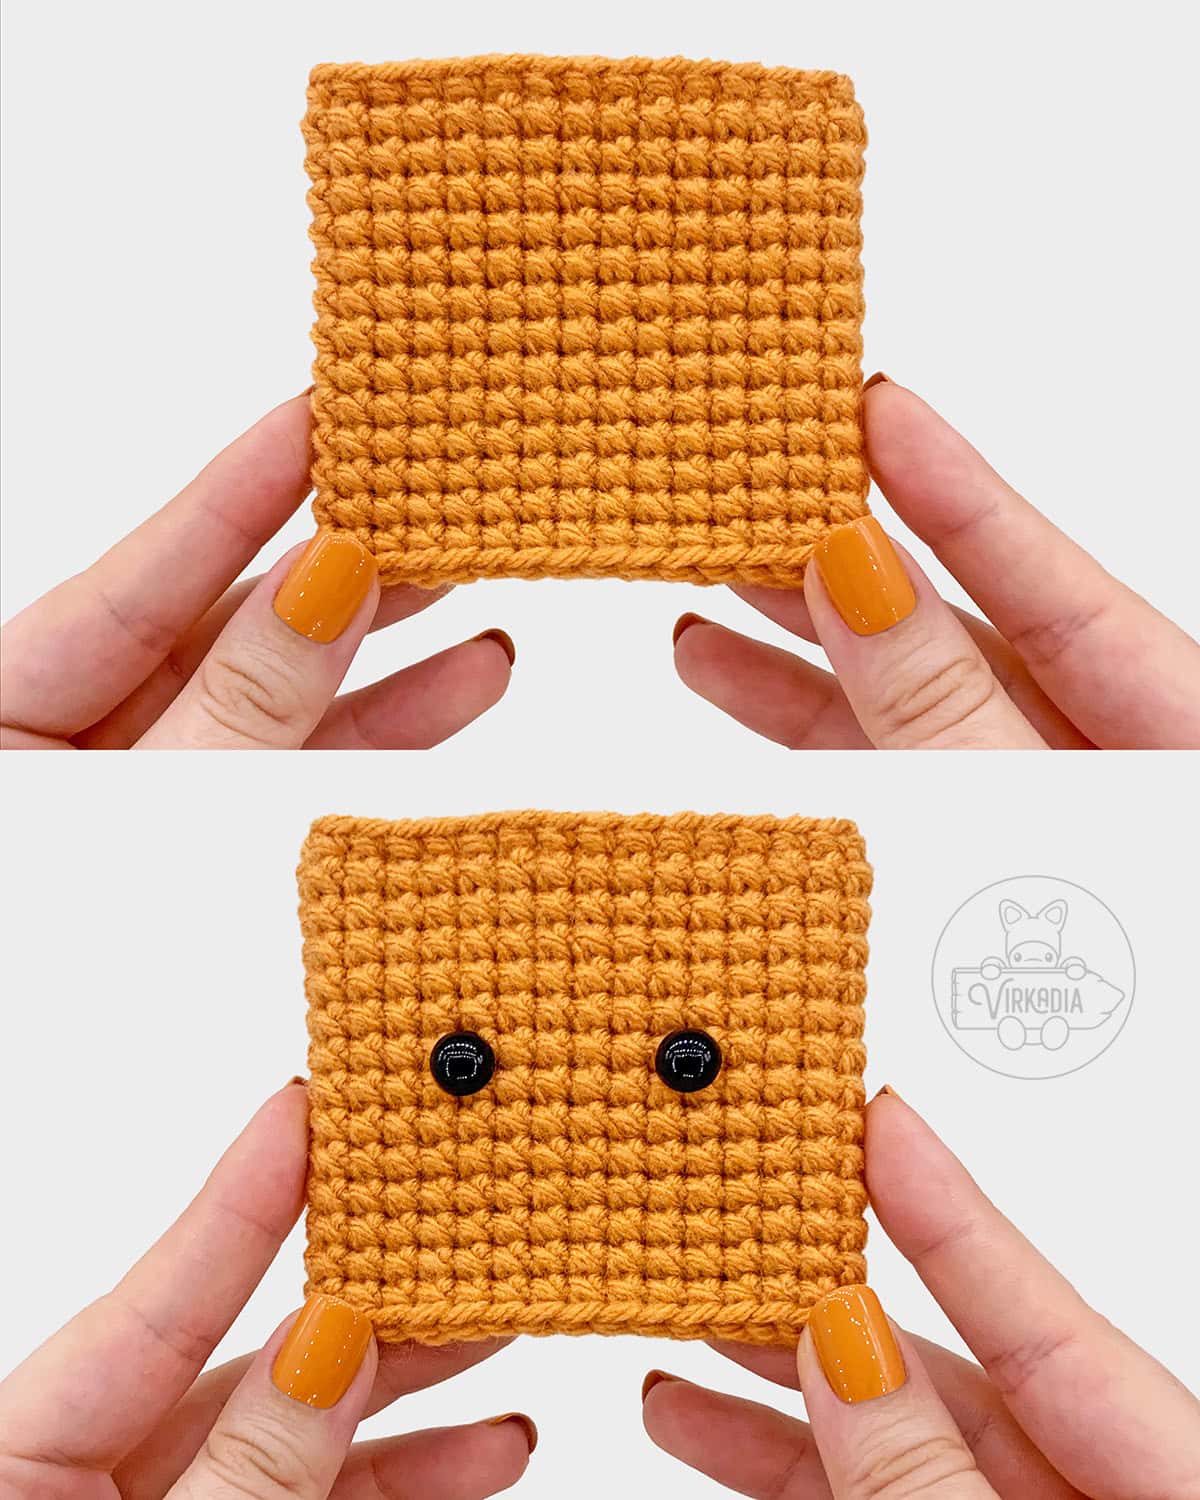
Adding Eyes:
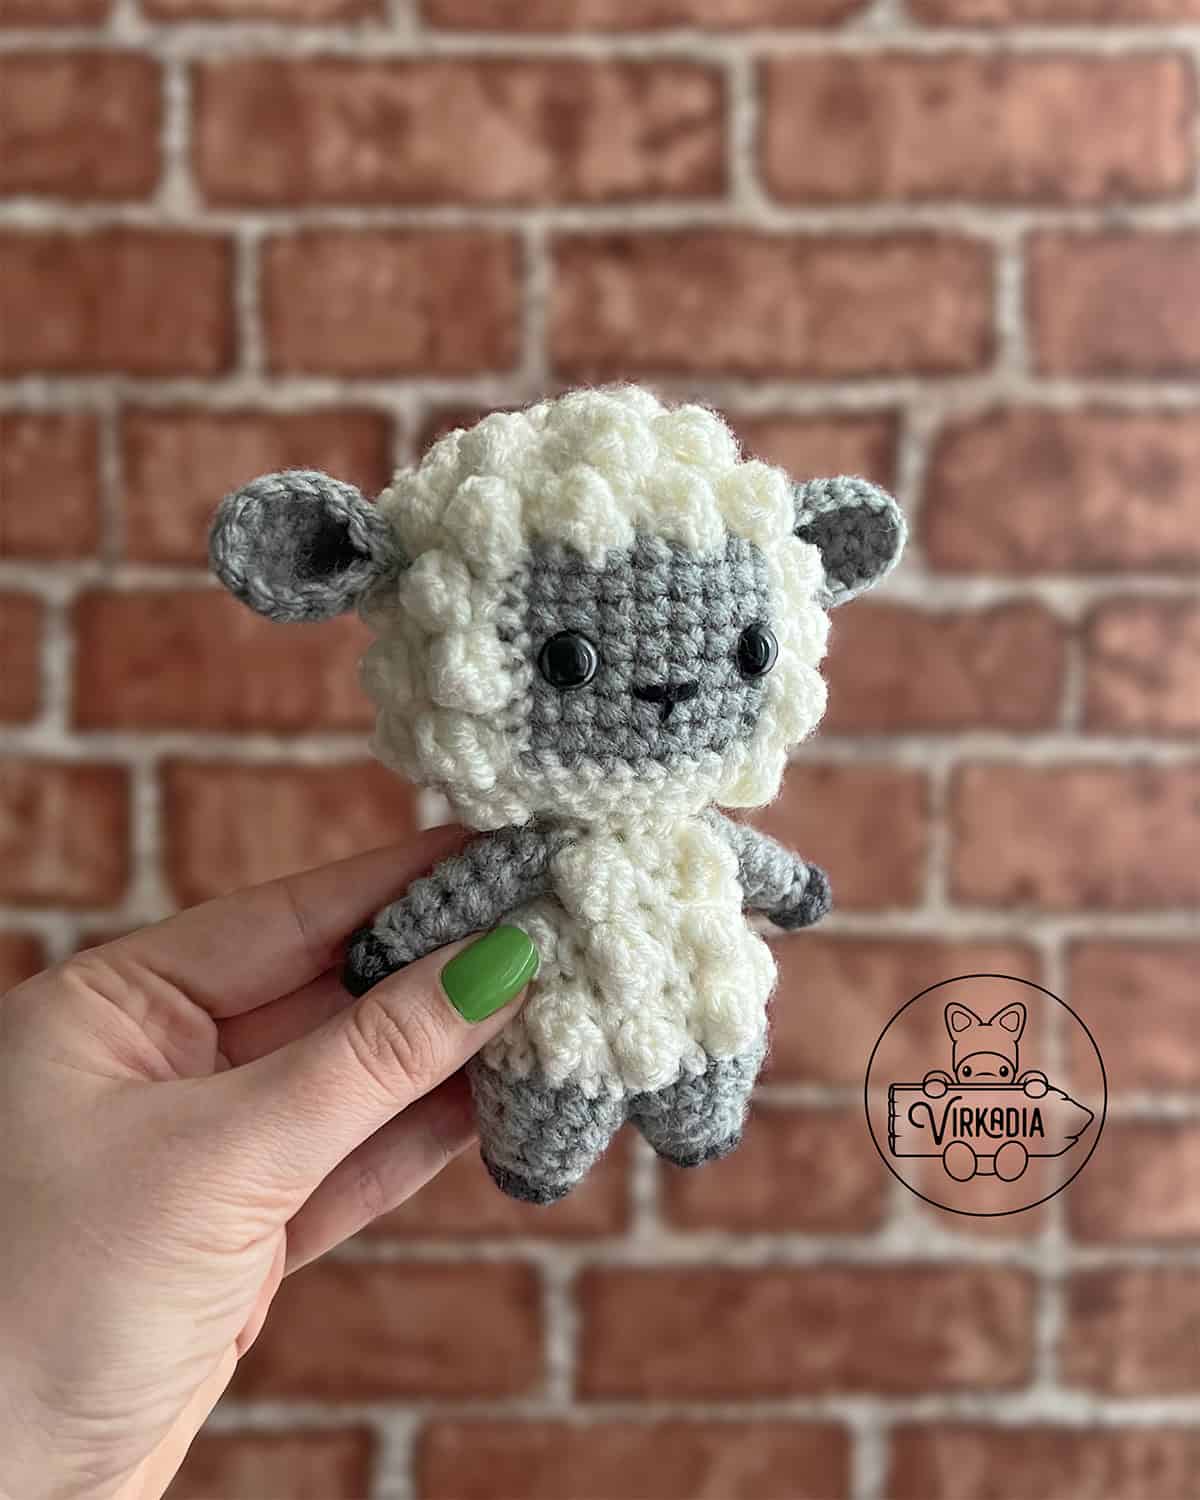
Using the example piece below as reference, insert both safety eyes through the center of the front of your head.
The front of the head should be on the flattest side (between your 3sc increases in rounds 3 to 5), a quarter turn before your joining seam.
The safety eyes should be inserted between rounds 10 and 11 and should sit 6 stitches apart.
Adding Nose:
The nose should be embroidered between rounds 11 and 12 and be centered between the eyes. The nose will be 2 stitches wide.
The additional line beneath the nose should extend down to end between rounds 12 and 13, and will be 1 round tall.
Begin by inserting your needle from inside to outside, 1 round down and 2 stitches right from where you’ve inserted the left eye, and pull through, leaving some tail inside for tying later.
Then, insert your needle back in, 2 more stitch to the right, and back out through the same space as you’ve last exited from. Repeat this step 3 more times, or until you are satisfied with the bulk of the nose.
On the next pass, insert your needle 2 stitches to the right again, as before, but this time exit 1 round and 1 stitch to the left, below the center of the nose.
Then, insert your needle into the space behind the center of the nose. Be careful not to split the threads of the nose and instead pass the needle over top, then behind, the threads only.
Pull through and remove your needle. Then, gently tie both ends together on the inside of your piece, taking extra care not to pull the threads too tight!
Crochet Lamb Head – Rounds 14 to 16:
Remove your stitch marker and continue to the next round. Begin stuffing as you go.
Rnd 14: [1pc into next st, 1sc into each of next 2 sts, sc2tog over next 2 sts] 3 times, 1pc into next st, 1sc into each of next 2 sts, sc3tog over next 3 sts, 1sc into each of next 6 sts, sc3tog over next 3 sts, 1pc into next st, 1sc into each of next 2 sts, join, ch 1 (26).
Rnd 15: [sc2tog over next 2 sts, 1sc into each of next 2 sts] 3 times, [1sc into each of next 2 sts, sc3tog over next 3 sts, 1sc into each of next 2 sts] 2 times, join, ch 1 (19).
Rnd 16: [1sc into next st, sc2tog over next 2 sts] 3 times, [1sc into next st, sc3tog over next 3 sts, 1sc into next st] 2 times, join (12).
Fasten off yarn A and leave a short tail for tying.
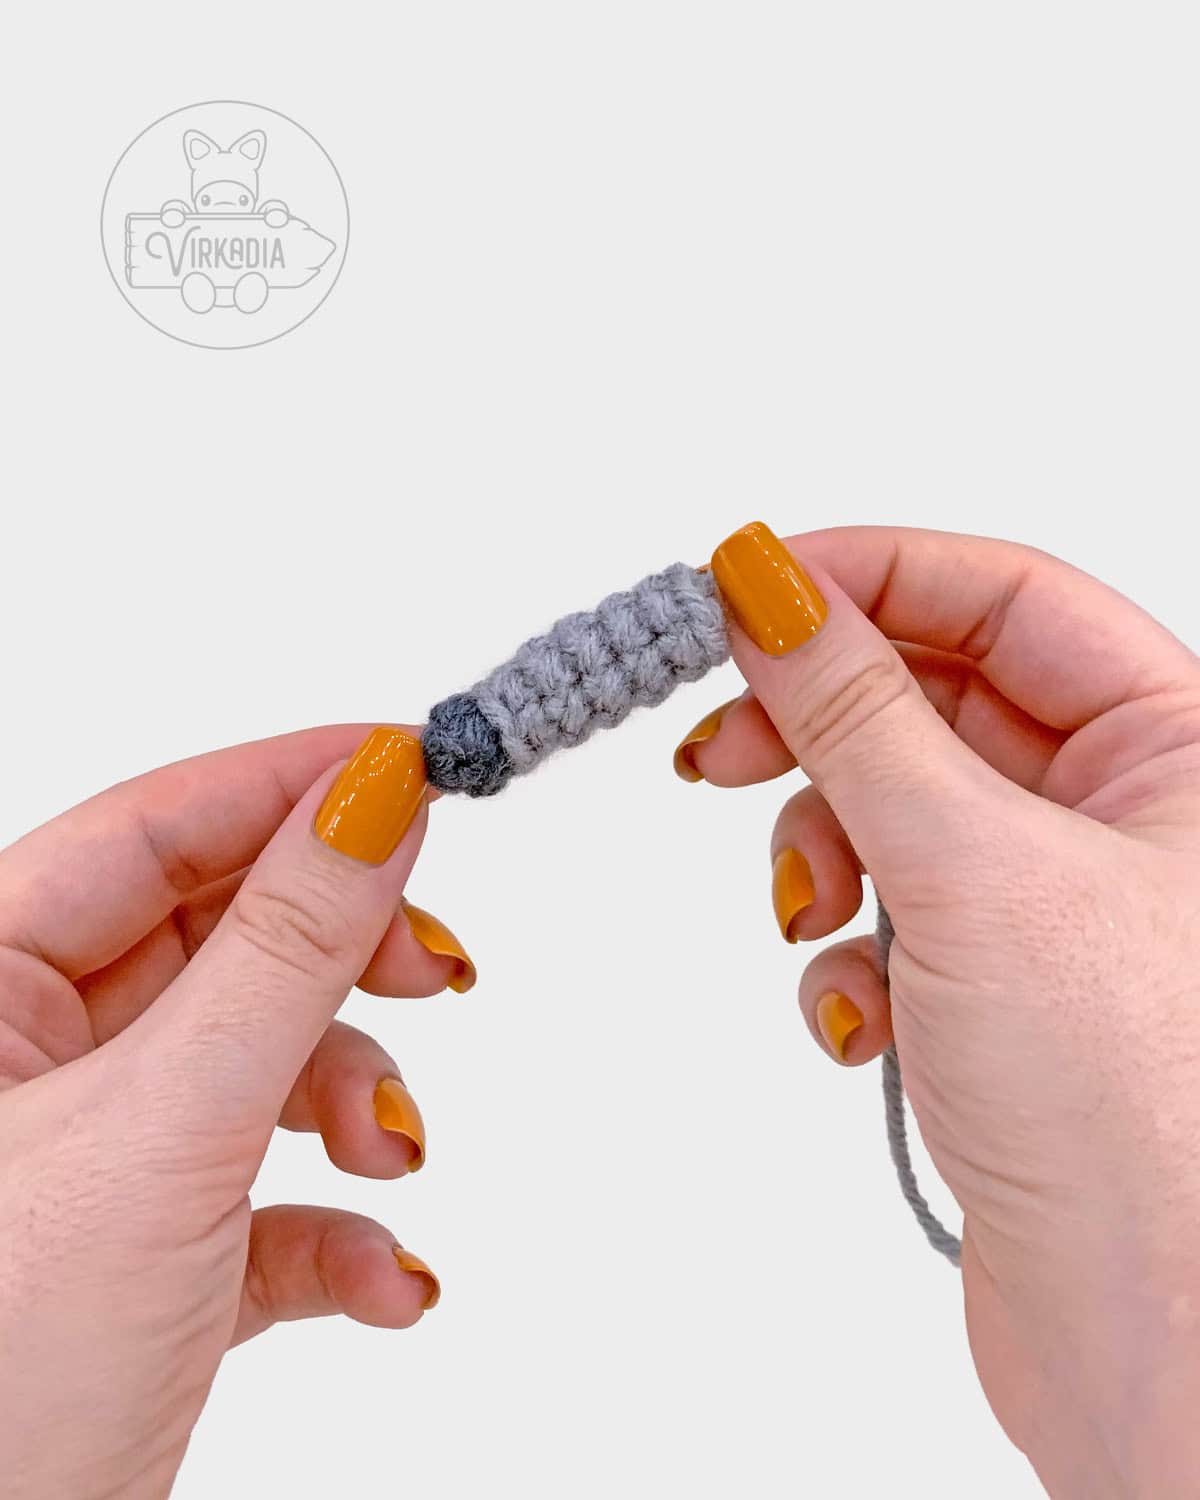
Crochet Lamb Arms – Rounds 1 to 8:
With yarn C (dark gray), make a magic ring (or ch 4, sl st into 1st st to form ring, ch 1).
Rnd 1: 6sc into ring, sl st into 1st st to join, ch 1 (6).
Rnd 2: 1sc into each st around, join (6).
Fasten off yarn C and leave a short tail for tying.
Join yarn B (gray) by inserting your hook into the last stitch of round 2 and pulling up a loop of yarn B.
Tie the tails of both yarn B and yarn C together on the interior of your piece to secure your ends.
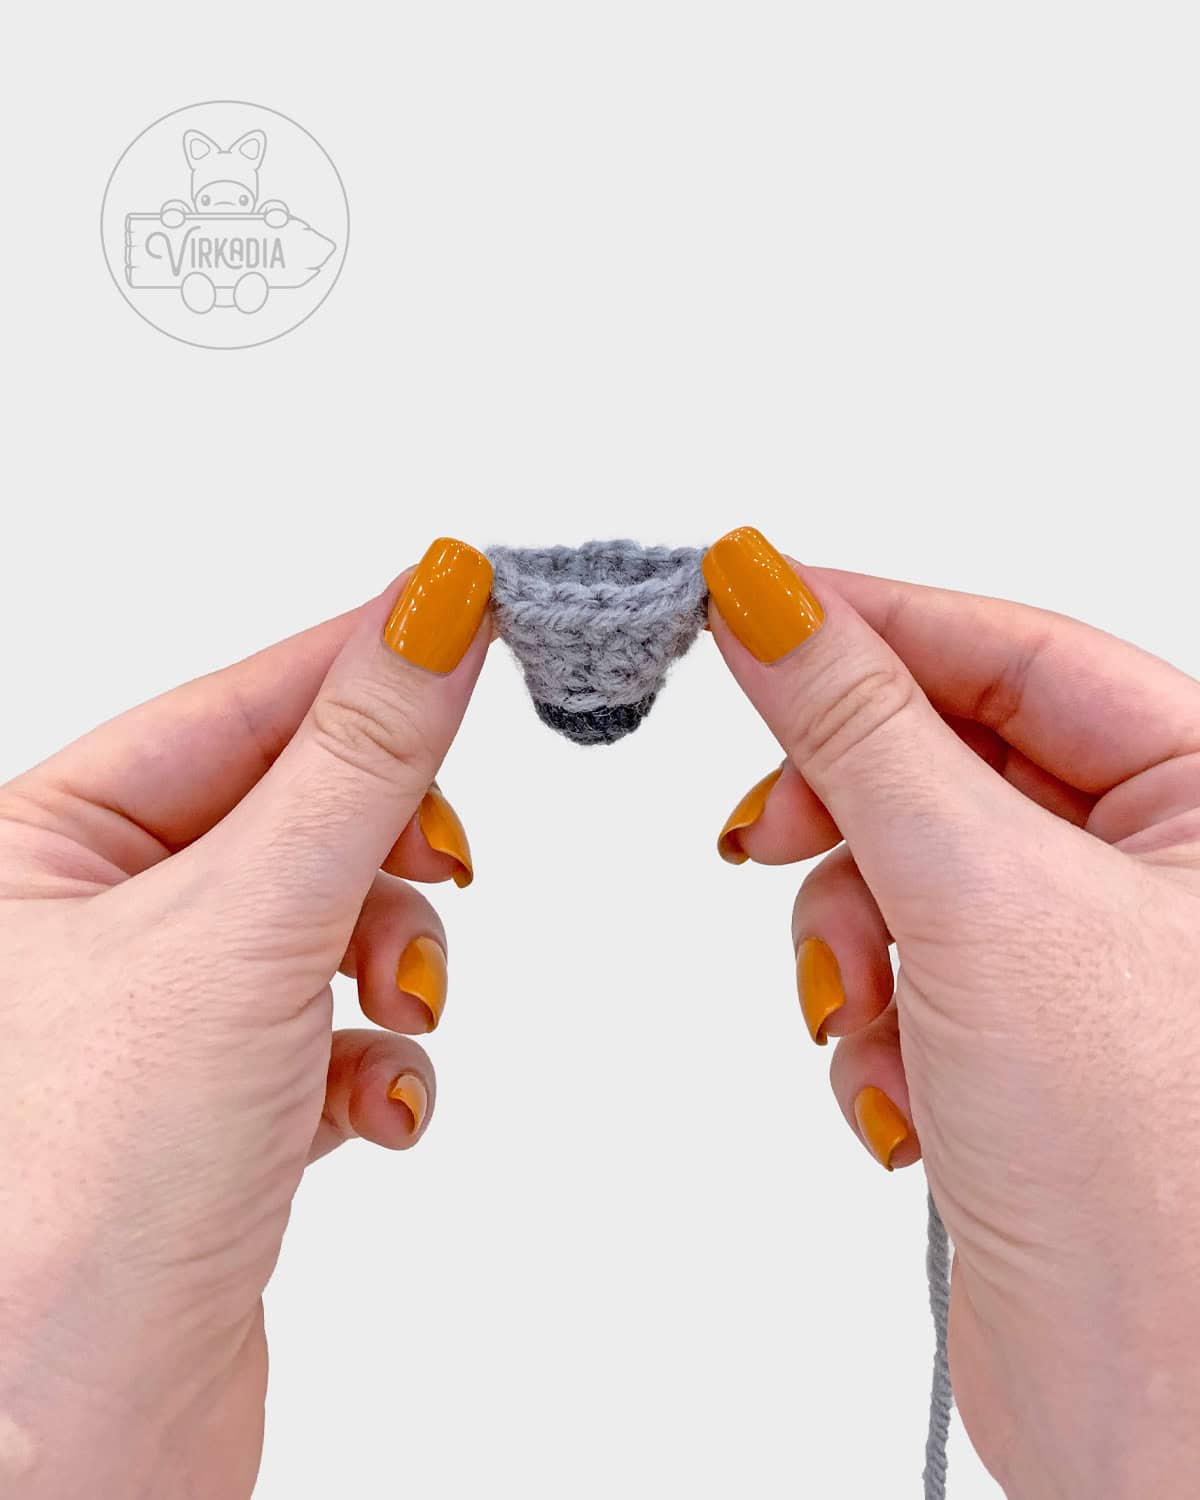
Rnd 3: sl st into each st around, join, ch 1 (6).
Rnd 4: 1sc into BLO of each st around, join, ch 1 (6).
Rnd 5: 1sc into each st around, join, ch 1 (6).
Rnd 6: 1sc into each st around, join, ch 1 (6).
Rnd 7: 1sc into each st around, join, ch 1 (6).
Rnd 8: 1sc into each st around, join (6).
Fasten off and set aside for now.
Repeat rounds 1 to 8 to create a second arm, then continue to the legs below.
Crochet Lamb Legs – Rounds 1 to 6:
With yarn C (dark gray), make a magic ring (or ch 4, sl st into 1st st to form ring, ch 1).
Rnd 1: 6sc into ring, sl st into 1st st to join, ch 1 (6).
Rnd 2: [1sc into each of next 2 sts, 2sc into next st] 2 times, join, ch 1 (8).
Fasten off yarn C and leave a short tail for tying.
Join yarn B (gray) by inserting your hook into the last stitch of round 2 and pulling up a loop of yarn B.
Tie the tails of both yarn B and yarn C together on the interior of your piece to secure your ends.
Rnd 3: sl st into each st around, join, ch 1 (8).
Rnd 4: in BLO of each st around, [2sc into next st, 1sc into each of next 3 sts] 2 times, join, ch 1 (10).
Rnd 5: [1sc into each of next 4 sts, 2sc into next st] 2 times, join, ch 1 (12).
Rnd 6: [2sc into next st, 1sc into each of next 3 sts] 3 times, join (15).
This will be leg #1. Fasten off and leave a tail (~8 to 12 inches) for sewing. Set aside for now.
With yarn C (dark gray), make a magic ring (or ch 4, sl st into 1st st to form ring, ch 1).
Rnd 1: 6sc into ring, sl st into 1st st to join, ch 1 (6).
Rnd 2: [1sc into each of next 2 sts, 2sc into next st] 2 times, join, ch 1 (8).
Fasten off yarn C and leave a short tail for tying.
Join yarn B (gray) by inserting your hook into the last stitch of round 2 and pulling up a loop of yarn B.
Tie the tails of both yarn B and yarn C together on the interior of your piece to secure your ends.
Rnd 3: sl st into each st around, join, ch 1 (8).
Rnd 4: in BLO of each st around, [2sc into next st, 1sc into each of next 3 sts] 2 times, join, ch 1 (10).
Rnd 5: [1sc into each of next 4 sts, 2sc into next st] 2 times, join, ch 1 (12).
Rnd 6: [2sc into next st, 1sc into each of next 3 sts] 3 times, join (15).
Fasten off and leave a short tail for tying. This will be leg #2.
Joining Legs (Round 7):
Join yarn A (white) by inserting your hook into the first stitch of leg #2. Pull up a loop of yarn A and chain 1.
Tie the tails of both yarn A and yarn B together on the interior of your piece to secure your ends.
Retrieve leg #1 that you’ve set aside earlier and leave it on standby. You will be working round 7 around part of both legs to join them.
Rnd 7: 1sc into each of next 12 sts of leg #2, sk last 3 sts of leg #2, 1sc into 1st st of leg #1, 1sc into each of next 11 sts of leg #1, sk last 3 sts of leg #1, sl st into 1st st of rnd to join, ch 1 (24).
Secure your working loop with a stitch marker and follow the instructions below for sewing the legs together before continuing to round 8.
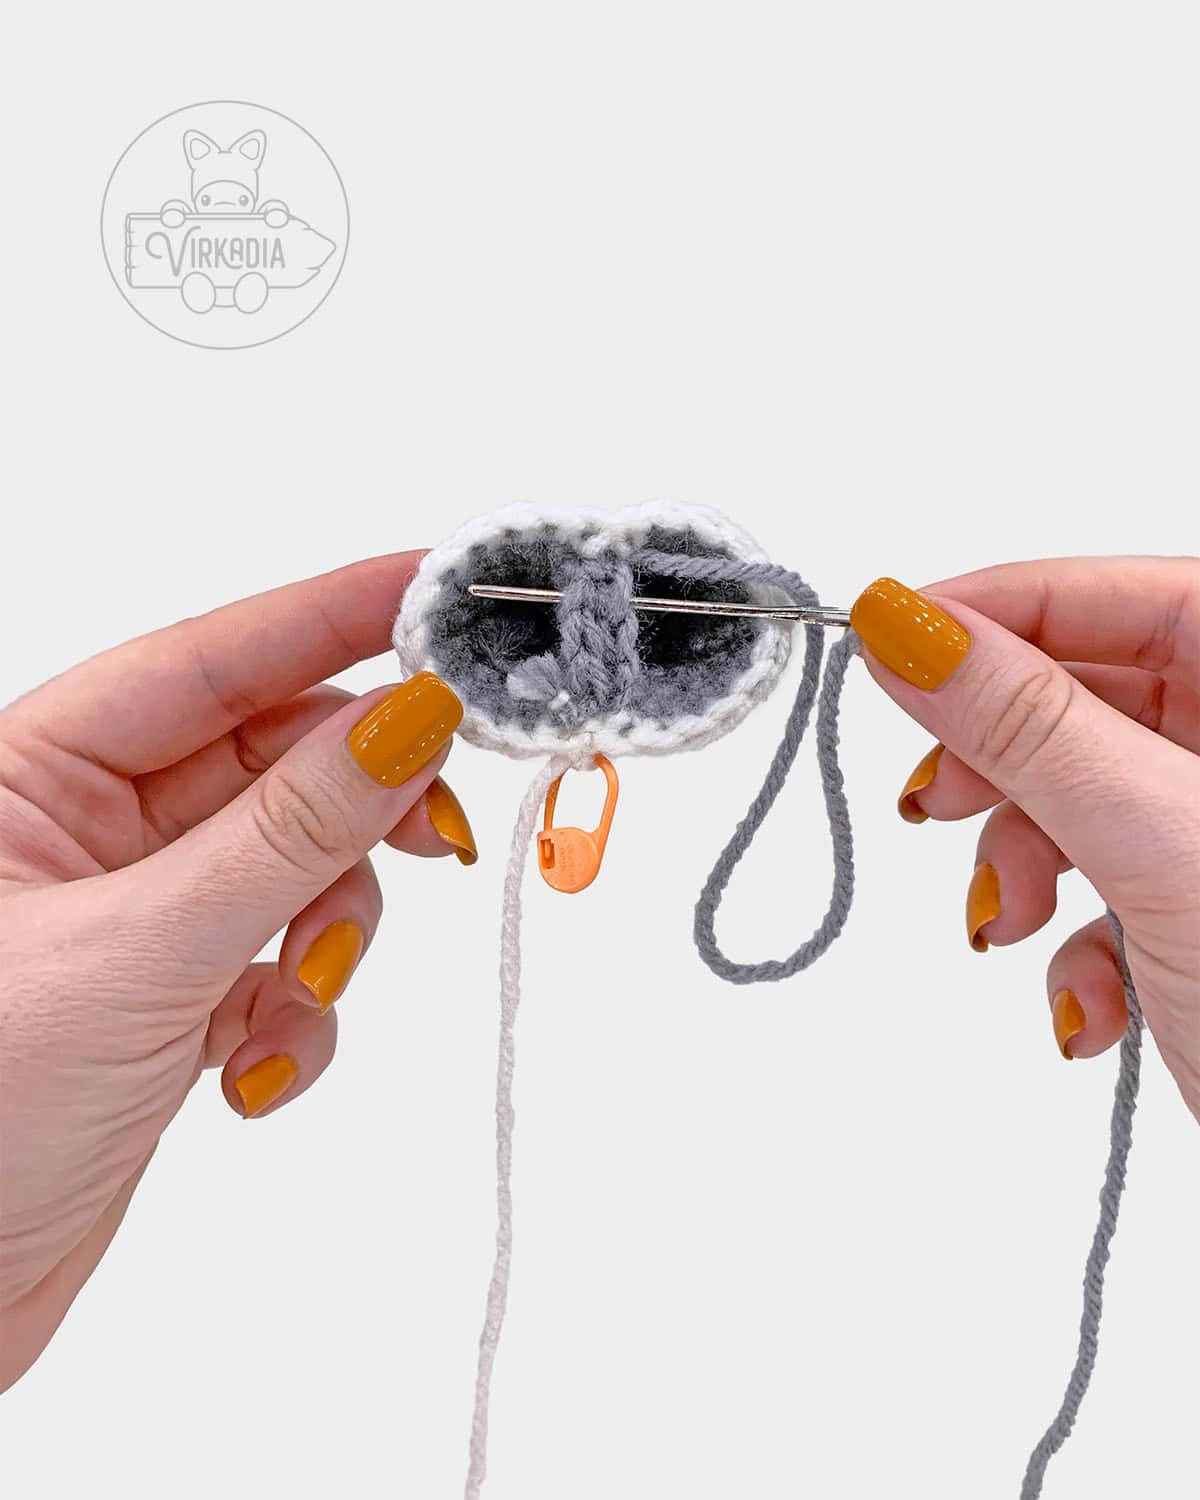
You will now see that both leg pieces are joined together, with the exception of 3 stitches of each on the inside of the piece.
Make sure that the top loops of each of these stitches are facing upwards. Then, using the 8-12 inch tail left over from leg #1, sew this inside slit closed.
For best results, try sewing a total of 5 pairs of stitches together—the 3 pairs of stitches that were not worked into during round 7, as well as each pair of stitches on either side of this length.
In other words, where the 1st and 24th stitches of round 7 were worked into and the 12th and 13th stitches were worked into should be sewn together, as well.
Secure your sewing with a knot to the interior of the piece and trim any excess tail. Remove your stitch marker and continue to round 8.
Crochet Lamb Body – Rounds 8 to 13:
Rnd 8: [1sc into each of next 2 sts, 1pc into next st] 8 times, join, ch 1 (24).
Rnd 9: [sc2tog over next 2 sts, 1sc into each of next 2 sts] 6 times, join, ch 1 (18).
Rnd 10: [1pc into next st, 1sc into each of next 2 sts] 6 times, join, ch 1 (18).
Rnd 11: [1sc into next st, sc2tog over next 2 sts] 6 times, join, ch 1 (12).
Rnd 12: 1sc into each of next 4 sts, 1pc into next st, 1sc into each of next 2 sts, 1pc into next st, 1sc into each of next 4 sts, join, ch 1 (12).
Retrieve both arms set aside earlier and flatten the top round of each arm so that the stitches form two parallel lines of 3 stitches each.
During round 13, you will be working through both layers of the arm and the current round of the body all at once to connect the arms onto the body.

Alternatively, if you have trouble with this method, you may instead work a normal round of single crochet stitches (1sc into each st around, join).
If finished this way, the arms may then be sewn onto the body individually, using a length of yarn A, between rounds 12 and 13 on either side of the body.
Choose whichever method works best for you!
Rnd 13: 1sc into next st, 1sc into each of next 3 sts of both arm and body together, 1sc into each of next 4 sts, 1sc into each of next 3 sts of both arm and body together, 1sc into next st, join (12).
Fasten off yarn A and leave a long (~3 ft) tail for sewing.
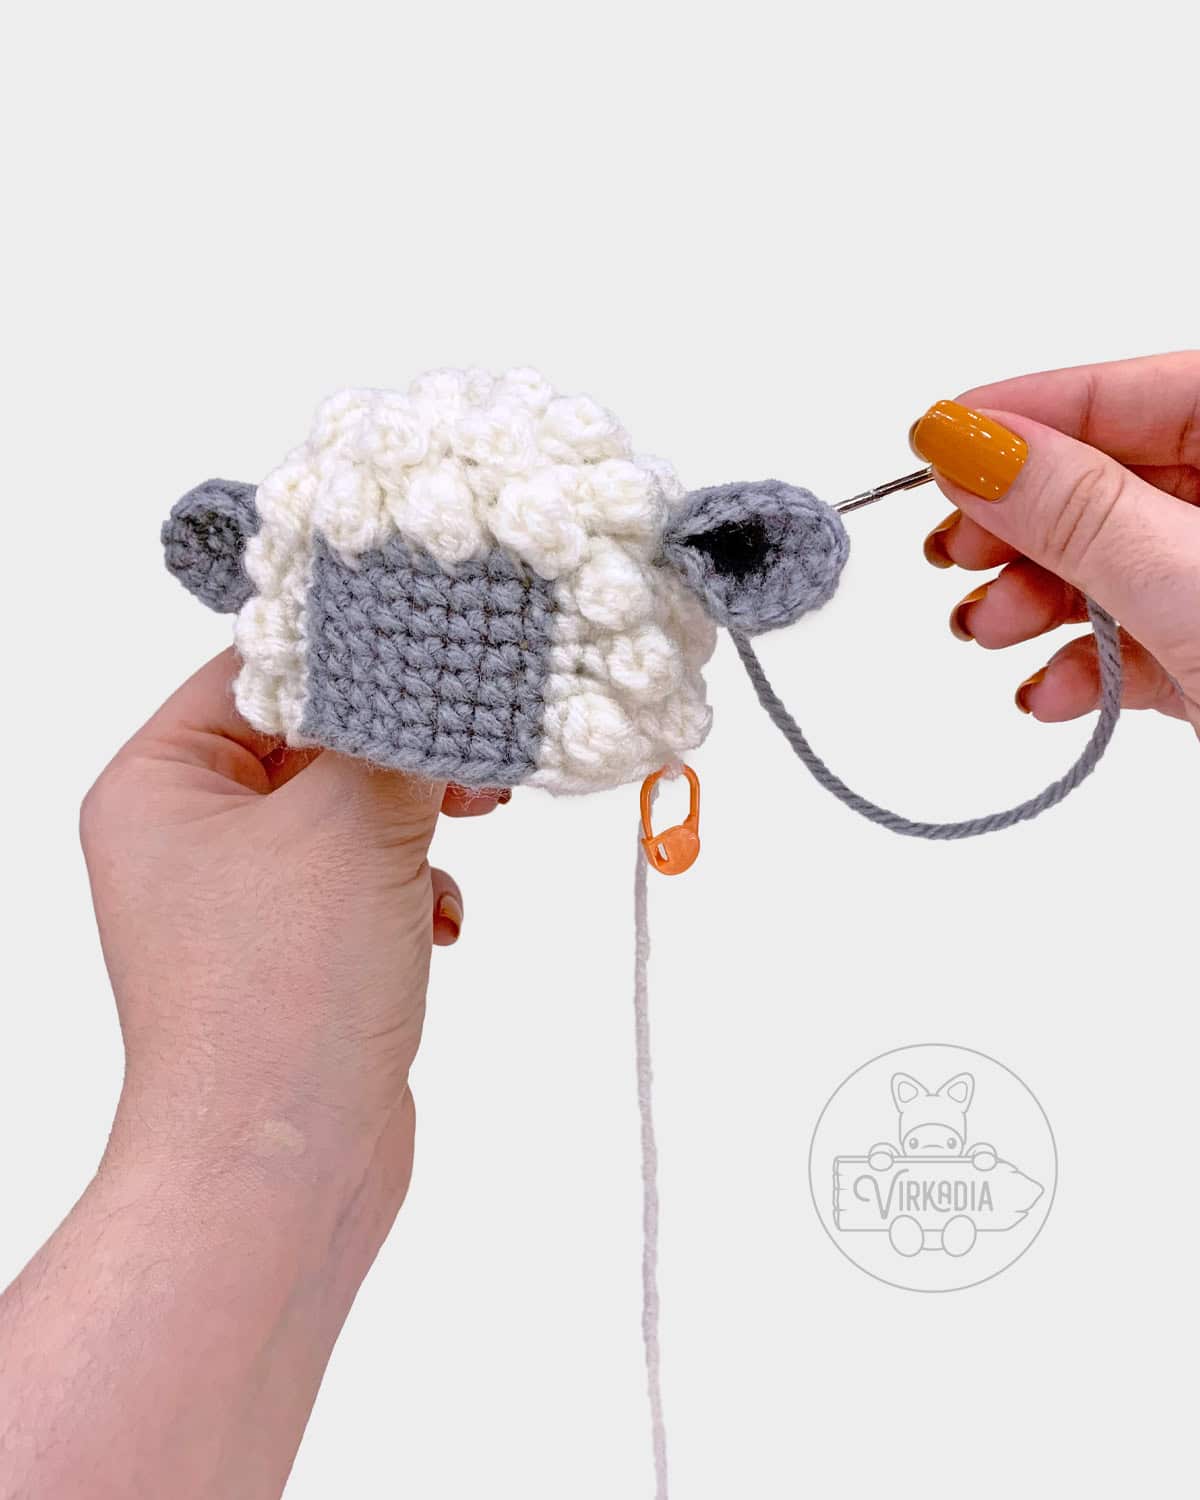
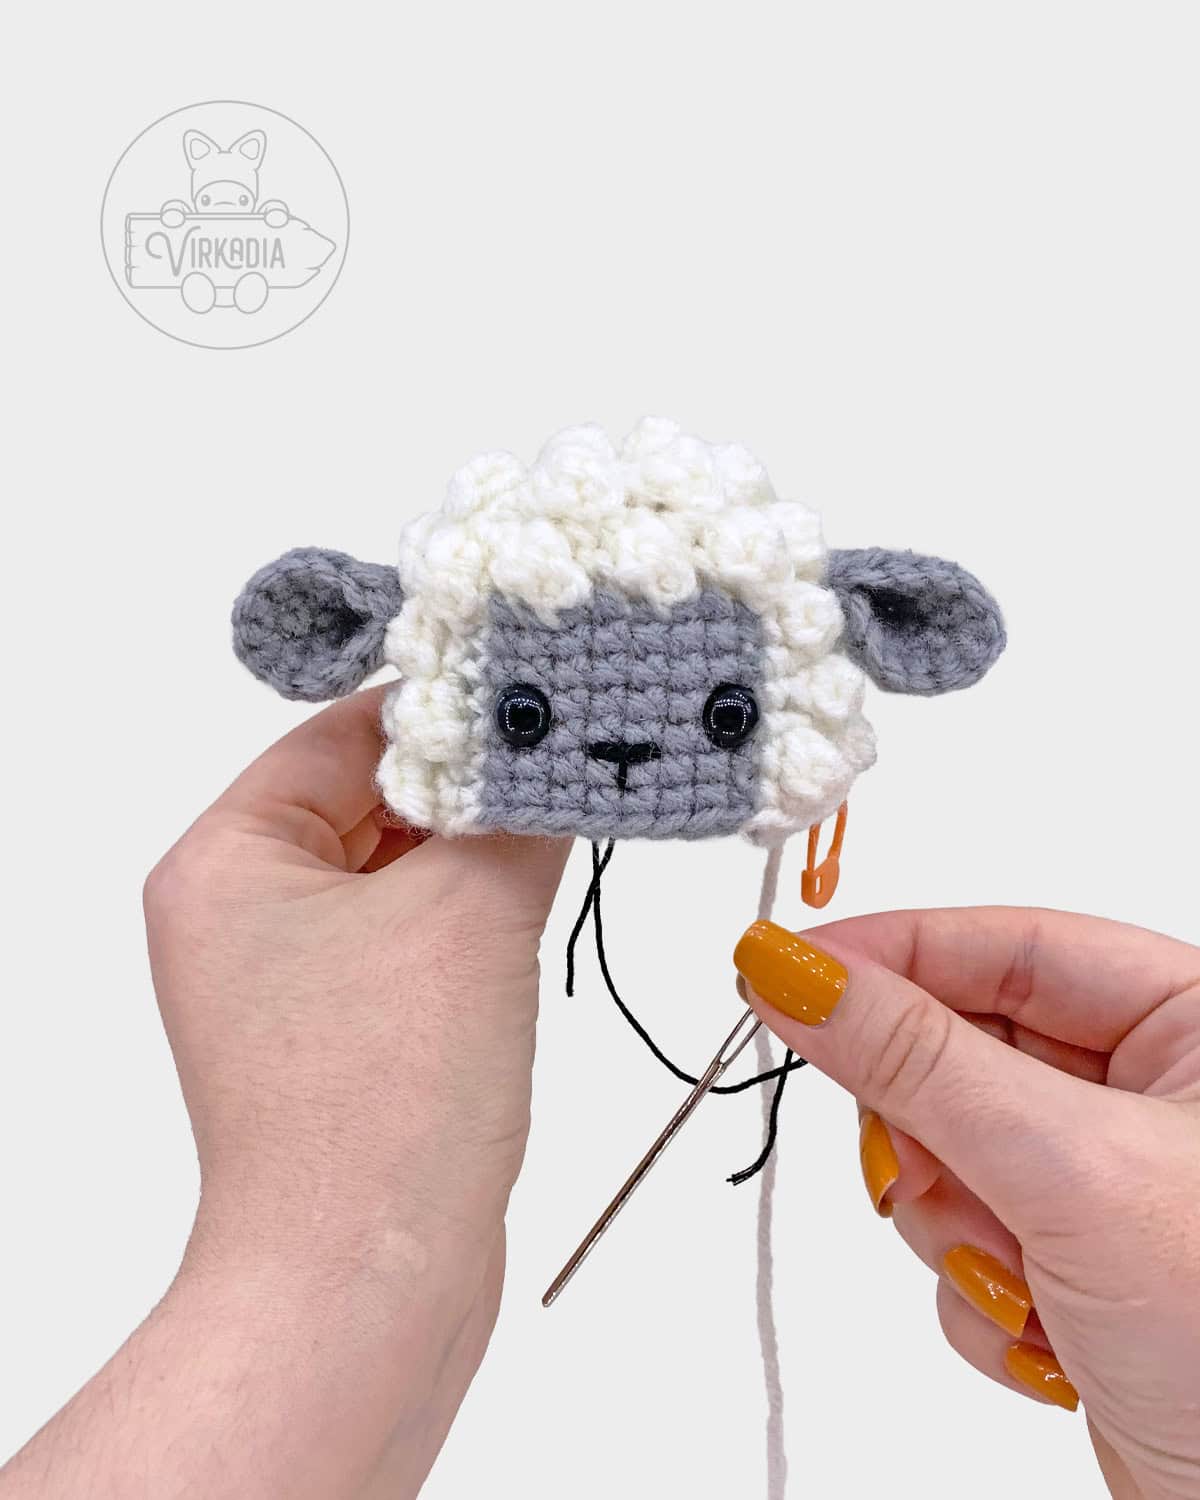
Sewing Together:
Retrieve the head and align it in your desired direction on top of the body.
With the long end tail left over from fastening off of the body, sew around the entire circumference of the head and body, stitch by stitch, to connect both pieces together.
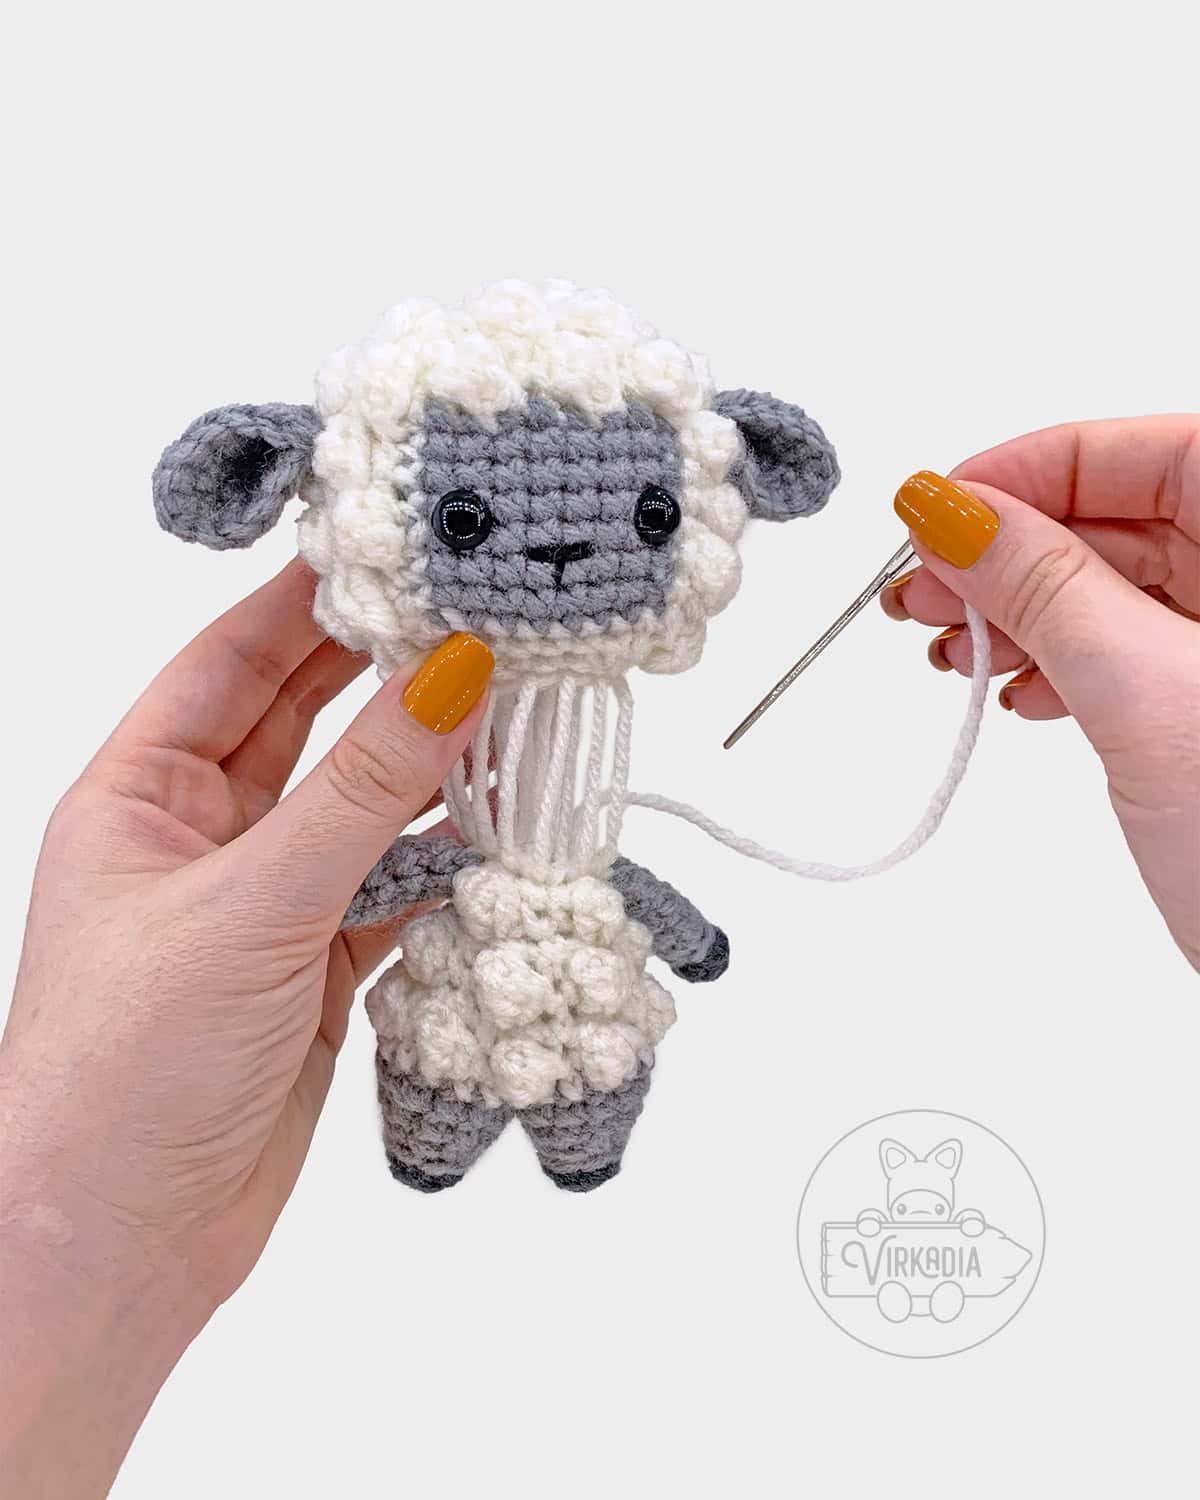
If you have trouble getting your needle into the crevice between the head and neck, try sewing very loosely, as shown above, leaving a large gap between the head and the body for you to more easily maneuver in.
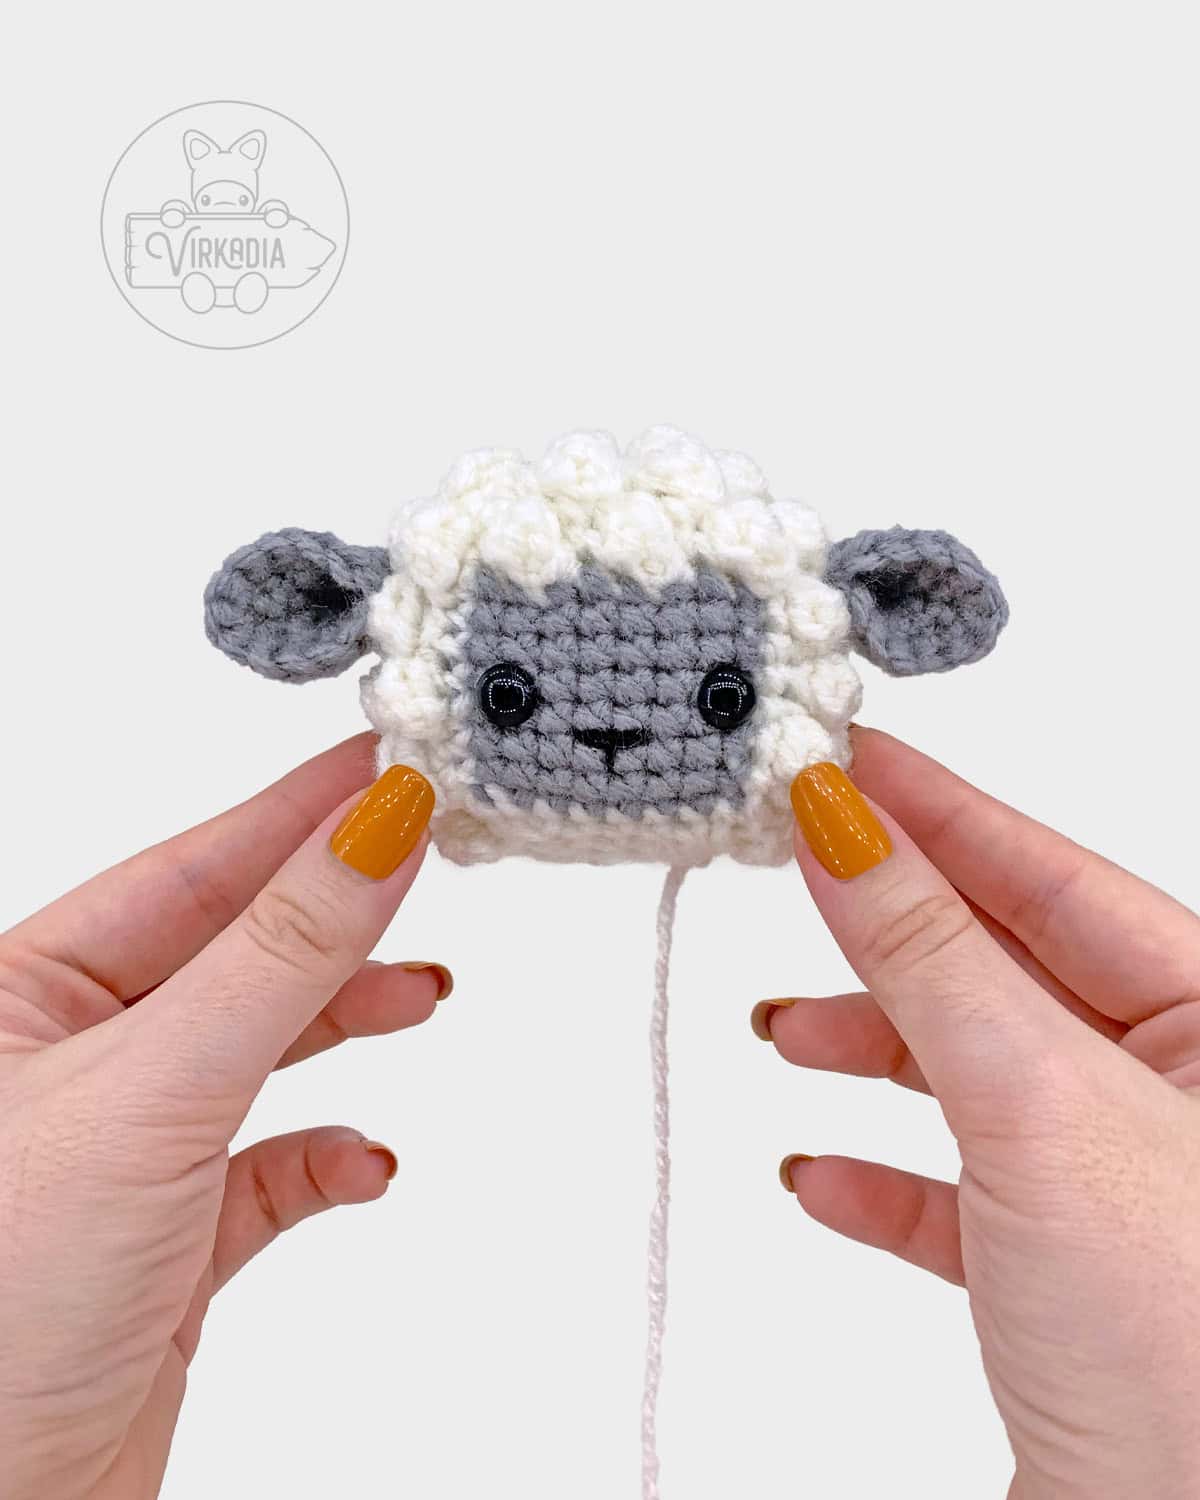
Then, once you’ve completed sewing around the full circumference, you may go back and tighten each strand of your sewing individually. Just be careful to tighten the strands in the same sequence as you’ve sewn them!
Once your head and body are connected, secure your sewing with a knot to the end tail from the head, or to a nearby stitch. Then, trim your tail, and weave in any excess length.
Conclusion | Free Crochet Lamb Amigurumi
And with that, you’re done the free crochet Lamb Pocket Pet pattern! If you enjoyed this pattern, be sure to check out its two companion patterns in the Easter Pocket Pets collection: the Chick Pocket Pet and the Bunny Pocket Pet!
You can also explore the Pocket Pets page and the Cutie Collections page for more original and free amigurumi patterns, or our Home Decor Patterns for other homemade household goodies!
If you’re looking to cozy up with a longer project, check out our Clothing Patterns, or assemble your own designs from one of our Granny Square Patterns!
And don’t forget to browse our downloadable, ad-free patterns in our Etsy store!
Follow Virkadia on Instagram to stay updated on all new and upcoming patterns, crochet content, and amigurumi adventures! Thank you for all of your support!

Hey hey, I'm Joey Diehl!
I am the fiber artist behind Virkadia! I have a BFA in Fibers & Material Studies and have been crocheting for over 20 years. I have designed, photographed, and written dozens of original crochet patterns that I am honored to have been shared to hundreds of thousands of readers.
Leave a Reply