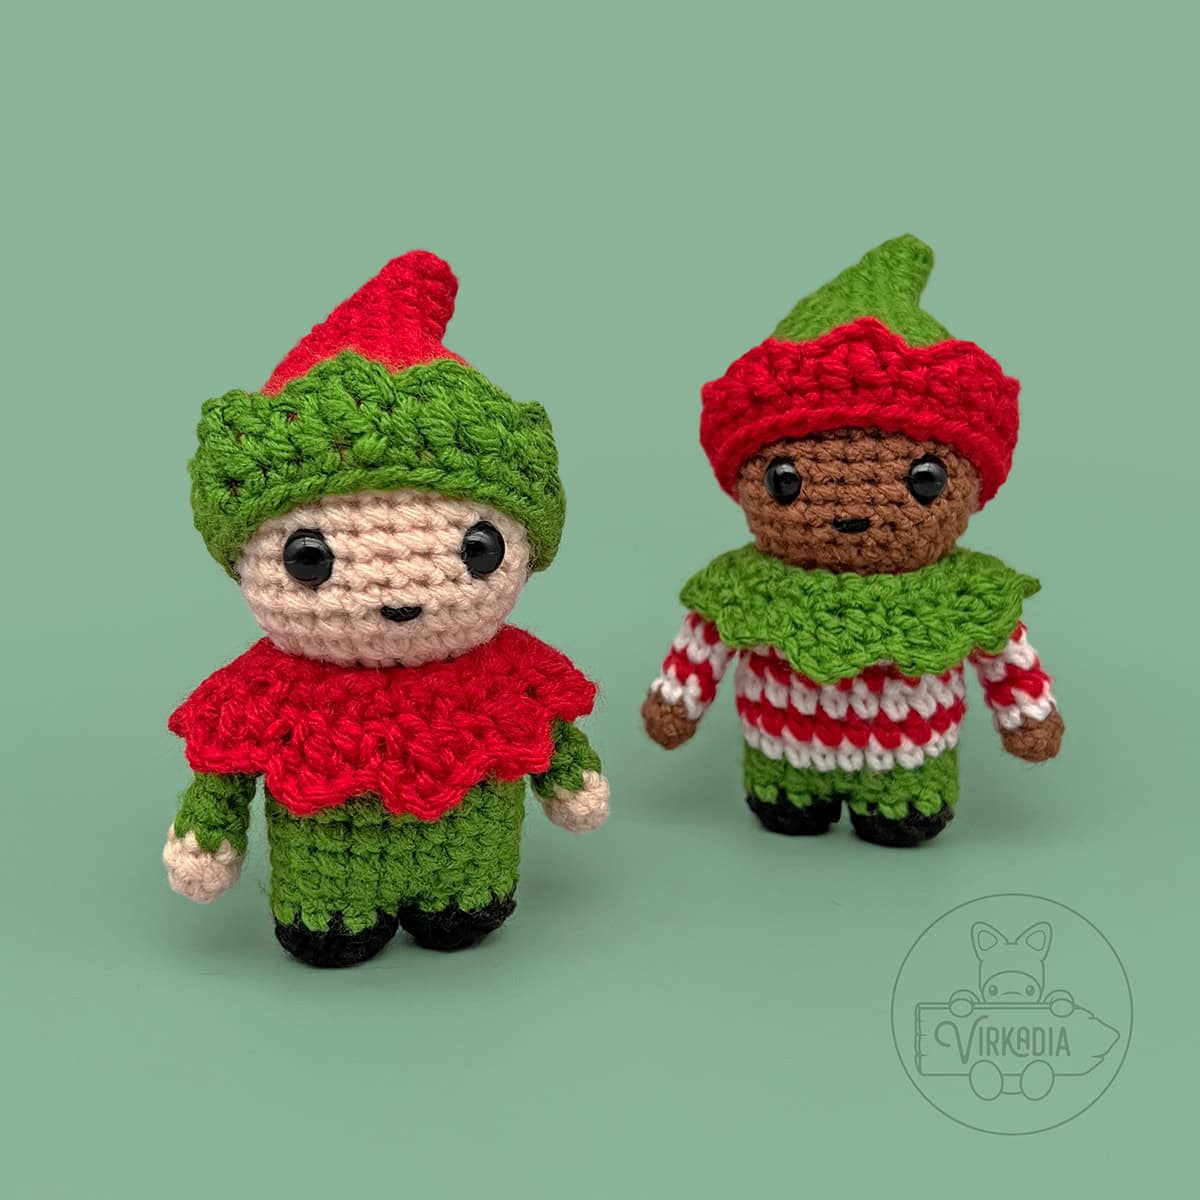
Ready to give your Little Crochet Guy a merry new look? This free crochet Little Elf Guy amigurumi pattern includes everything you need to turn your crochet doll into a cheerful Christmas elf, complete with a classic elf hat and a matching collar.
There's plenty of work to be done at the North Pole, and your Little Crochet Guy is ready to lend a helping hand! Whether he’s helping to wrap presents, riding along with last-minute holiday shopping, or watching the gifts get displayed beneath the Christmas tree, he’ll be dressed for the occasion in his festive new outfit.
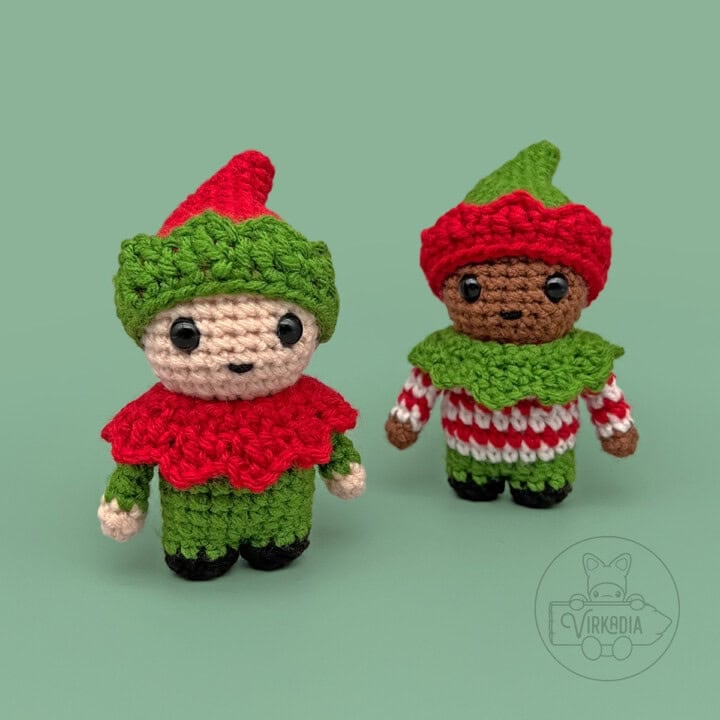
So, without further ado, here is the tutorial for the Little Elf Guy, a free crochet Christmas outfit pattern for your Little Crochet Guy amigurumi doll!
Pattern Information | Free Crochet Little Elf Guy
This free crochet Little Elf Guy amigurumi pattern has a difficulty rating of intermediate.
The finished dimensions are 5.5 inches (height) by 3 inches (width) by 2.75 inches (depth).*
You may also make your pieces larger or smaller by increasing or decreasing your yarn weight and/or hook size, respectively.
*Finished dimensions are calculated from a model using medium weight yarn, a size H-8 (5 mm) crochet hook, the YU/YO method and the following gauge: 18 sc x 21 rows = 4 inches.
And don’t forget to add your project on Ravelry!
Supplies:
- Size H-8 (5 mm) crochet hook
- Medium (4) weight yarn in 2 colors:
- Yarn A – red (example uses Red Heart Super Saver: Cherry Red)
- Yarn B – green (Big Twist Value: Forest Green)
- Polyester fiberfill
- Yarn needle
- Scissors
- Stitch markers
Alternate Yarn Supplies:
Color Variation 2 (as seen on the right in cover photo):
- Medium (4) weight yarn in 2 colors:
- Yarn A – green (Big Twist Value: Forest Green)
- Yarn B – red (example uses Red Heart Super Saver: Cherry Red)
Terminology:
This free crochet Little Elf Guy amigurumi pattern uses English (US) terminology:
- st (sts) = stitch (stitches)
- ch = chain stitch
- sl st = slip stitch
- sc = single crochet
- sc2tog = single crochet 2 together (over the span of 2 stitches), also known as a decrease
- hdc = half double crochet
- dc = double crochet
- sk = skip
Please note that this pattern is written so that each crochet stitch abbreviation is attached to a number, such as 1sc, 2sc, etc. This number denotes how many of that stitch is to be worked into the same stitch.
You can learn more about how to read Virkadia patterns on our Pattern Help FAQ page!
Special Stitch Instructions:
Please review our special stitch instructions on our Stitch Tutorials FAQ page before beginning, as some techniques may be unique to this pattern.
You can also watch our amigurumi techniques video tutorial for all of our tips and tricks for improving your project!
This free crochet Little Elf Guy amigurumi pattern uses the following special stitch tutorials:
- Single Crochet (YU/YO Method)
- Invisible Decrease
- Joining Rounds
This pattern is worked in the round, with each round joined at the end with a slip stitch. Unless otherwise instructed, the first stitch of your next round will always be worked into the same stitch as your joining slip stitch has been worked into.
Be sure to always keep the ‘right side’ of your stitches facing outwards as you work. The right side is the front side of the stitch that is facing you as you are completing each stitch.
Pattern Instructions | Free Crochet Little Elf Guy
Little Crochet Guy - Base Pattern:
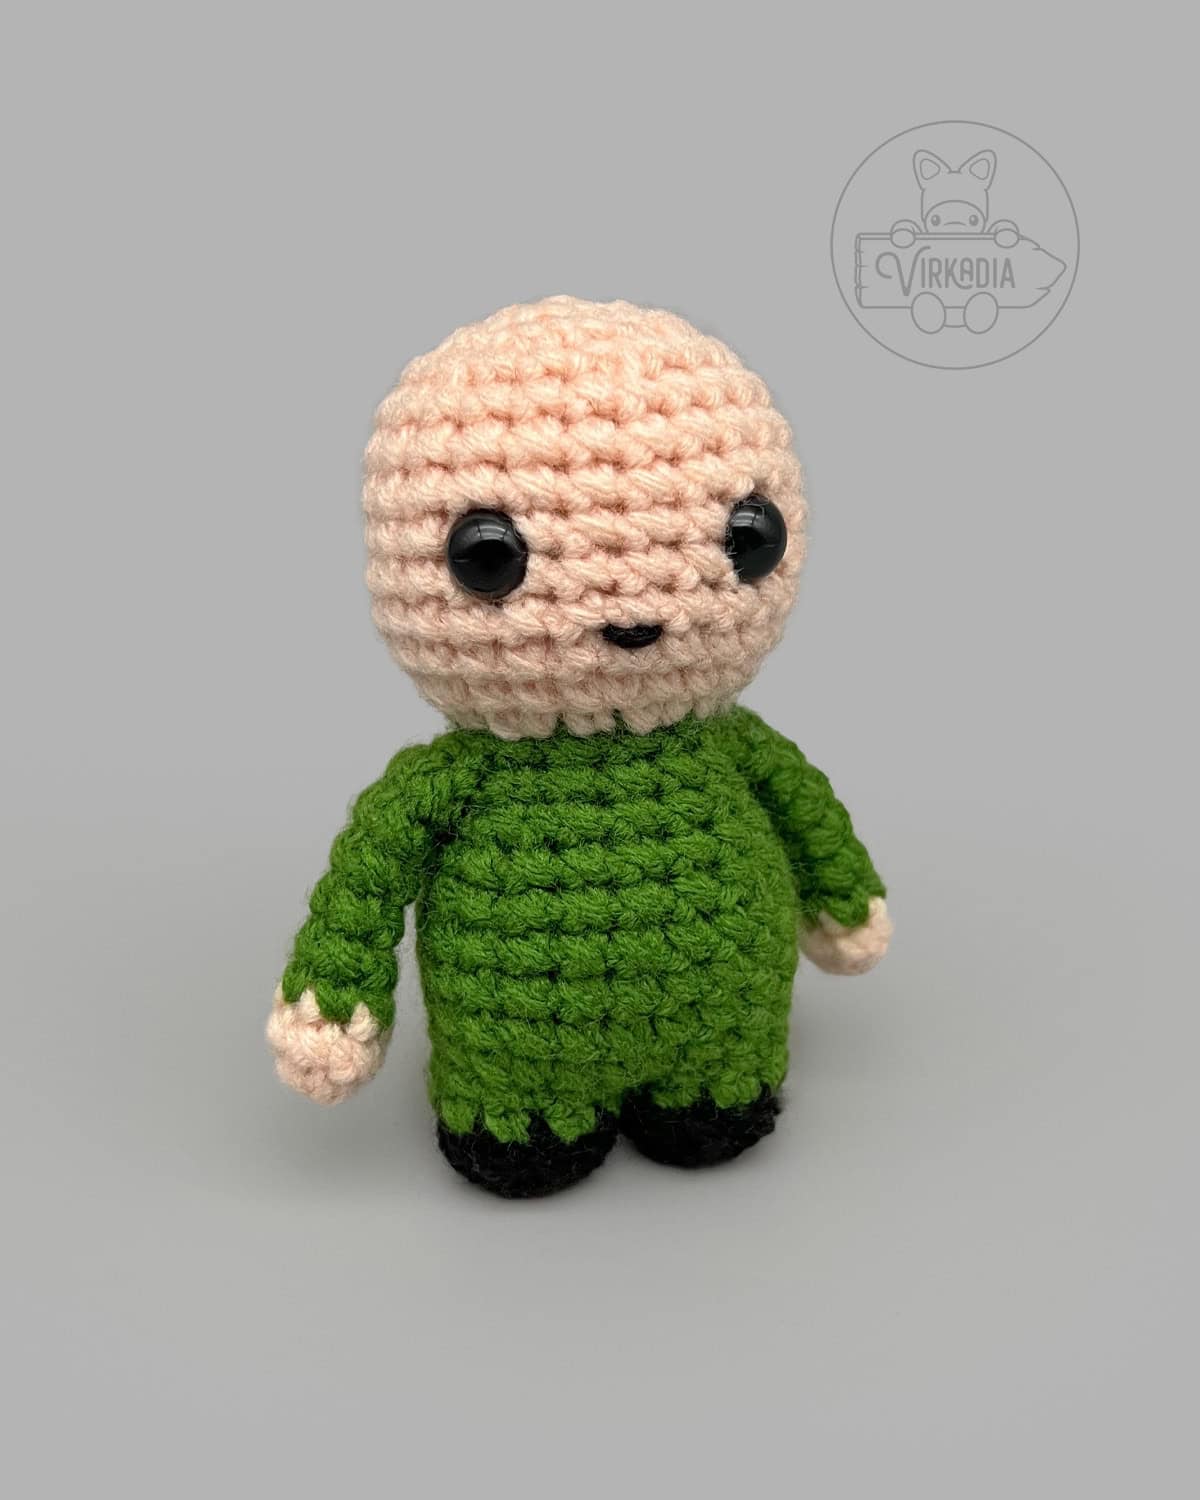
Before making your Little Elf Guy accessories, you should first start with the Little Crochet Guy base pattern.
The example body shown throughout this free crochet Little Elf Guy doll pattern is worked in 3 colors, with separate colors used for the skin (beige), body (green), and shoes (black), as seen below.
The alternative example (color variation 2), as seen on the right in the cover image, uses a body that is worked in 5 colors. Different colors are used for the skin (brown), pants (green), shoes (black), and colors are alternated after each round for the shirt (between white and red).
However, you may also customize your base pattern into different color ways by following the Customizing Colors instructions, as outlined in the base pattern.
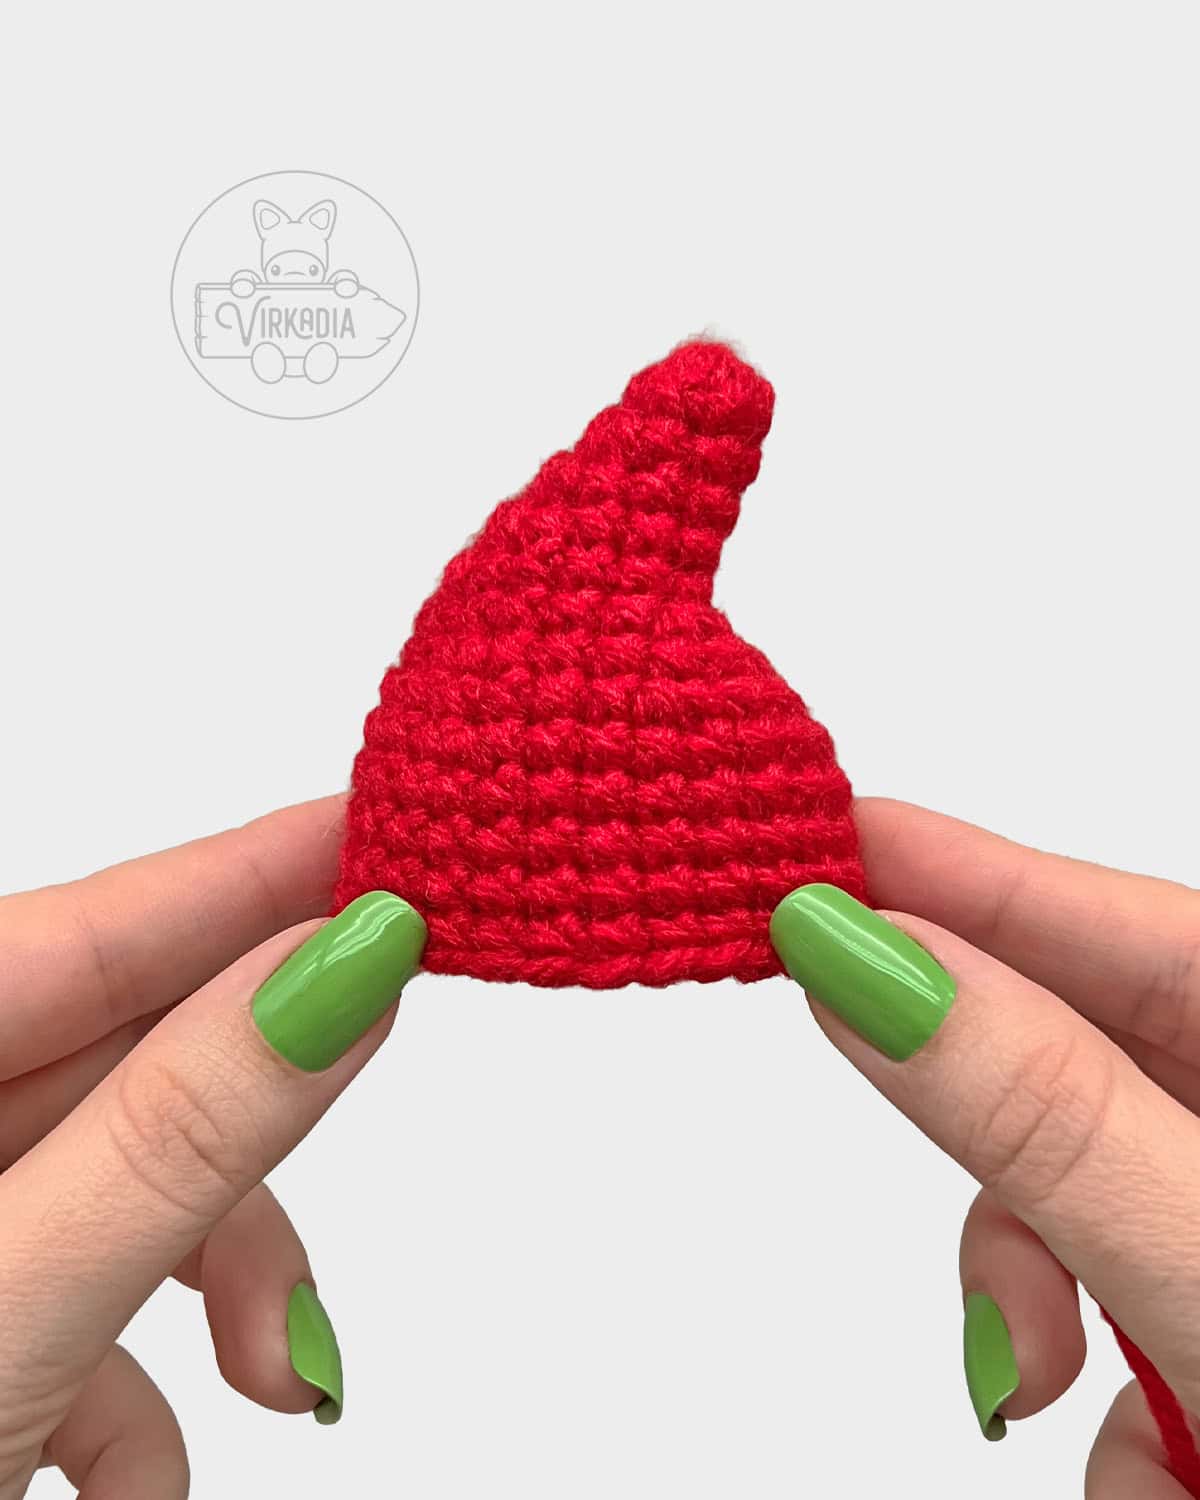
Crochet Little Elf Guy Hat - Top:
With yarn A (red), make a magic ring (or ch 2, work rnd 1 into 2nd ch from hook).
Rnd 1: 6sc into ring, sl st into 1st st to join, ch 1 (6).
Rnd 2: 1sc into each st around, join, ch 1 (6).
Rnd 3: 1sc into each of next 2 sts, (1sc, 1hdc) into next st, (1hdc, 1sc) into next st, 1sc into each of next 2 sts, join, ch 1 (8).
Rnd 4: 1sc into each of next 3 sts, (1sc, 1hdc) into next st, (1hdc, 1sc) into next st, 1sc into each of next 3 sts, join, ch 1 (10).
Rnd 5: 1sc into each of next 4 sts, (1sc, 1hdc) into next st, (1hdc, 1sc) into next st, 1sc into each of next 4 sts, join, ch 1 (12).
Rnd 6: 1sc into each of next 5 sts, (1sc, 1hdc) into next st, (1hdc, 1sc) into next st, 1sc into each of next 5 sts, join, ch 1 (14).
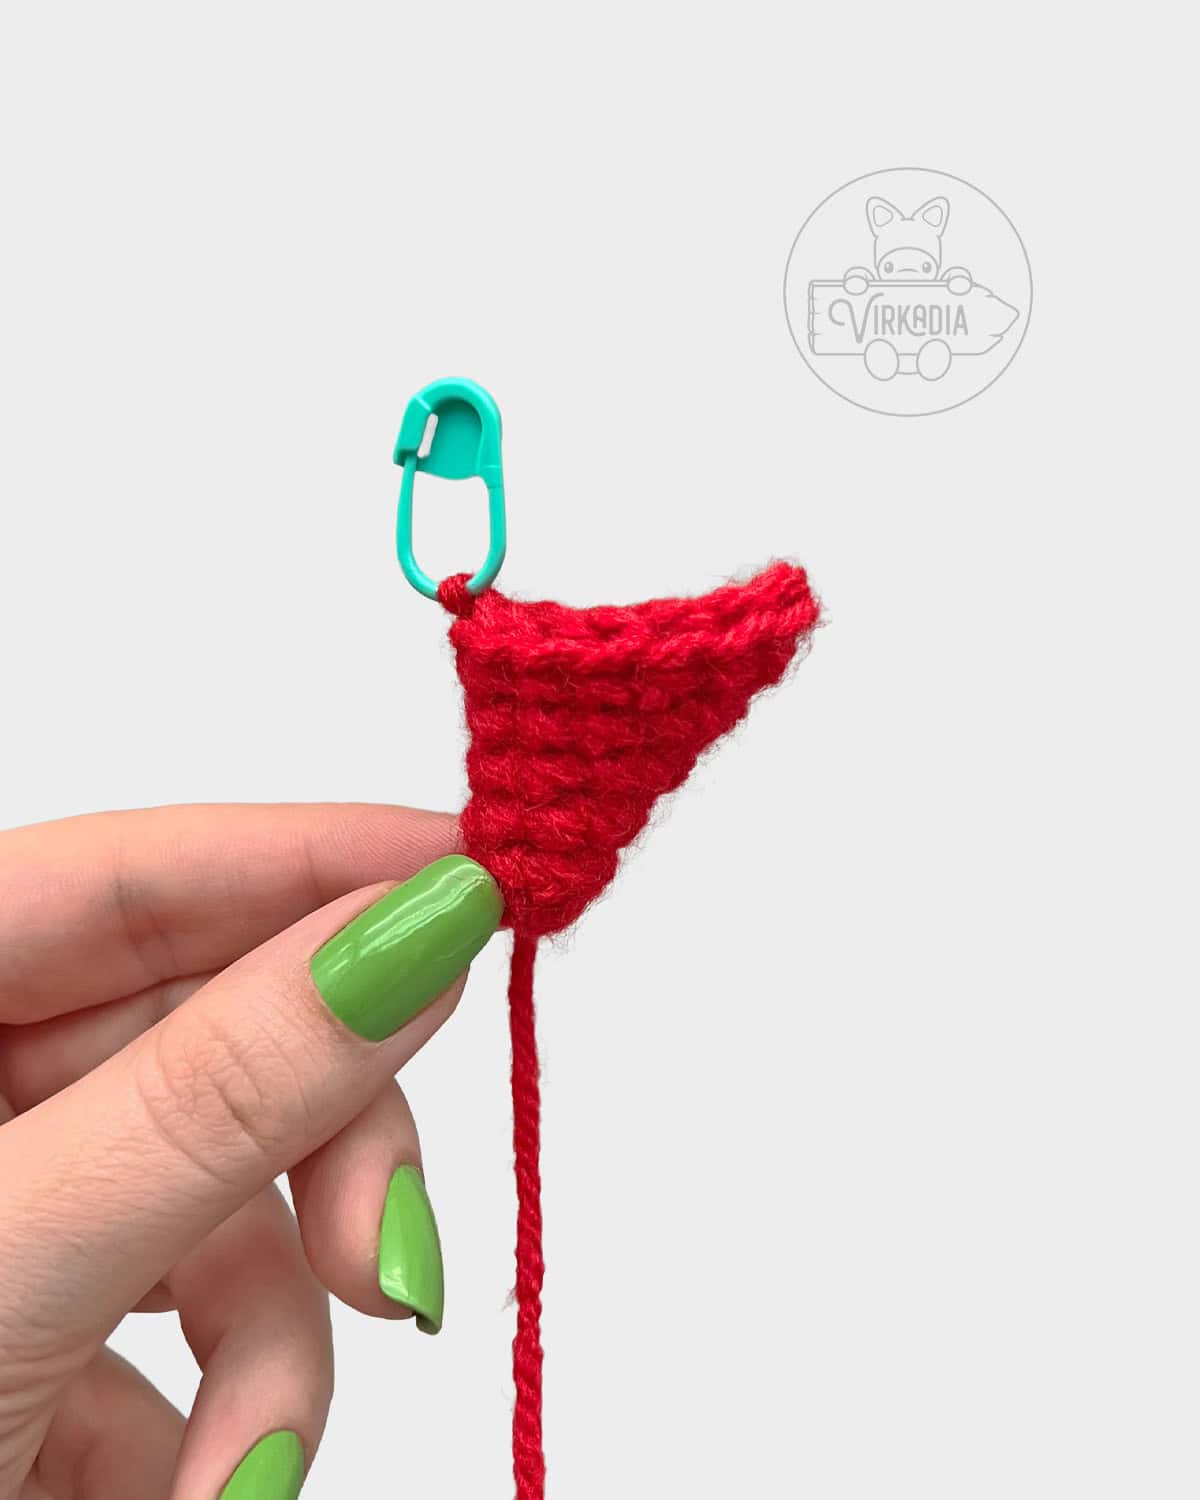
Rnd 7: 2sc into each of next 2 sts, 1sc into each of next 10 sts, 2sc into each of next 2 sts, join, ch 1 (18).
Rnd 8: [1sc into each of next 5 sts, 2sc into next st] 3 times, join, ch 1 (21).
Rnd 9: [1sc into each of next 2 sts, 2sc into next st, 1sc into each of next 4 sts] 3 times, join, ch 1 (24).
Rnd 10: [1sc into each of next 7 sts, 2sc into next st] 3 times, join, ch 1 (27).
Rnd 11: 1sc into each st around, join, ch 1 (27).
Rnd 12: 1sc into each st around, join, ch 1 (27).
Rnd 13: 1sc into each st around, join, ch 1 (27).
Rnd 14: 1sc into each st around, join (27).
Fasten off yarn A and weave in your end tail.
Set aside for now and continue to the instructions for the crochet Little Elf Guy hat rim next.
Crochet Little Elf Guy Hat - Rim:
With yarn B (green), chain 47.
Round 1 will first be worked in a straight line across. At the end of round 1, you will then curl your work into a circle and begin working in the round.
At the end of the instructions for round 1, join your work by curling the row around so that the front side of the very first stitch of round 1 in now next to the last stitch you've made at the end of the round.
Insert your hook through the last chain at the end of the foundation chain, or the 3rd chain after your last 2 skipped chains, then into the top of the very first single crochet from the beginning of round 1.
Yarn over and pull through both layers, as well as the loop on your hook, to complete your joining slip stitch.
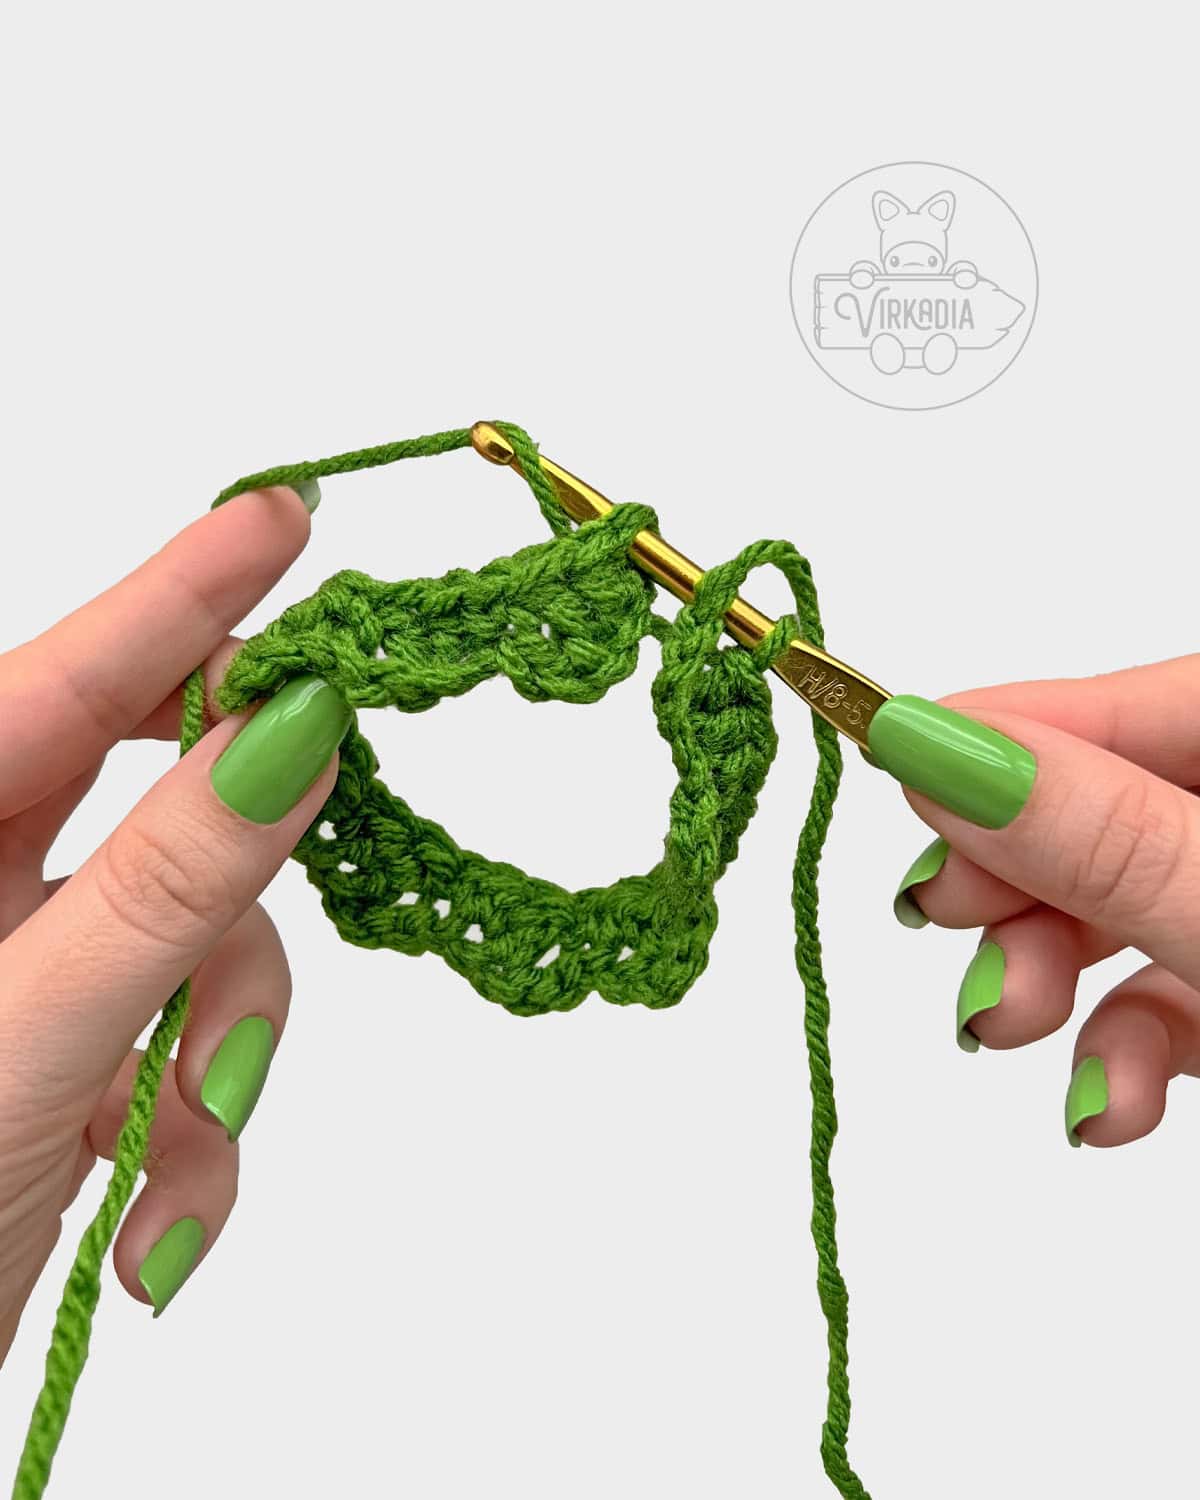
Rnd 1: beginning in 2nd ch from hook, [1sc into next st, 1hdc into next st, 1dc into next st, sk next 2 ch] 9 times, sl st into last ch and 1st st of rnd together to join, ch 1 (27).
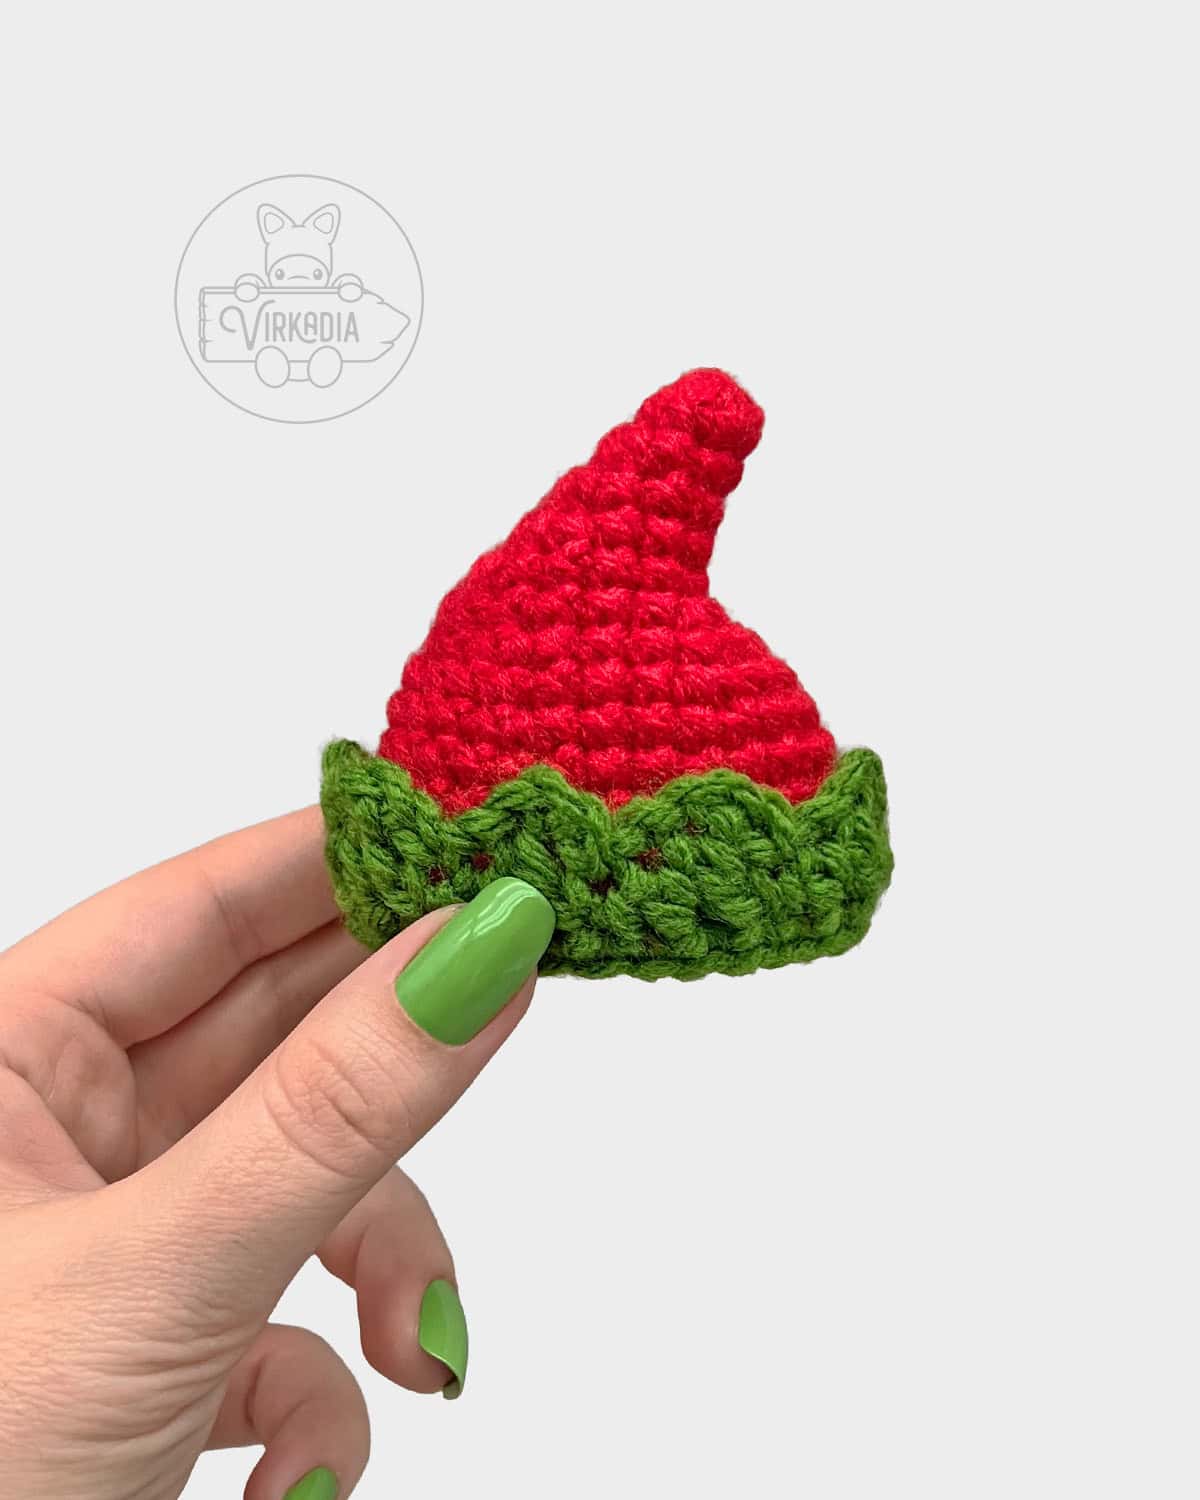
Retrieve the top of the hat that you’ve set aside earlier and place it inside of your hat rim so that the last round of both layers are parallel with each other.
Each stitch in round 2 will be worked through both layers simultaneously, inserting through the rim piece first then the hat top second, in order to join them together.
Rnd 2: in both rim and top together, 1sc into each st around, join (27).
Fasten off yarn B and weave in your end tail.
Set aside for now and continue to the instructions for the crochet Little Elf Guy collar next.
Crochet Little Elf Guy Collar:
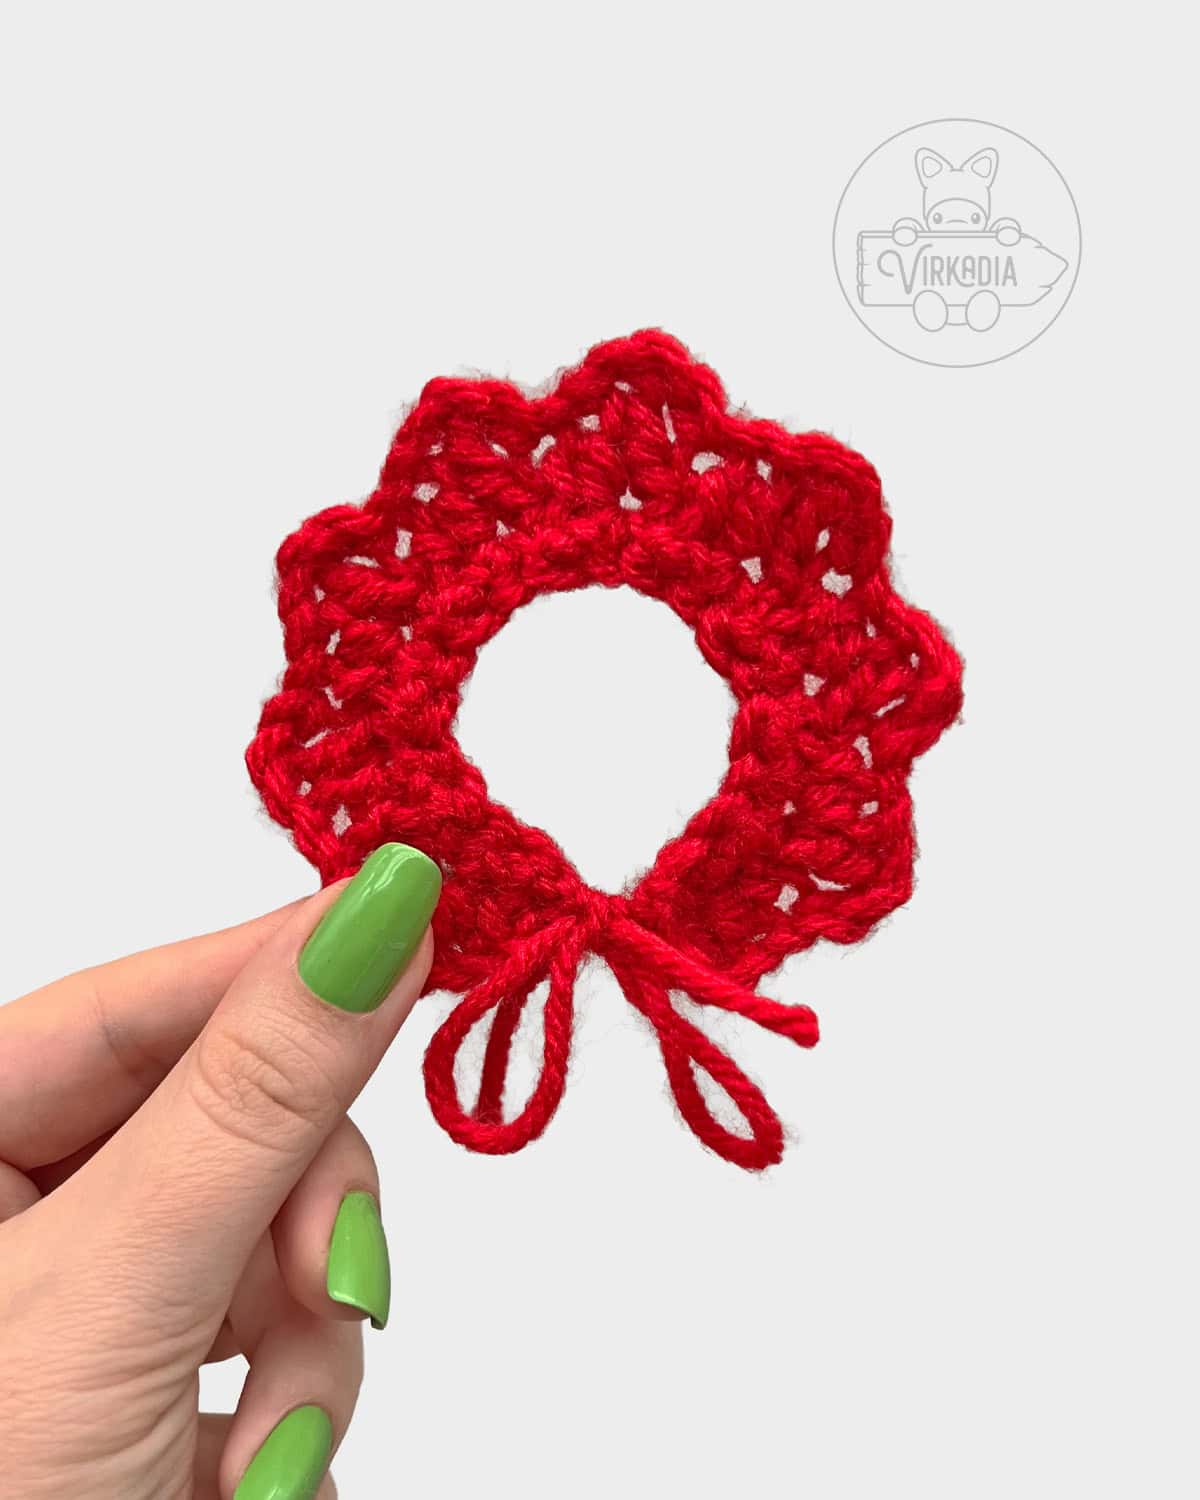
With yarn A (red), leave a 4 to 6 inch beginning tail for tying and chain 46.
Row 1: beginning in 2nd ch from hook, [1sc into next st, 1hdc into next st, 1dc into next st, sk next 2 ch] 8 times, 1sc into next st, 1hdc into next st, 1dc into next st, sk next 1 ch, sl st into last ch, ch 1, turn (28).
Row 2: sk sl st, [1sc into next st, sc2tog over next 2 sts] 9 times (18).
To fasten off, work 1 more chain and cut your working yarn, leaving another 4 to 6 inch end tail for tying.
Pull your end tail completely up and through the chain stitch. Then, secure your work by pulling on your end tail until that last chain is pulled tight.
Assembling Pieces:
To assemble all pieces of your crochet Little Elf Guy together, begin by wrapping the collar around the neck of the body.
Make sure that the opening of the collar is rotated towards the back of the body. Then, tie both tails together into a simple bow to secure your collar.
To finish, take the crochet elf hat that you’ve set aside earlier and push it down on top of the head until it is secure.
Conclusion | Free Crochet Little Elf Guy
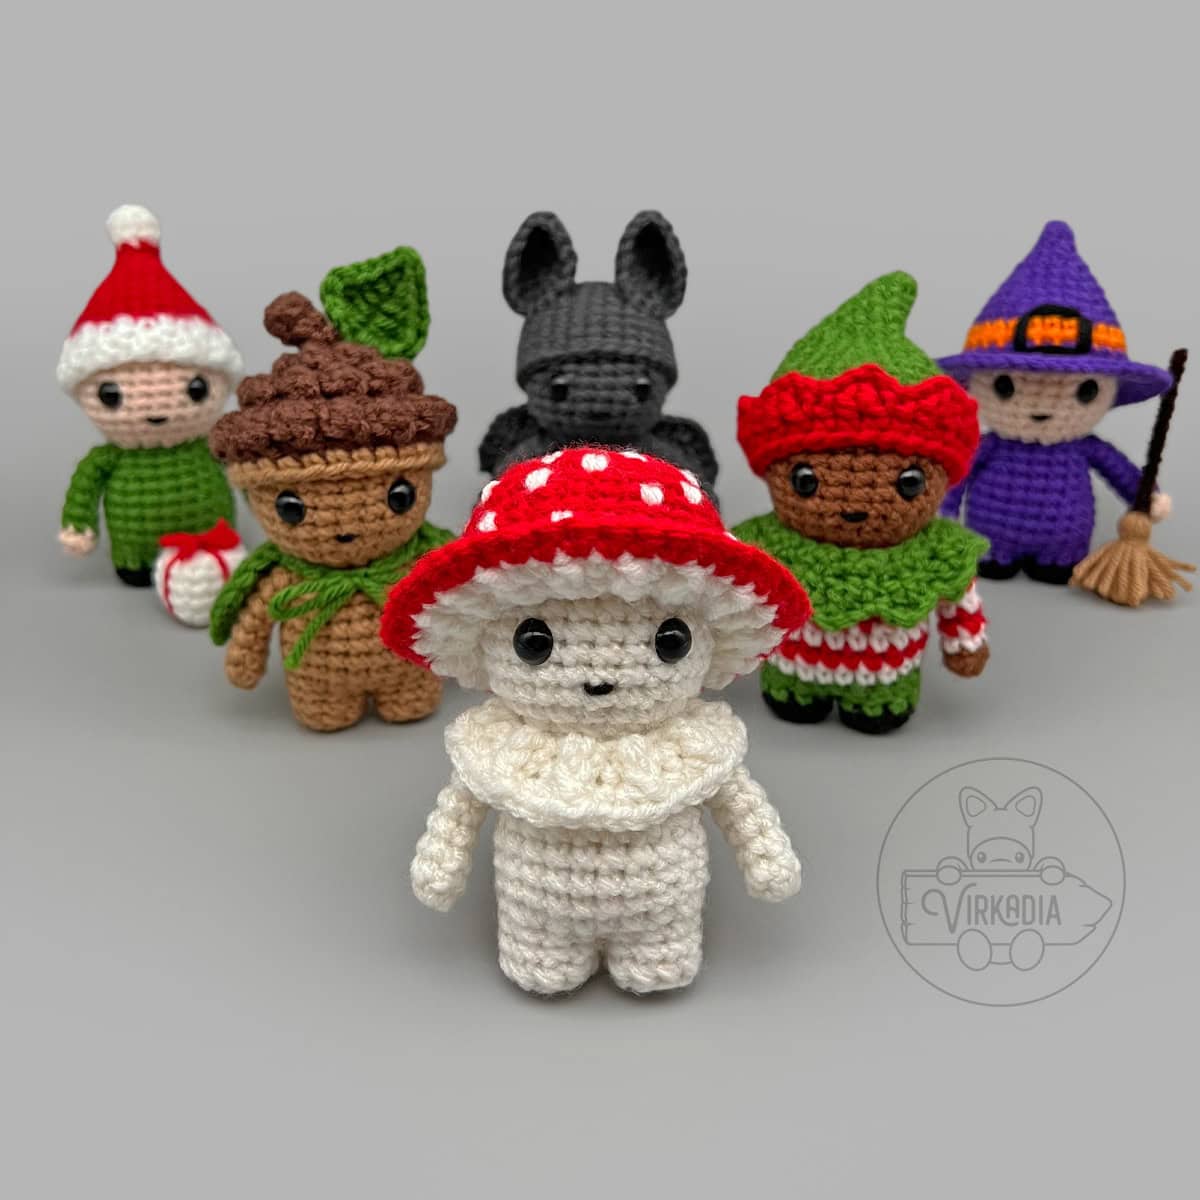
And with that, you’re done the free crochet Little Elf Guy pattern! If you enjoyed this pattern, be sure to check out our full library of mix-and-match clothing and accessories for your new buddy in our Little Crochet Guy collection!
You can also explore the Cutie Collections and the Pocket Pets archives for more original and free amigurumi patterns, or our Home Decor Patterns for other homemade household goodies!
If you’re looking to cozy up with a longer project, check out our Clothing Patterns, or assemble your own designs from one of our Granny Square Patterns!
And don’t forget to browse our downloadable, ad-free patterns in our Etsy store!
Follow Virkadia on Instagram to stay updated on all new and upcoming patterns, crochet content, and amigurumi adventures! Thank you for all of your support!
Hey hey, I'm Joey Diehl!
I am the fiber artist behind Virkadia! I have a BFA in Fibers & Material Studies and have been crocheting for over 20 years. I have designed, photographed, and written dozens of original crochet patterns that I am honored to have been shared to hundreds of thousands of readers.
Leave a Reply