
Ready to give your Little Crochet Guy a new look that is out of this world? This free crochet Little Alien Guy amigurumi pattern includes everything you need to turn your crochet doll into a visitor from beyond the stars, complete with alien antennas and a hanging UFO!
With Halloween just around the corner, your Little Crochet Guy is ready to explore the great unknown! Whether he’s making a mysterious landing in the dead of night, investigating strange lights in the sky, or simply enjoying a spooky sci-fi movie night, he’ll be ready for the occasion in this new cosmic outfit.
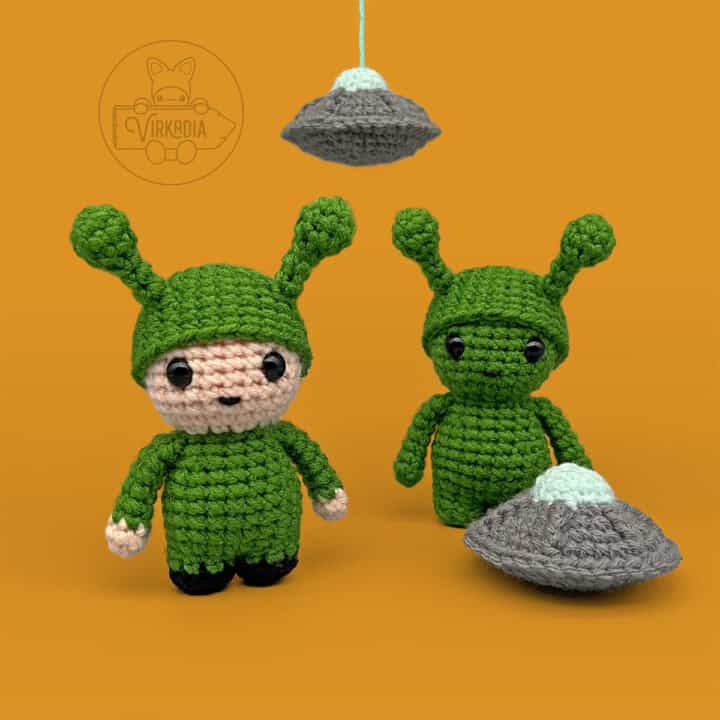
So, without further ado, here is the tutorial for the Little Alien Guy, a free crochet Halloween outfit pattern for your Little Crochet Guy amigurumi doll!
Pattern Information | Free Crochet Little Alien Guy
This free crochet Little Alien Guy amigurumi pattern has a difficulty rating of intermediate.
The finished dimensions are 5.25 inches (height) by 3.25 inches (width) by 2.25 inches (depth).*
You may also make your pieces larger or smaller by increasing or decreasing your yarn weight and/or hook size, respectively.
*Finished dimensions are calculated from a model using medium weight yarn, a size H-8 (5 mm) crochet hook, the YU/YO method and the following gauge: 18 sc x 21 rows = 4 inches.
And don’t forget to add your project on Ravelry!
Supplies:
- Size H-8 (5 mm) crochet hook
- Medium (4) weight yarn in 3 colors:
- Yarn A – green (example uses Big Twist Value: Forest Green)
- Yarn B – gray (Red Heart Super Saver: Dusty Gray)
- Yarn C – light blue (Big Twist Value: Mint)
- Polyester fiberfill
- Yarn needle
- Scissors
- Stitch markers
Terminology:
This free crochet Little Alien Guy amigurumi pattern uses English (US) terminology:
- st (sts) = stitch (stitches)
- ch = chain stitch
- ch-sp = chain space
- sl st = slip stitch
- sc = single crochet
- sc2tog = single crochet 2 together (over the span of 2 stitches), also known as a decrease
- dc = double crochet
- FPdc = front post double crochet*
*Be sure to read through the special instructions for this stitch before beginning, as they may be unique to this pattern.
Please note that this pattern is written so that each crochet stitch abbreviation is attached to a number, such as 1sc, 2sc, etc. This number denotes how many of that stitch is to be worked into the same stitch.
You can learn more about how to read Virkadia patterns on our Pattern Help FAQ page!
Special Stitch Instructions:
Please review our special stitch instructions on our Stitch Tutorials FAQ page before beginning, as some techniques may be unique to this pattern.
You can also watch our amigurumi techniques video tutorial for all of our tips and tricks for improving your project!
This free crochet Little Alien Guy amigurumi pattern uses the following special stitch tutorials:
- Single Crochet (YU/YO Method)
- Invisible Decrease
- Joining Rounds
- Front Post Double Crochet
This pattern is worked in the round, with each round joined at the end with a slip stitch. Unless otherwise instructed, the first stitch of your next round will always be worked into the same stitch as your joining slip stitch has been worked into.
Be sure to always keep the ‘right side’ of your stitches facing outwards as you work. The right side is the front side of the stitch that is facing you as you are completing each stitch.
Front Post Double Crochet:
This free crochet Little Alien Guy amigurumi pattern uses front post double crochet stitches to create the radiating lines around the UFO, as seen below.
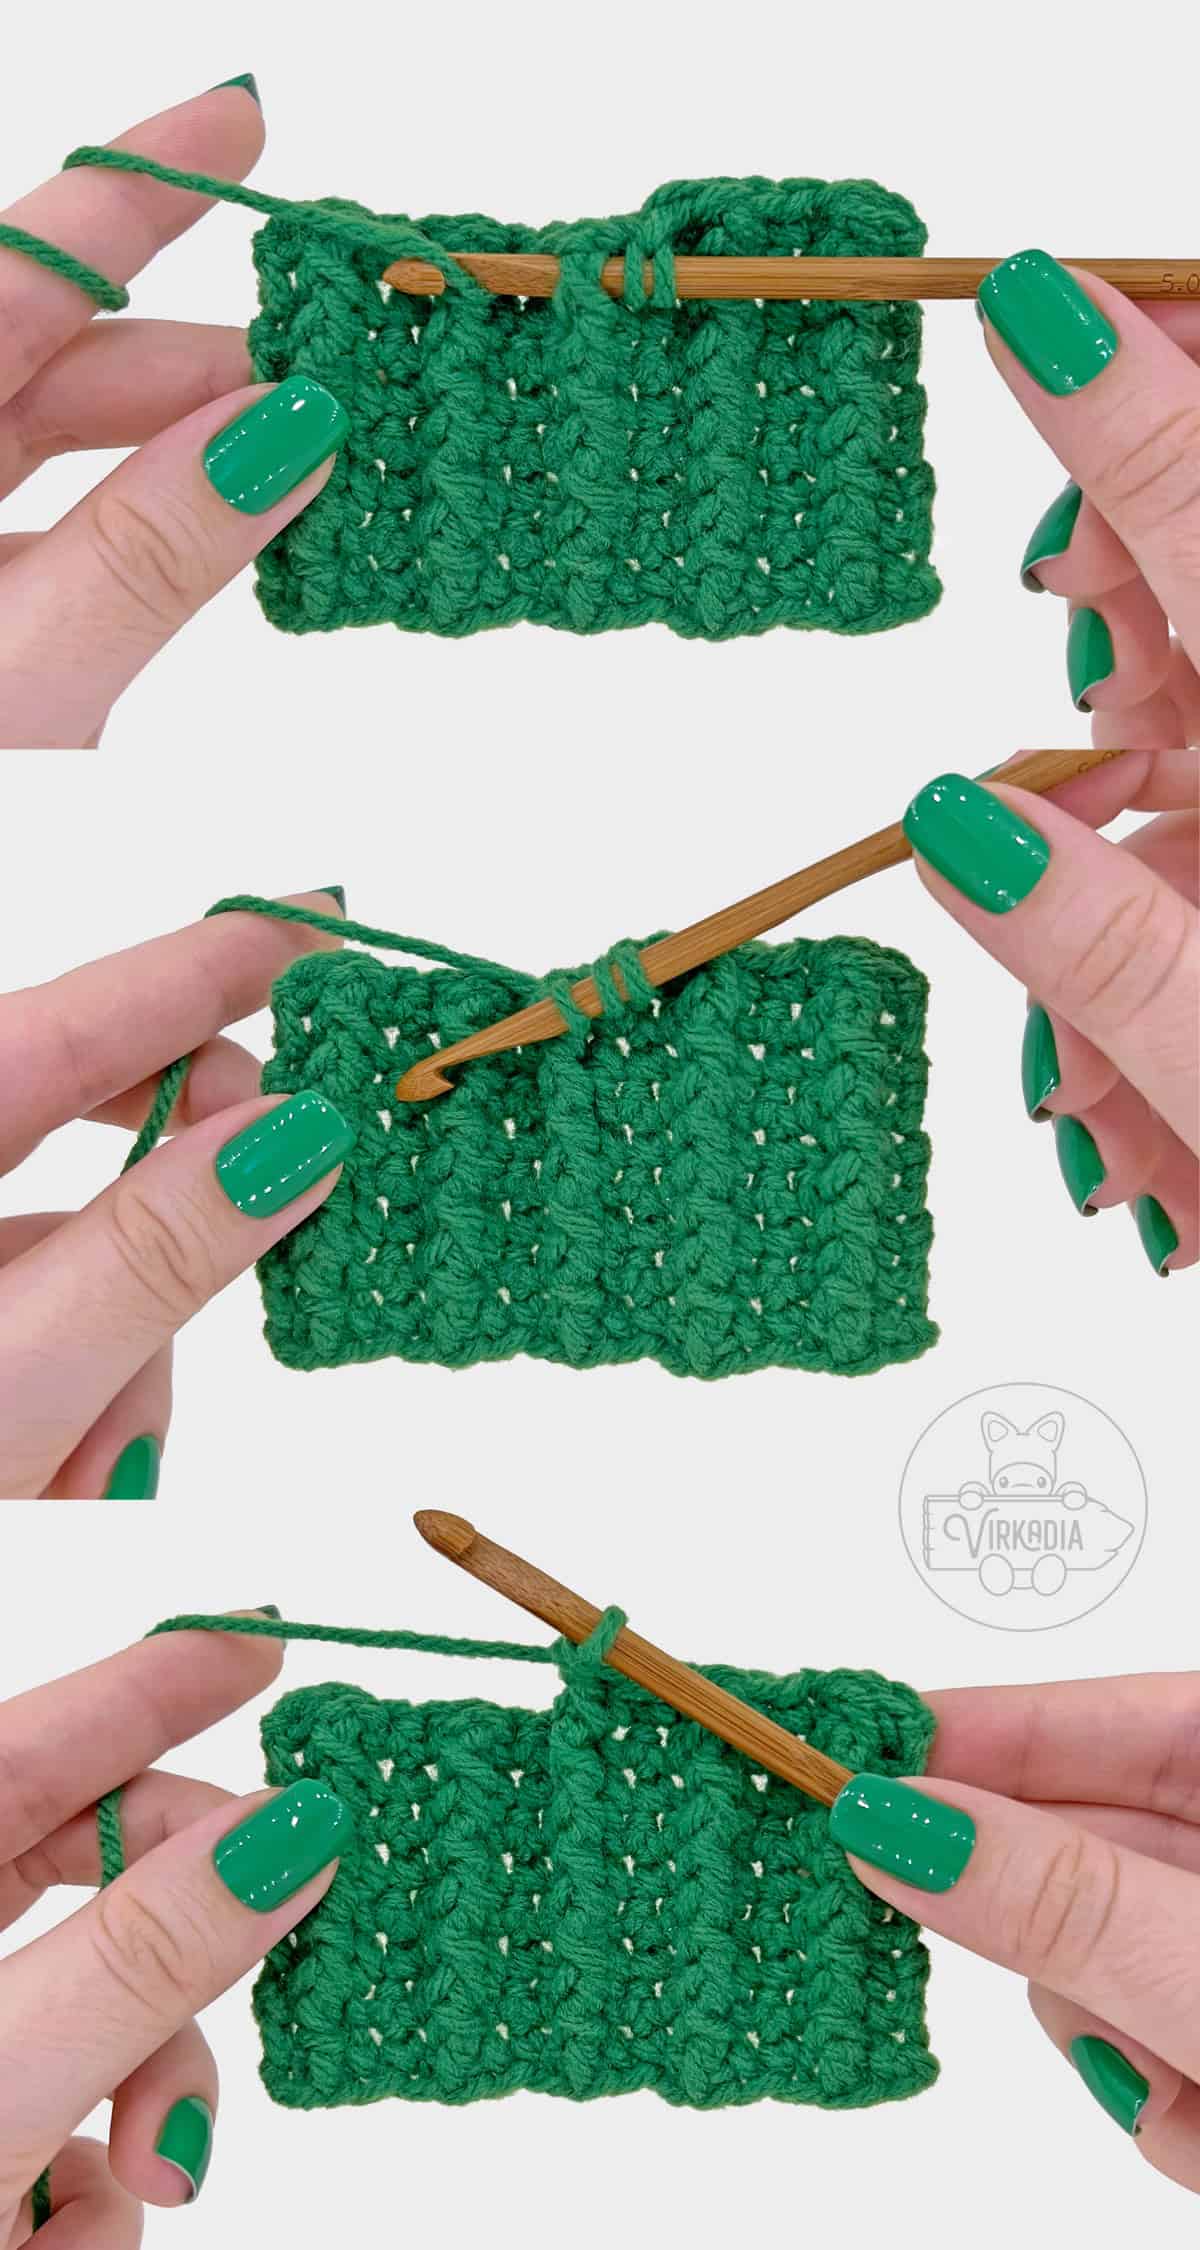
To begin your front post double crochet, locate your double crochet in the row below that your new stitch will be worked onto.
Instead of working into the top two loops of the stitch, as you would for a normal double crochet, you will instead be working your stitch around the vertical body of the double crochet itself.
Yarn over, then insert your hook, from right to left for right-handed crocheters (or left to right for lefties) underneath the vertical body of the double crochet in the row below.
With your hook, exit on the opposite side of the double crochet. The vertical body of your double crochet should now be laying over top of your hook.
Yarn over, then pull through a new loop, pulling it beneath the body of the double crochet so that your hook is now back on the right side (or left side, for lefties) of the double crochet.
You should now have three loops on your hook. Complete your double crochet as normal by yarning over and pulling through two loops, two times.
Pattern Instructions | Free Crochet Little Alien Guy
Little Crochet Guy - Base Pattern:
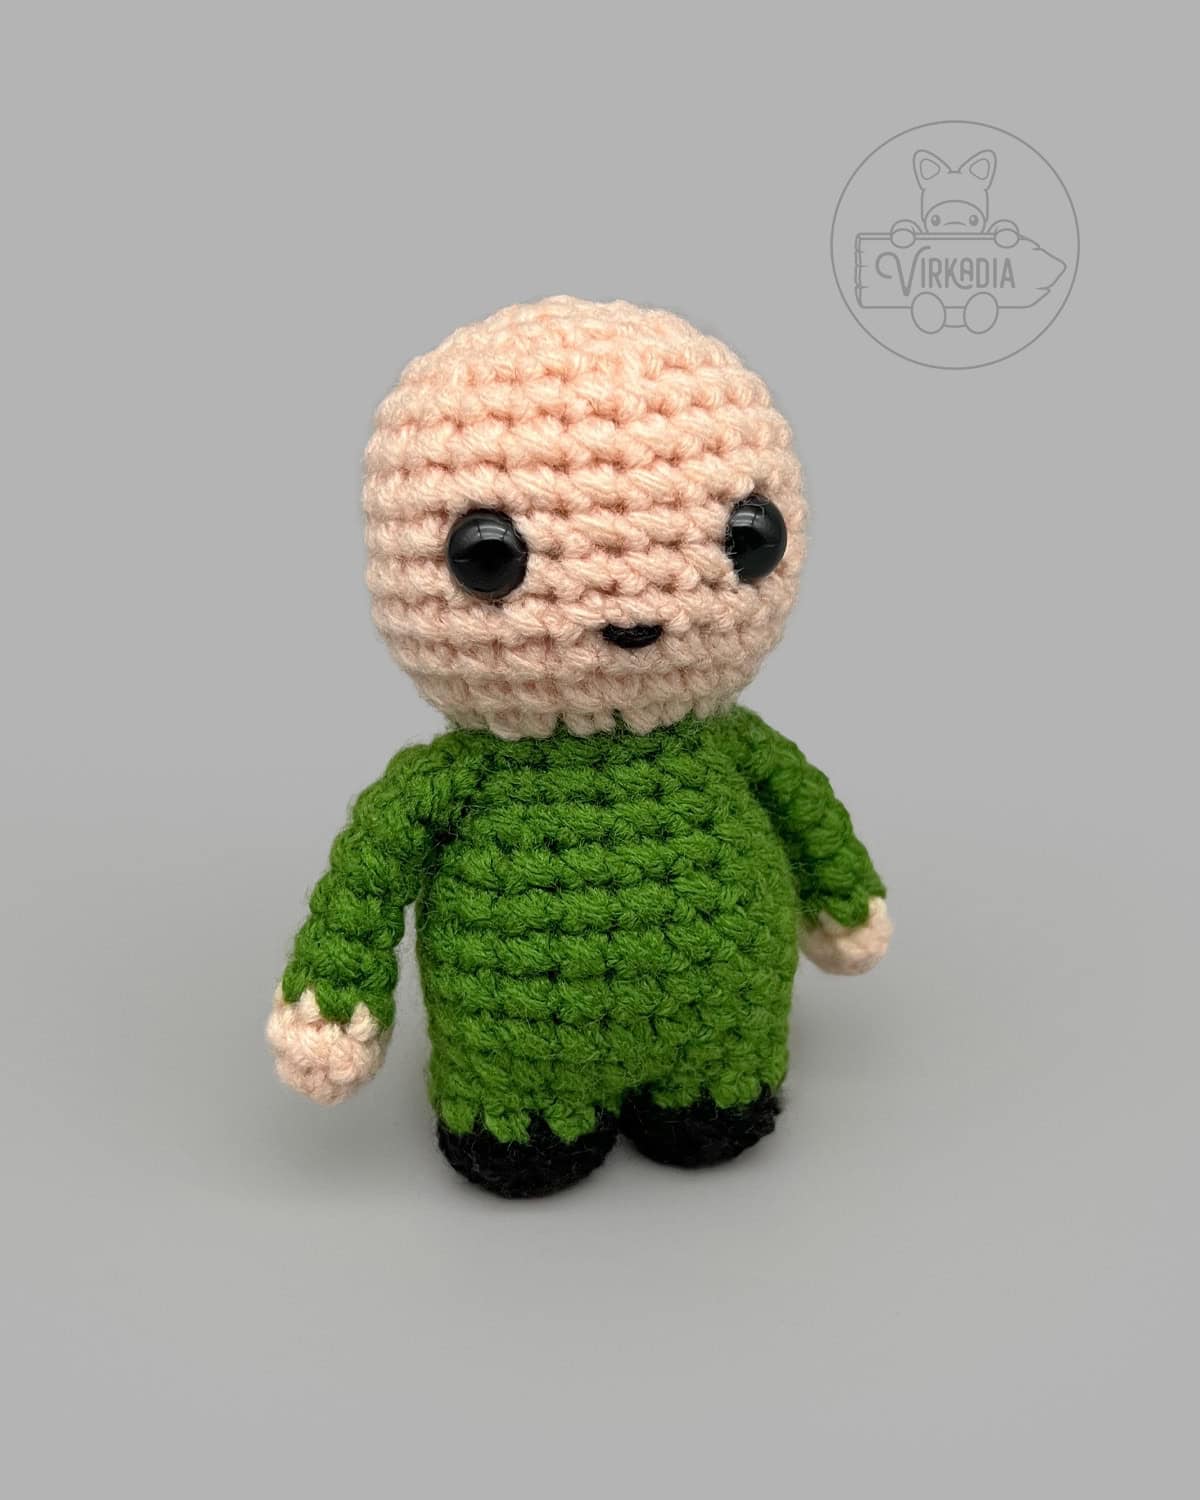
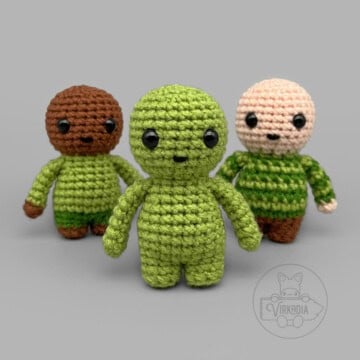
Before making your Little Alien Guy accessories, you should first start with the Little Crochet Guy base pattern.
The example body shown throughout this free crochet Little Alien Guy doll pattern is worked in 3 colors, with separate colors used for the skin (beige), body (green), and shoes (black), as seen below.
The alternative example, as seen on the right in the cover image, uses a body that is worked in one solid color (green).
You may also customize your base pattern into different color ways by following the Customizing Colors instructions, as outlined in the base pattern.
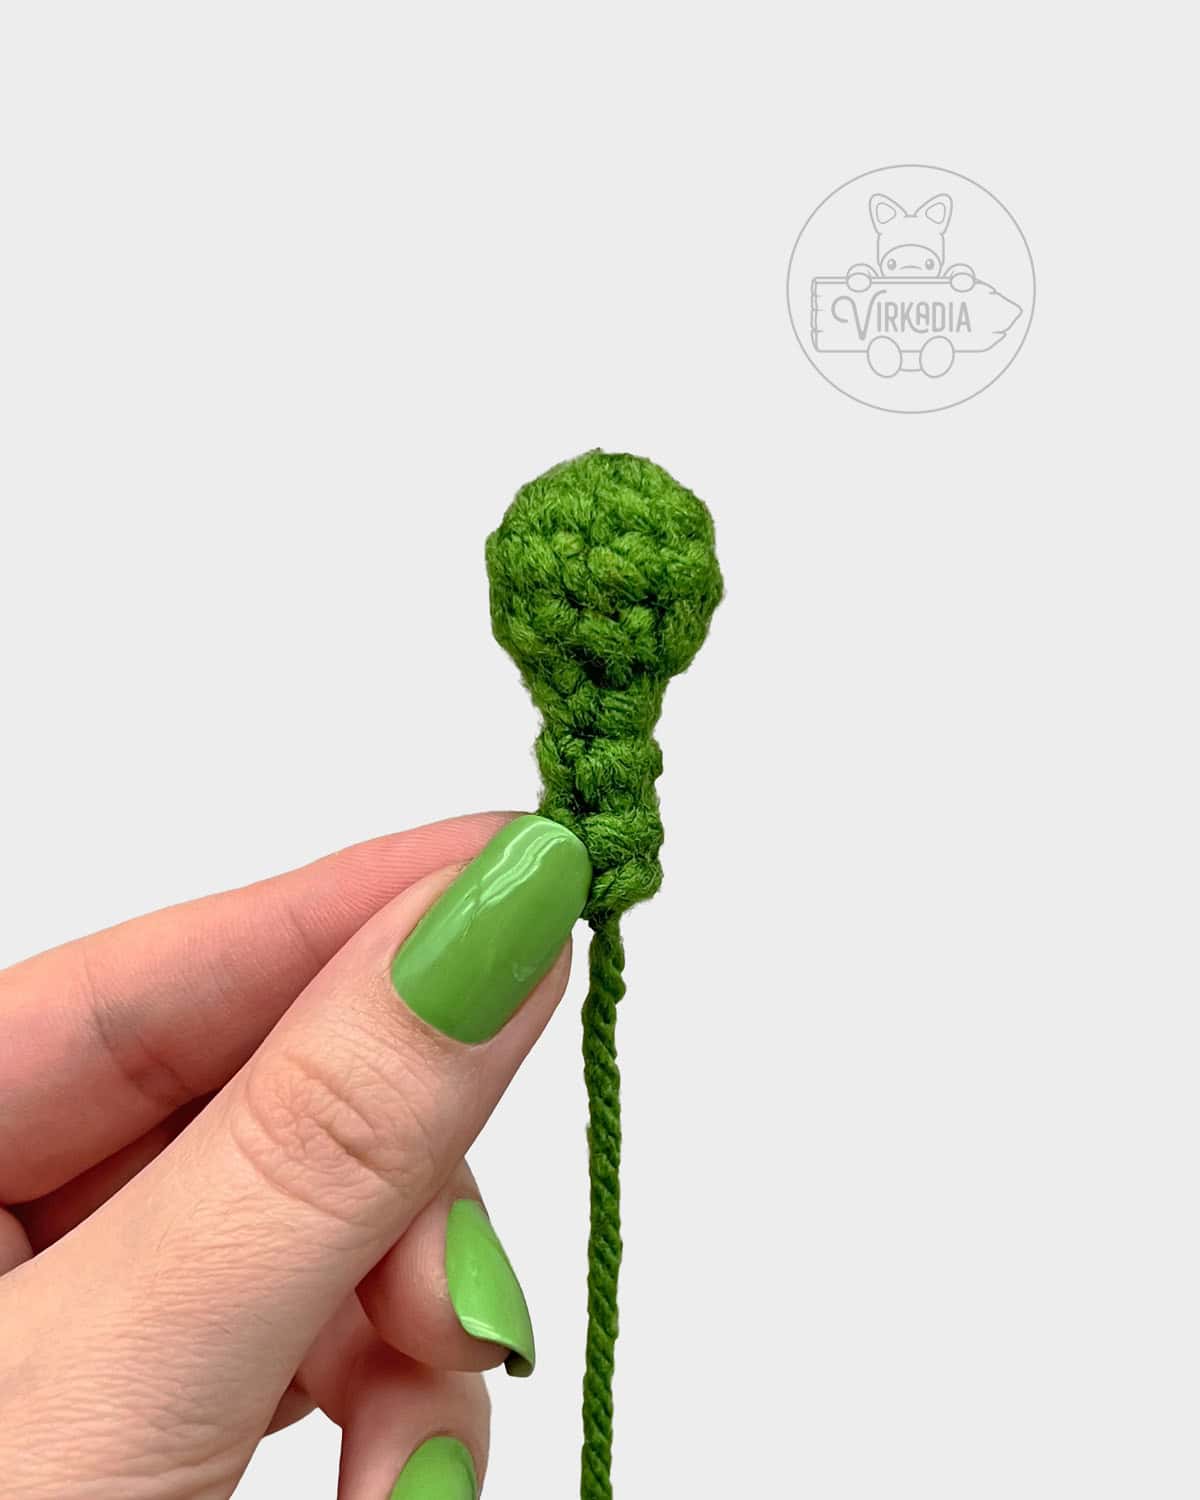
Crochet Little Alien Guy Antennae:
With yarn A (green), make a magic ring (or ch 2, work rnd 1 into 2nd ch from hook).
Rnd 1: 6sc into ring, sl st into 1st st to join, ch 1 (6).
Rnd 2: [1sc into next st, 2sc into next st] 3 times, join, ch 1 (9).
Rnd 3: 1sc into each st around, join, ch 1 (9).
Rnd 4: [sc2tog over next 2 sts, 1sc into next st] 3 times, join, ch 1 (6).
Rnd 5: [1sc into next st, sc2tog over next 2 sts] 2 times, join, ch 1 (4).
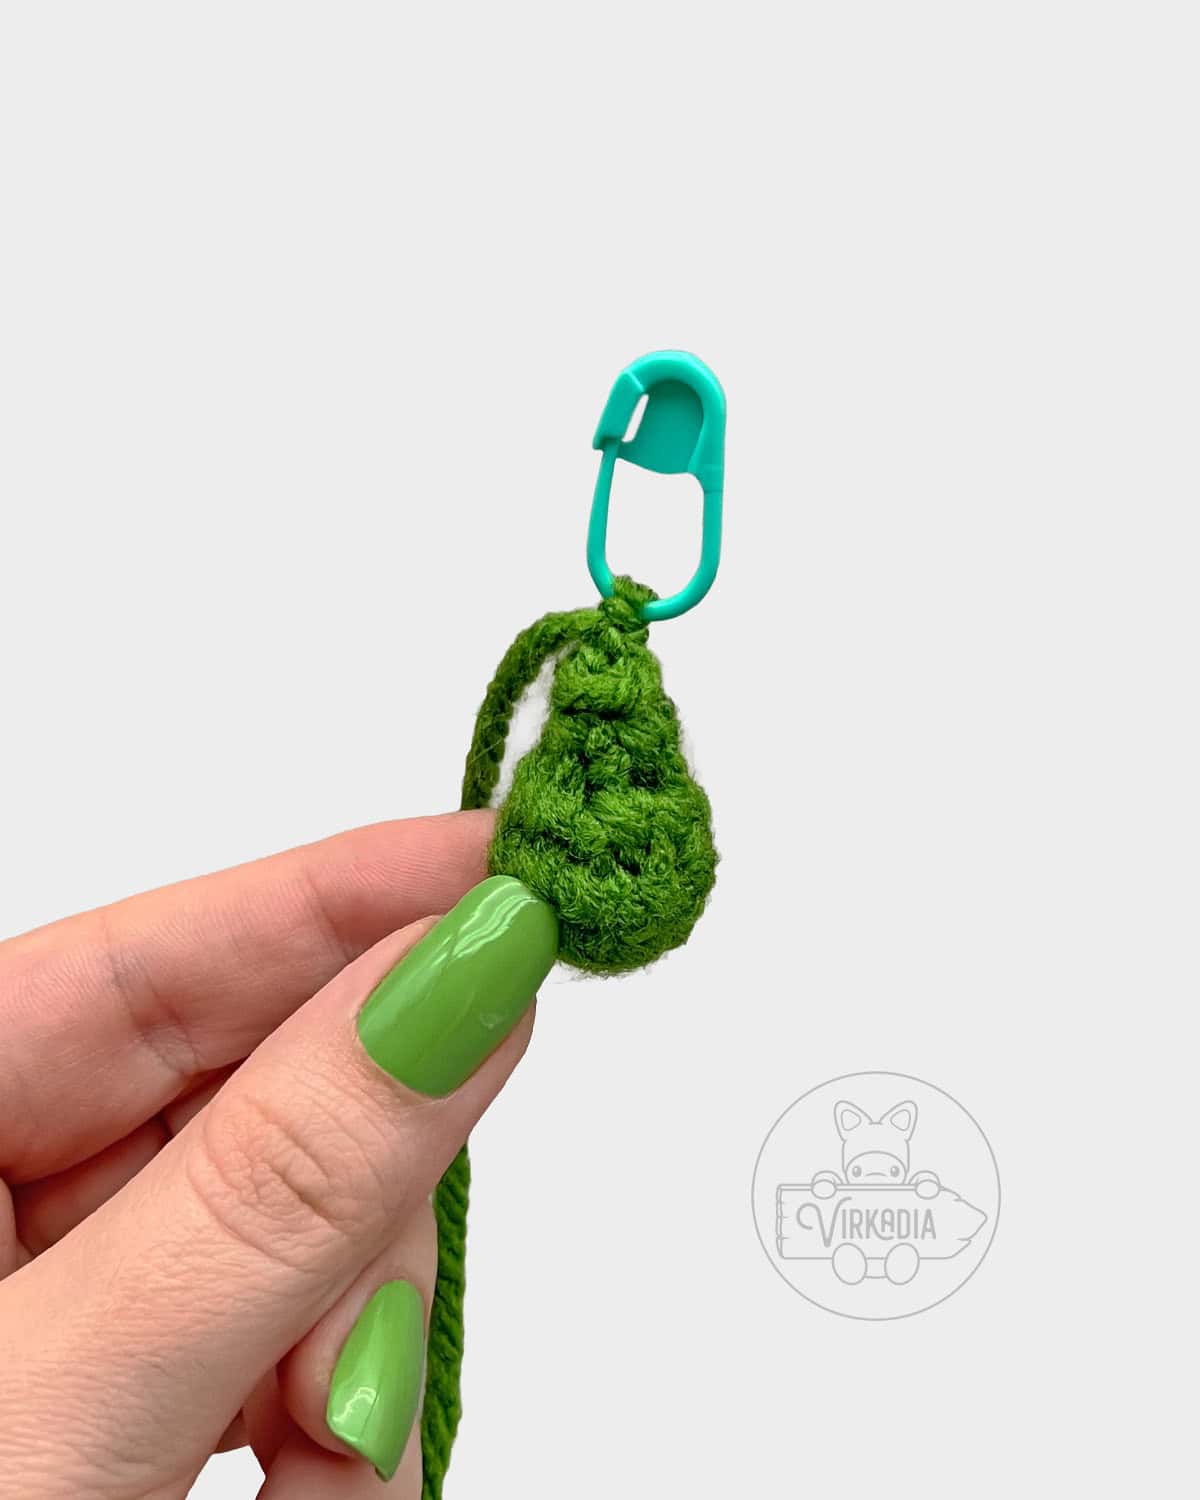
The next two rounds have only 4 stitches in each round, which can be tricky to work into because the round is so small.
After inserting your hook to begin your next stitch, point the head of your hook upward and out of the center hole of the antenna, so that your hook is accessible and you are able to yarn over.
Rnd 6: 1sc into each st around, join, ch 1 (4).
Rnd 7: 1sc into each st around, join (4).
Fasten off yarn A and weave in any remaining tail. Set aside for now.
Repeat rounds 1 to 7, 1 more time, for a total of 2 antennae. Then, continue to your crochet Little Alien Guy hat next.
Crochet Little Alien Guy Hat:
With yarn A (green), make a magic ring (or ch 2, work rnd 1 into 2nd ch from hook).
Rnd 1: 6sc into ring, sl st into 1st st to join, ch 1 (6).
Rnd 2: 2sc into each st around, join, ch 1 (12).
Rnd 3: [1sc into next st, 2sc into next st] 6 times, join, ch 1 (18).
Rnd 4: [2sc into next st, 1sc into each of next 2 sts] 6 times, join, ch 1 (24).
Rnd 5: [1sc into each of next 7 sts, 2sc into next st] 3 times, join, ch 1 (27).
Rnd 6: 1sc into each st around, join, ch 1 (27).
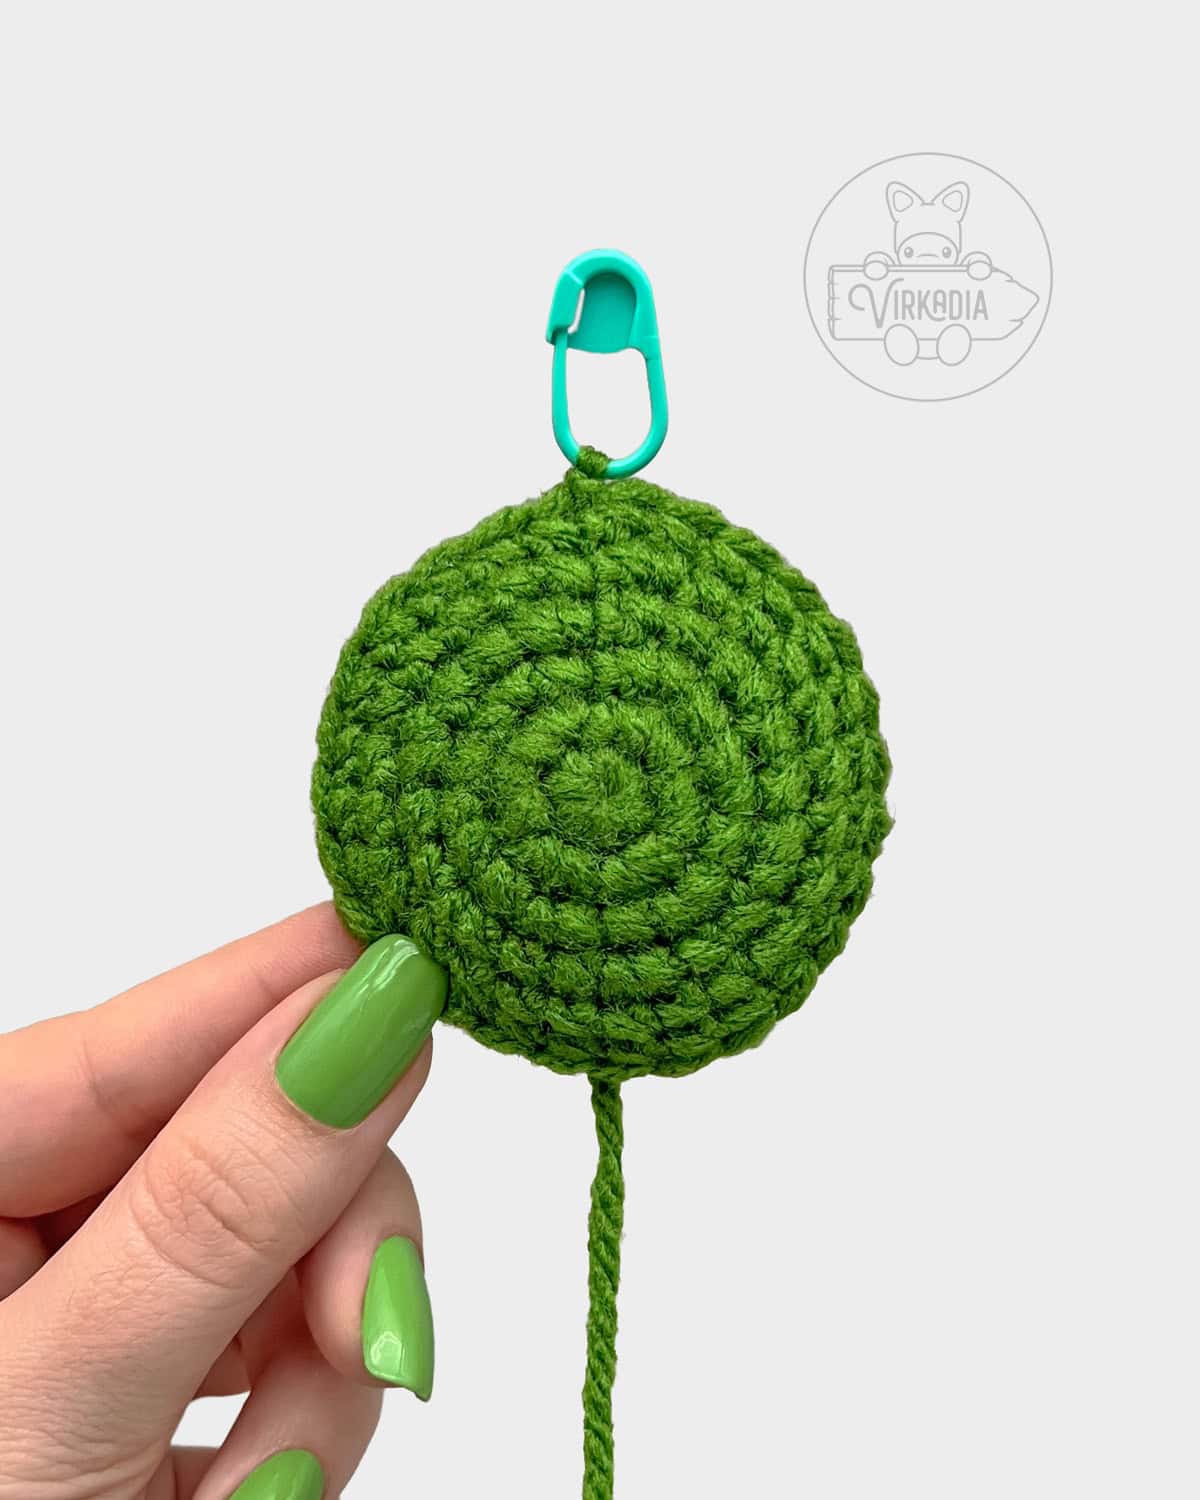
Retrieve both antennae that you’ve set aside earlier and keep them on standby.
During round 7, we will begin attaching the antennae onto the hat by working some stitches through both the last round of an antenna and the current round of the hat simultaneously.
Before attaching, align each antenna in front of the hat, so that your hook is inserted into the antenna first, then the hat second.
Additionally, for the next round, you will be working into the back 2 stitches (from inside to outside) of round 7 of the antenna, leaving the front 2 stitches empty.
The following round will then repeat the same sequence again, except that you will work into the 2 front stitches (this time, from outside to inside) of the antenna that you omitted during round 7 of the hat.
Alternatively, if you have trouble with this method, you may instead work two normal rounds of single crochet stitches (1sc into each st around, join, ch 1).
Afterwards, the antennae may then be sewn on individually, using a length of yarn A, over top of round 7 and 8 of the hat.
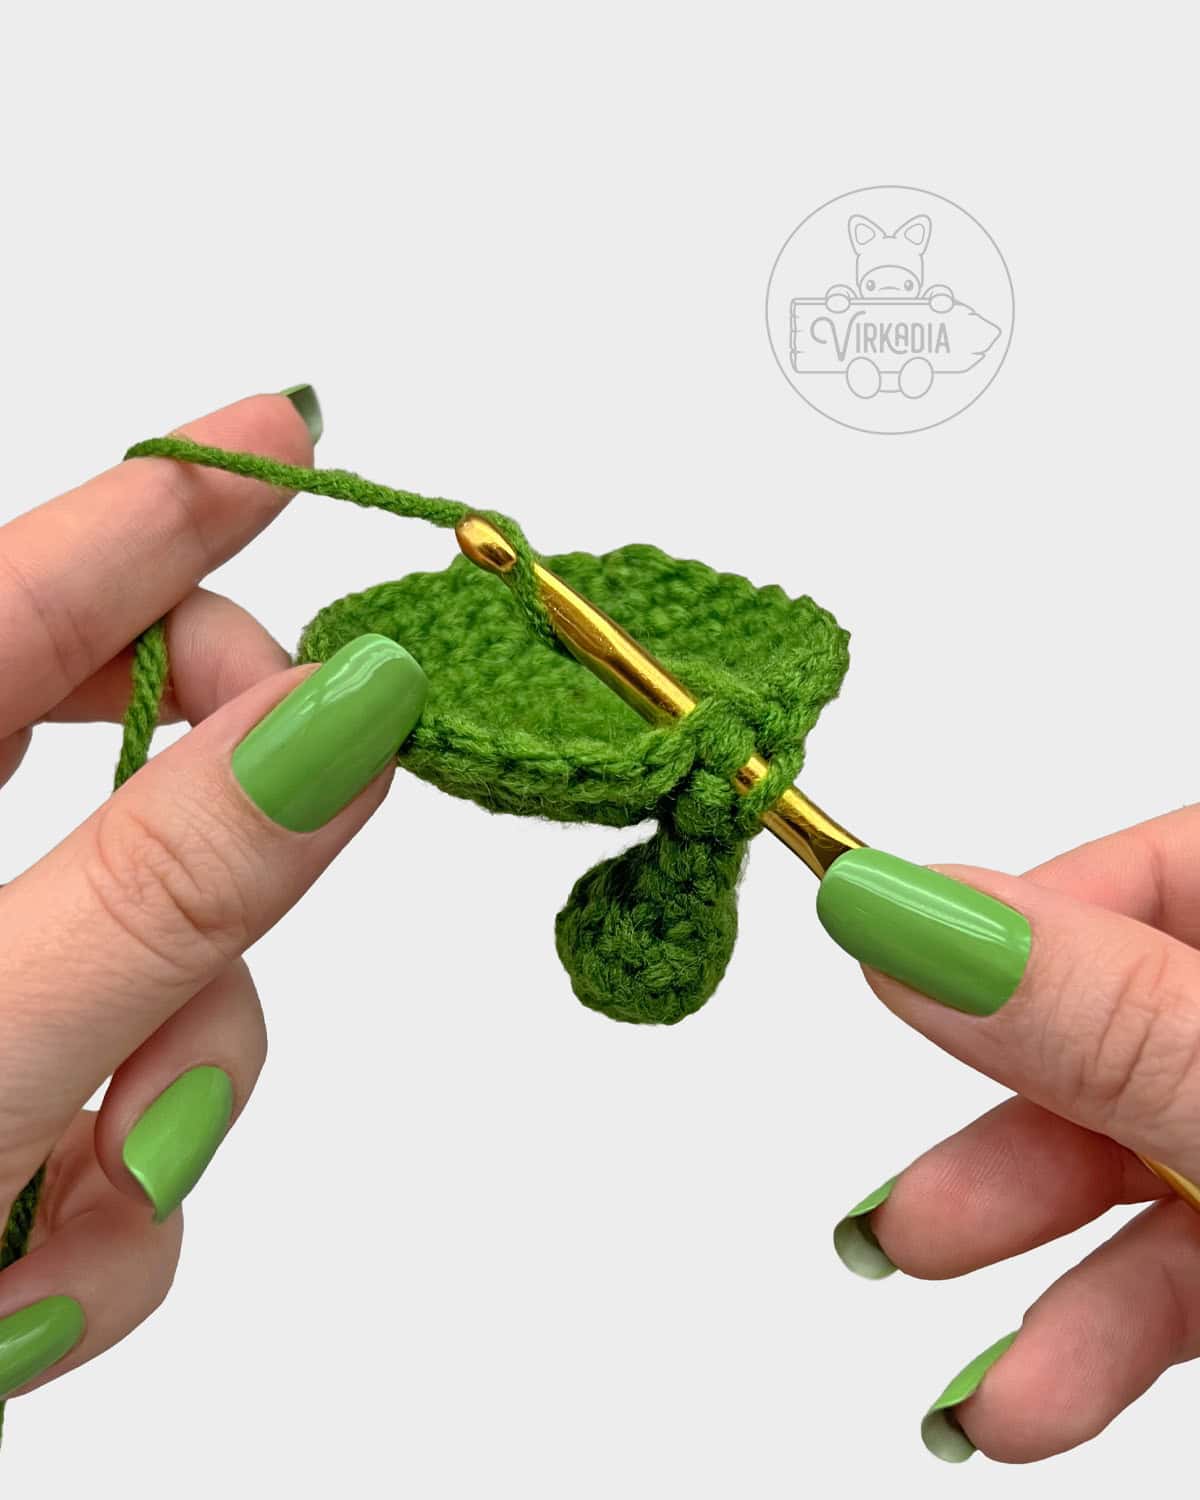
Rnd 7: 1sc into each of next 9 sts of hat only, 1sc into each of next 2 sts of both 1st antenna and hat together, 1sc into each of next 5 sts of hat only, 1sc into each of next 2 sts of both 2nd antenna and hat together, 1sc into each of next 9 sts of hat only, join, ch 1 (27).
Rnd 8: repeat rnd 7 (27).
Rnd 9: 1sc into each st around, join, ch 1 (27).
Rnd 10: 1sc into each st around, join, ch 2 (27).
Rnd 11: 1sc into each st around, join (27).
Fasten off and weave in any remaining tails.
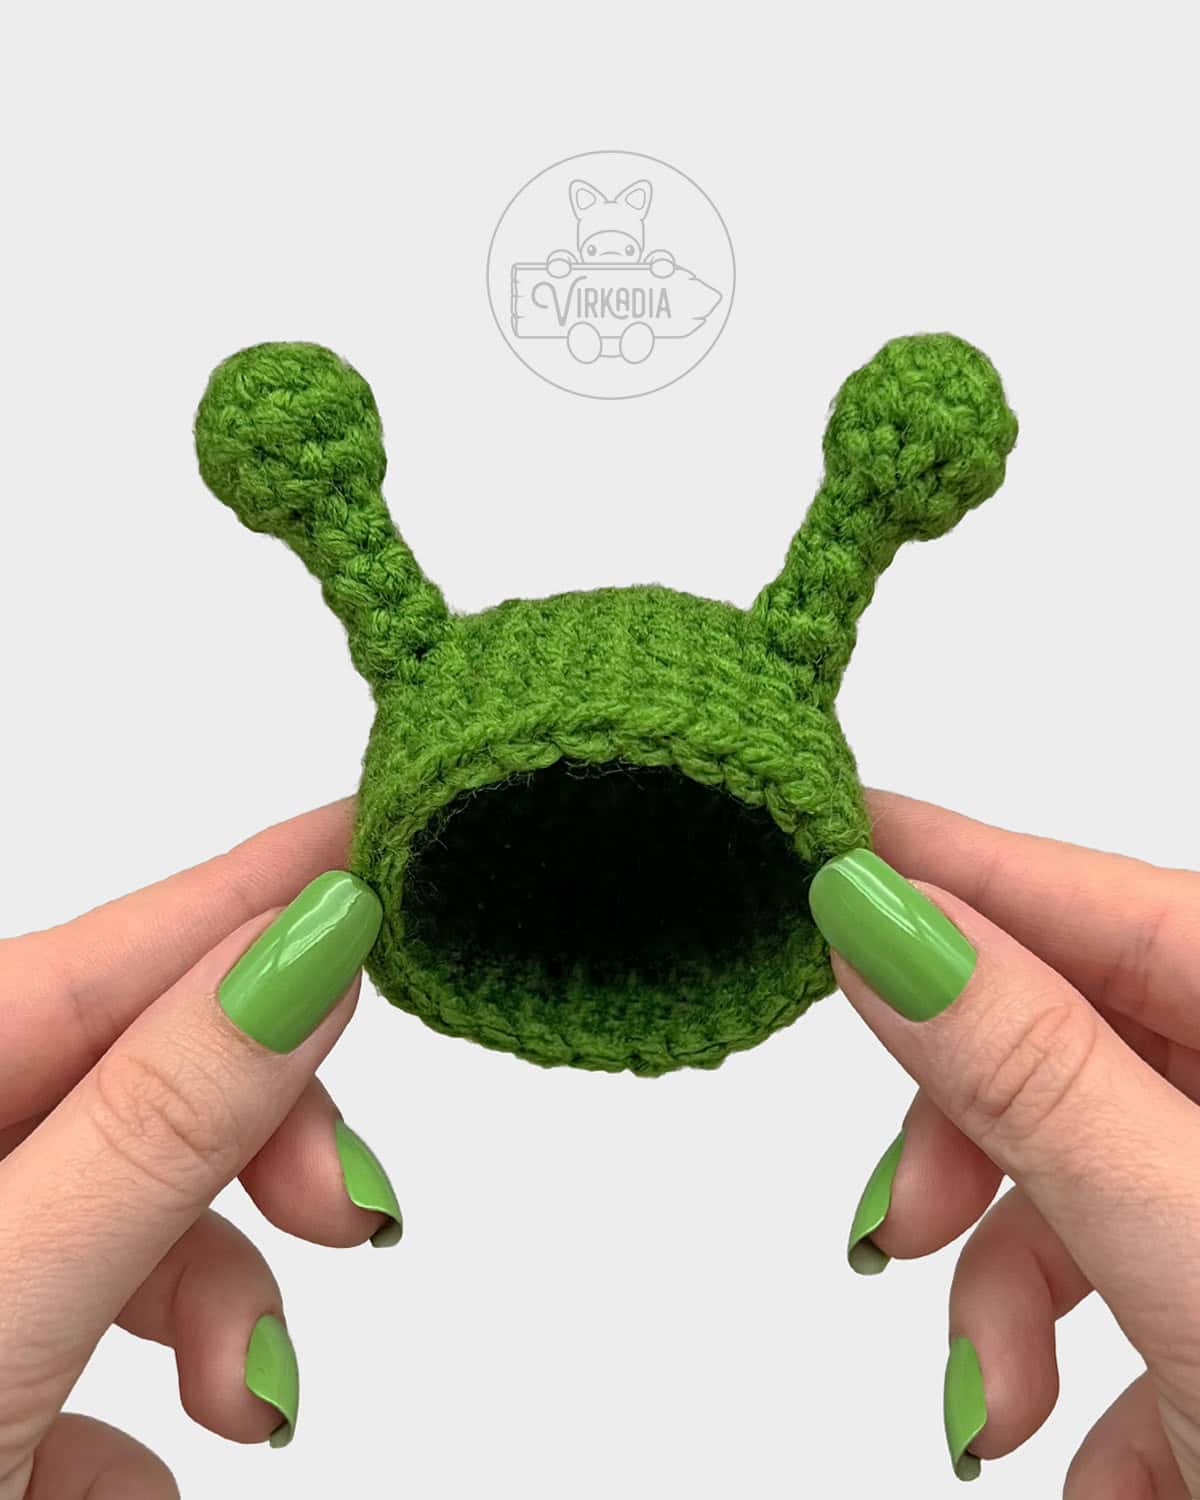
Set aside for now and continue to the bottom layer of the crochet Little Alien Guy UFO next.
Crochet UFO - Bottom Layer:
With yarn B (gray), make a magic ring (or ch 2, work rnd 1 into 2nd ch from hook).
Rnd 1: 6sc into ring, sl st into 1st st to join, ch 1 (6).
Rnd 2: 2sc into each st around, join, ch 1 (12).
Rnd 3: [1sc into next st, 2sc into next st] 6 times, join, ch 1 (18).
Rnd 4: [2sc into next st, 1sc into each of next 2 sts] 6 times, join, ch 1 (24).
Rnd 5: [1sc into each of next 3 sts, 2sc into next st] 6 times, join, ch 1 (30).
Rnd 6: [2sc into next st, 1sc into each of next 4 sts] 6 times, join (36).
Fasten off and leave a short tail for tying.
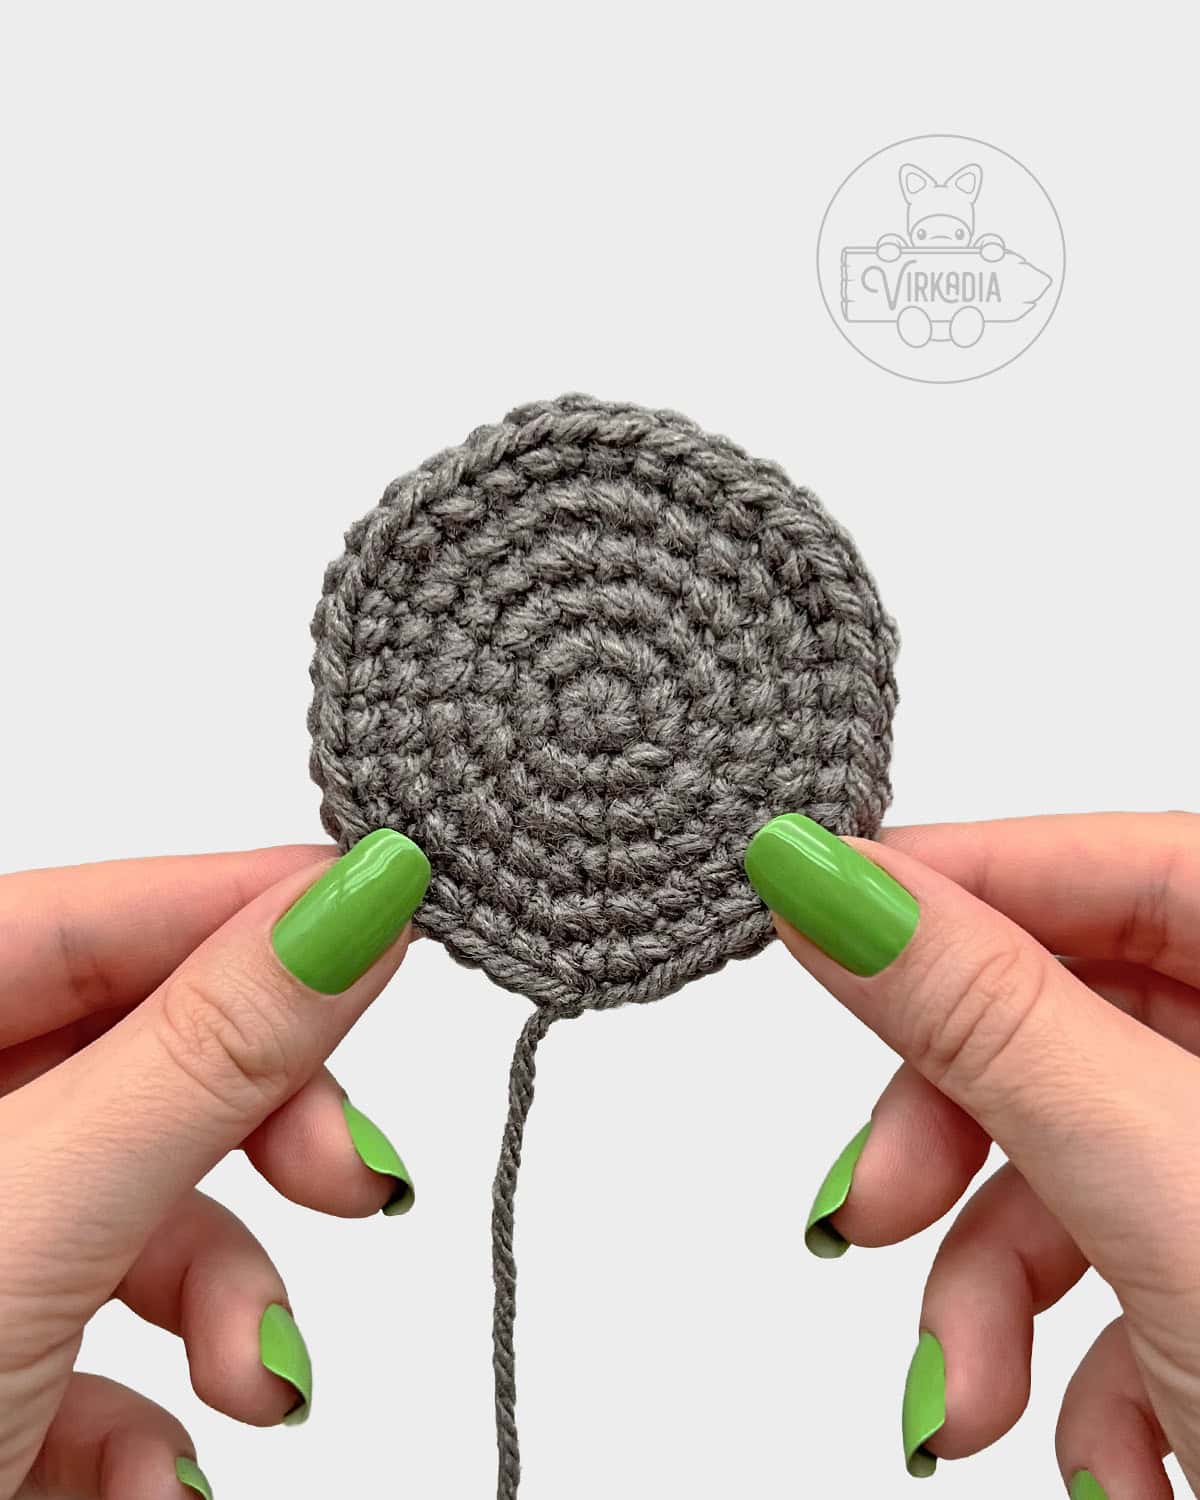
Set aside for now and continue to the top layer of the crochet UFO next.
Crochet UFO - Top Layer:
With yarn C (light blue), make a magic ring (or ch 2, work rnd 1 into 2nd ch from hook).
Rnd 1: 6sc into ring, sl st into 1st st to join, ch 1 (6).
Rnd 2: 2sc into each st around, join, ch 1 (12).
Rnd 3: 1sc into each st around, join, ch 1 (12).
Rnd 4: 1sc into each st around, join (12).
Fasten off yarn C and leave a short tail for tying.
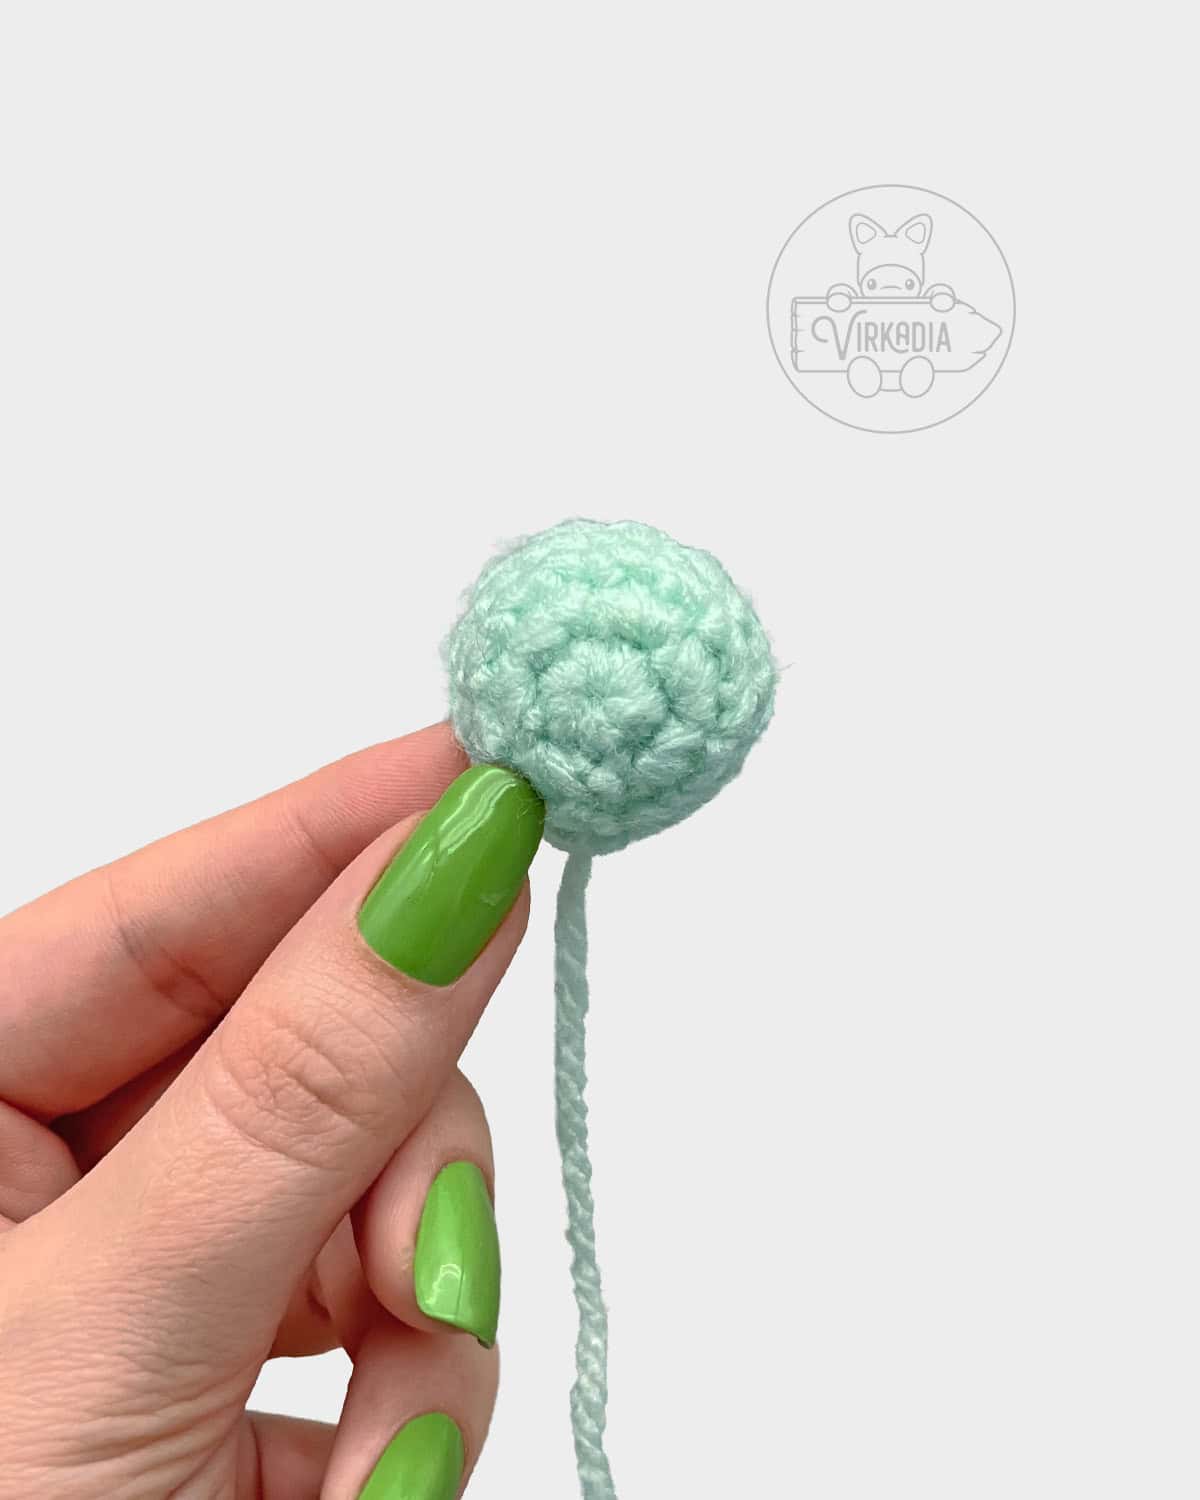
Join yarn B (gray) by inserting your hook into the first stitch of your next round. Pull up a loop of yarn B and chain 1.
Tie the tails of both yarn B and yarn C together on the interior of your piece to secure your ends, then trim any excess length.
Rnd 5: [2sc into next st, 1dc into next st] 6 times, join, ch 1 (18).
Rnd 6: [1sc into next st, 2sc into next st, 1FPdc around next st] 6 times, join, ch 1 (24).
Rnd 7: [2sc into next st, 1sc into each of next 2 sts, 1FPdc around next st] 6 times, join, ch 1 (30).
Rnd 8: [1sc into each of next 3 sts, 2sc into next st, 1FPdc around next st] 6 times, join, ch 1 (36).
Retrieve the bottom layer of your crochet UFO that you’ve set aside earlier and place it behind your top layer.
For best results, make sure that the joining seam of both layers are facing the same way. Additionally, double-check that the right side of the bottom layer is facing outwards before continuing.
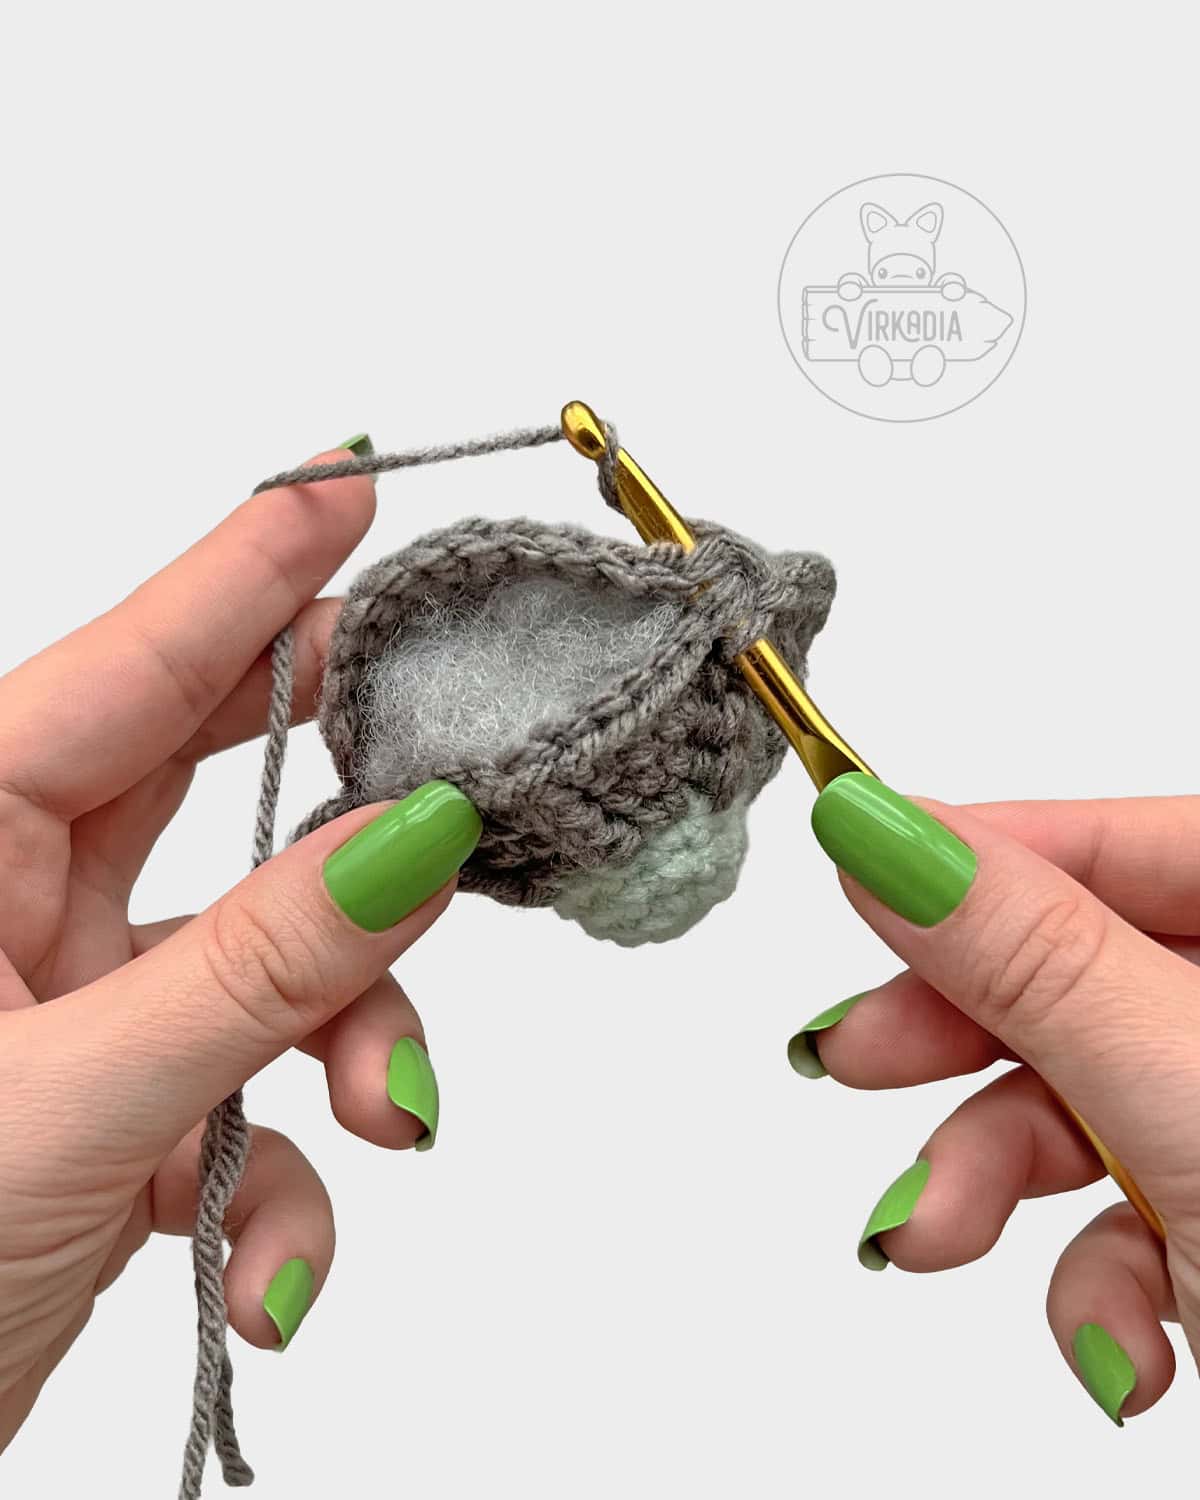
Round 9 will be worked through both layers of the UFO simultaneously, in order to join them together.
Begin lightly stuffing your piece as you join and continue to add more stuffing until the round is completely closed, taking care not to overstuff your piece.
Rnd 9: in both layers around, [2sc into next st, 1sc into each of next 5 sts] 6 times, join (42).
Fasten off yarn B and leave a short tail for tying.
Tie the end tails from both the top and bottom layers together, then weave in any excess length.
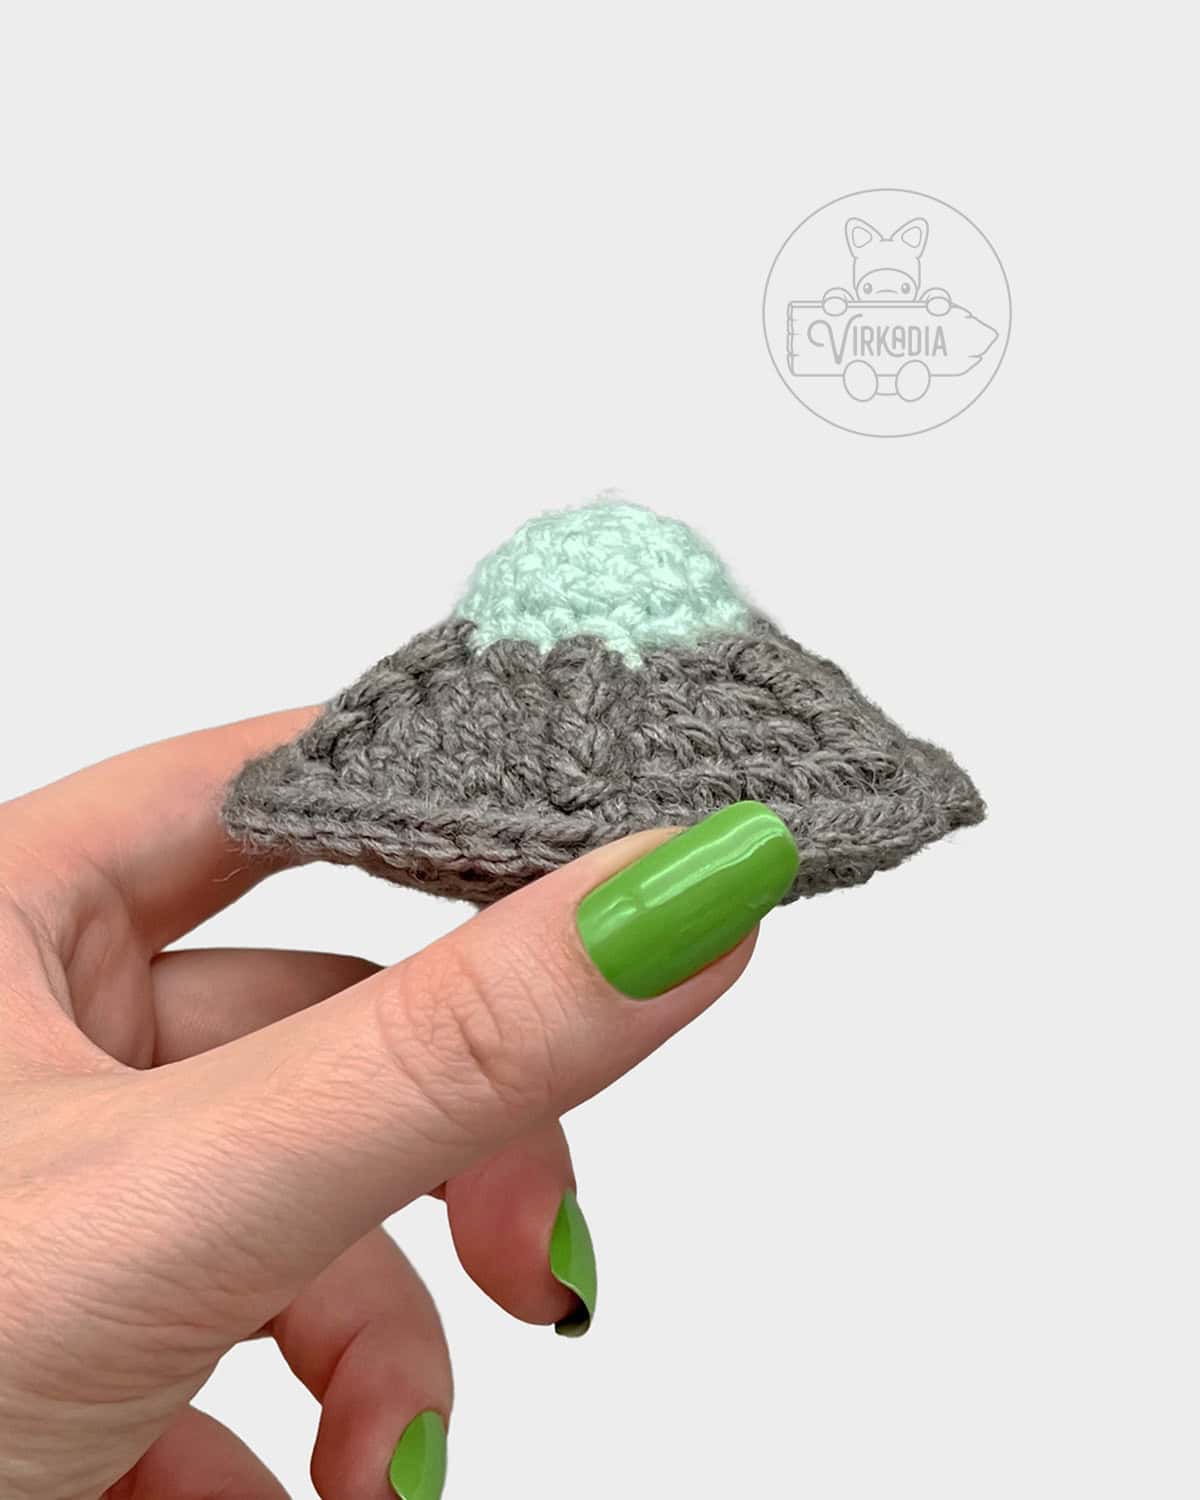
Assembling Pieces:
To assemble all pieces together, begin by taking the alien hat that you’ve set aside earlier and pushing it down on top of the head until it is secure.
The crochet UFO can be posed next to your crochet Little Alien Guy, or you may modify it into an interactive toy, instead.
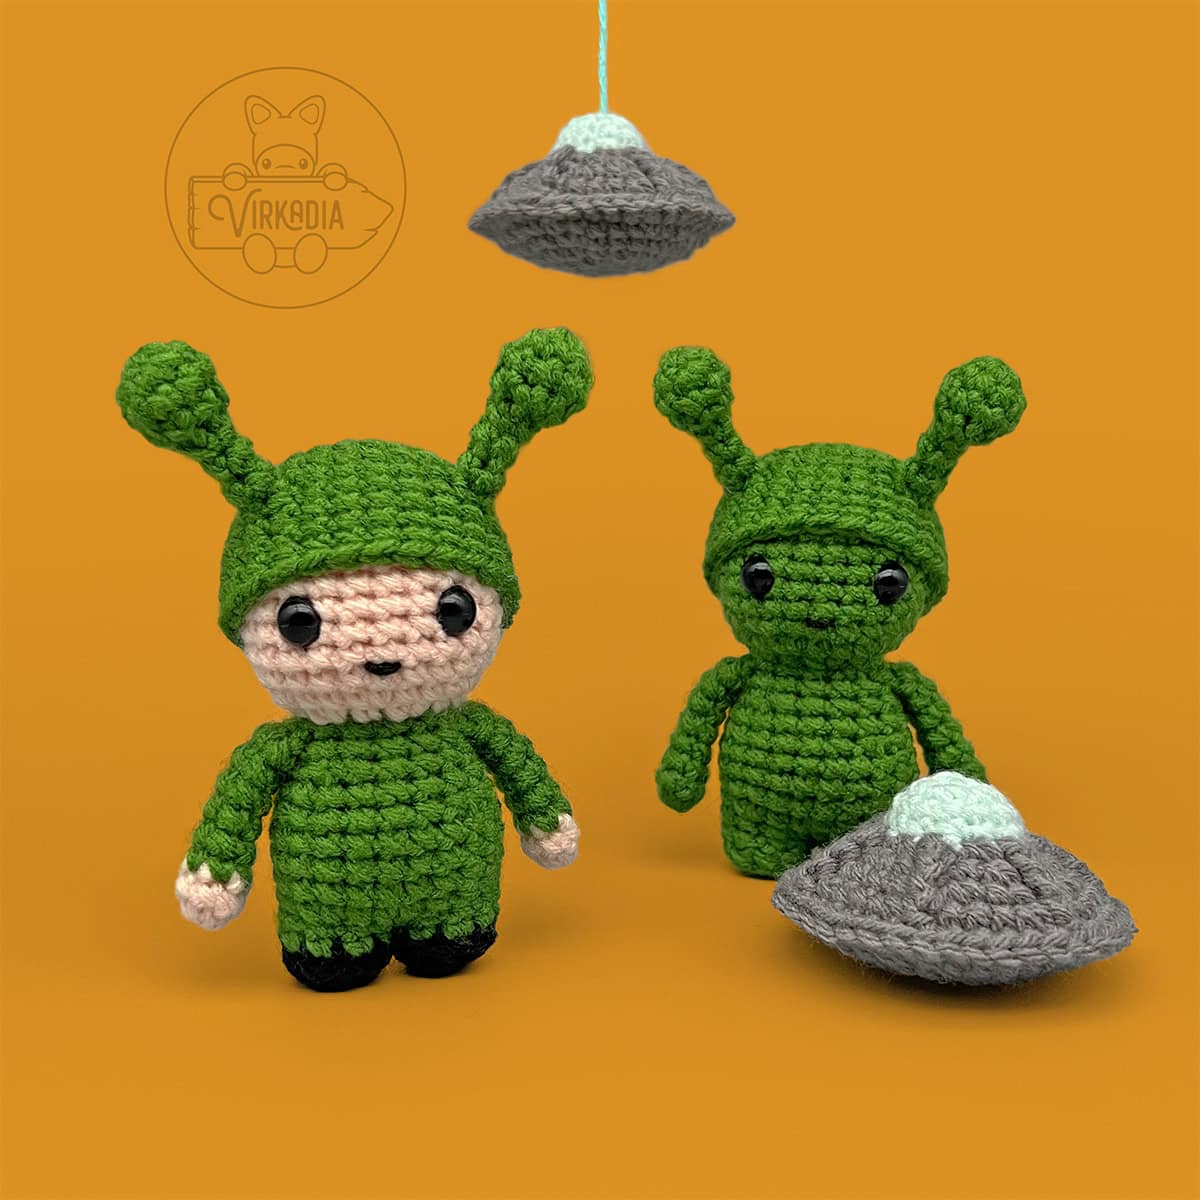
For example, you could sew a length of string or fishing line onto the top of the UFO, then tie it onto a small stick or dowel rod so that it can be waved around.
Alternatively, you can also attach the UFO onto the top of a piece of thick, sturdy wire or a dowel rod, add a base onto the bottom, then pose your floating UFO next to your crochet Little Alien Guy as a stationary accessory.
Conclusion | Free Crochet Little Alien Guy
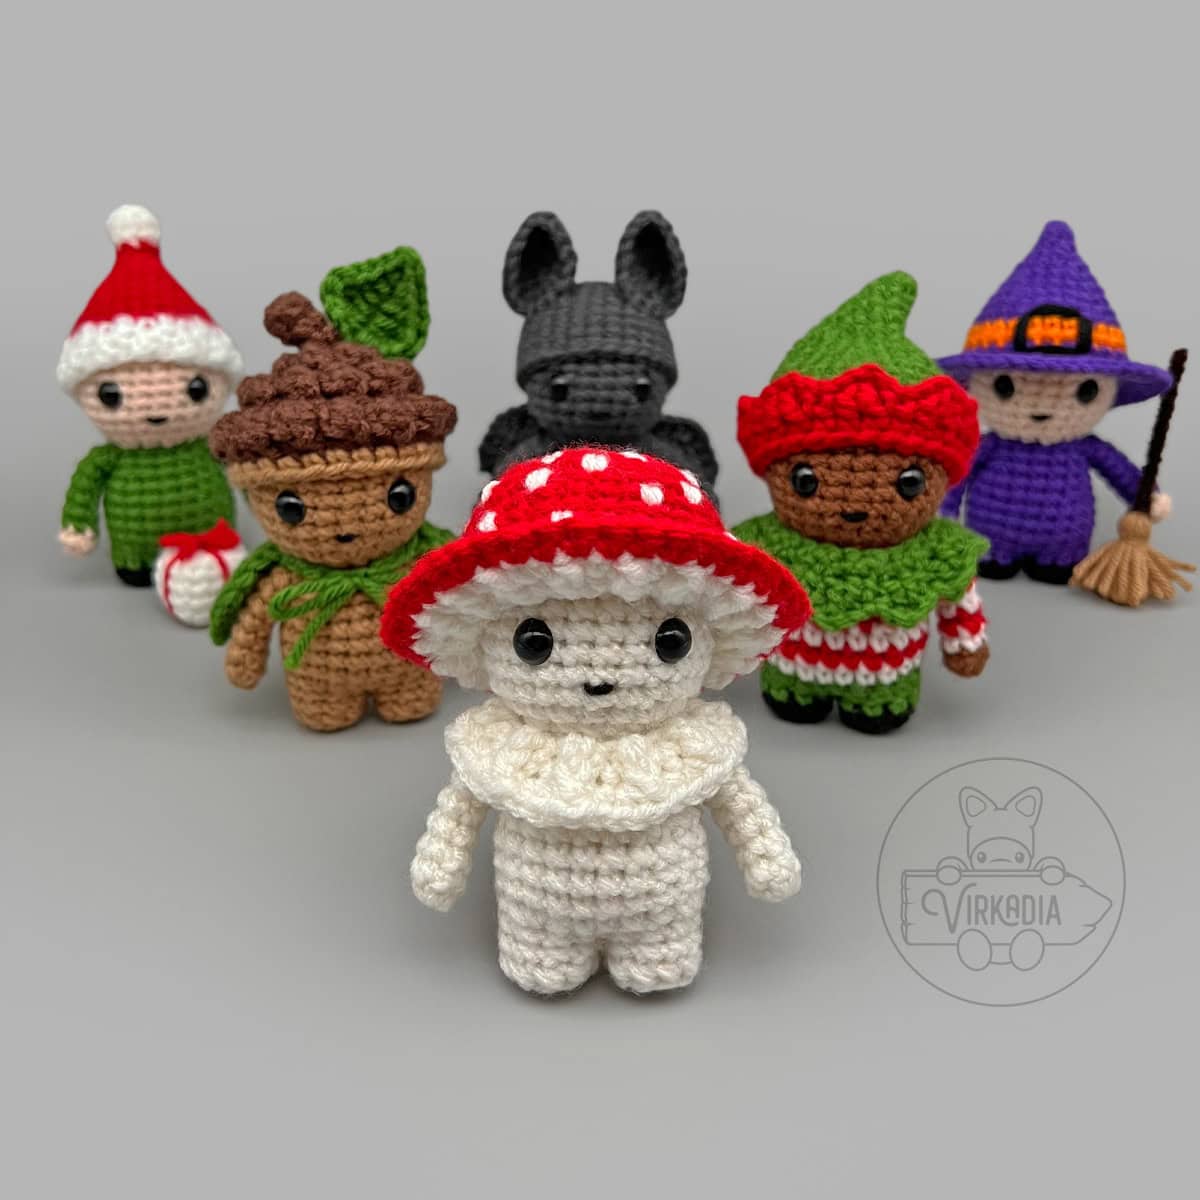
And with that, you’re done the free crochet Little Alien Guy pattern! If you enjoyed this pattern, be sure to check out our full library of mix-and-match clothing and accessories for your buddy in our Little Crochet Guy collection!
You can also explore the Cutie Collections and the Pocket Pets archives for more original and free amigurumi patterns, or our Home Decor Patterns for other homemade household goodies!
If you’re looking to cozy up with a longer project, check out our Clothing Patterns, or assemble your own designs from one of our Granny Square Patterns!
And don’t forget to browse our downloadable, ad-free patterns in our Etsy store!
Follow Virkadia on Instagram to stay updated on all new and upcoming patterns, crochet content, and amigurumi adventures! Thank you for all of your support!
Hey hey, I'm Joey Diehl!
I am the fiber artist behind Virkadia! I have a BFA in Fibers & Material Studies and have been crocheting for over 20 years. I have designed, photographed, and written dozens of original crochet patterns that I am honored to have been shared to hundreds of thousands of readers.
Leave a Reply