Baked into from this free crochet terracotta pot amigurumi pattern are all the sunny scenes of sweet springtime—the air awakening with a yawn of warm breeze, the sky stretching its arms of sunny golden rays, and the Earth tossing back a colorful blanket of fresh blooms across the horizon.
While you bask in the fresh floral breeze of sunny springtime, there’s no better way to celebrate the rebirth of the earth than with this free crochet terracotta pot amigurumi pattern!
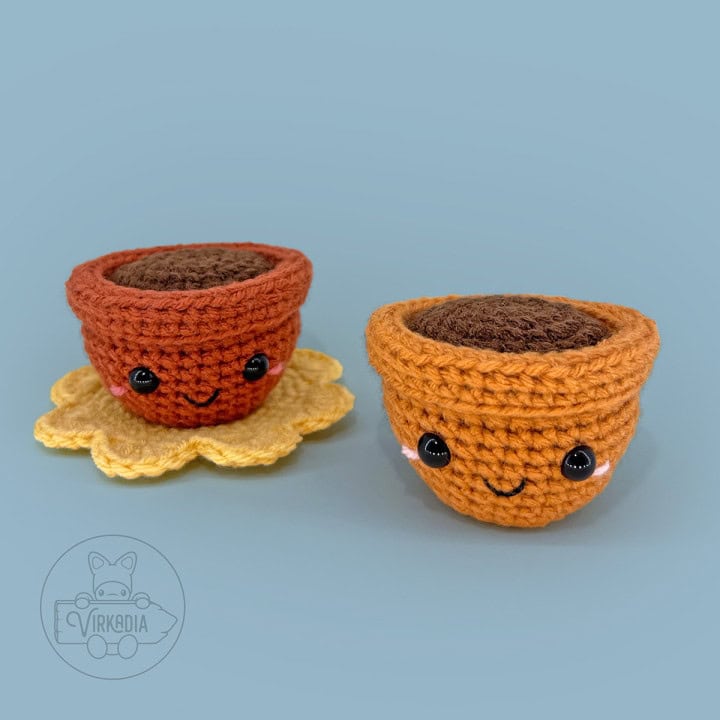
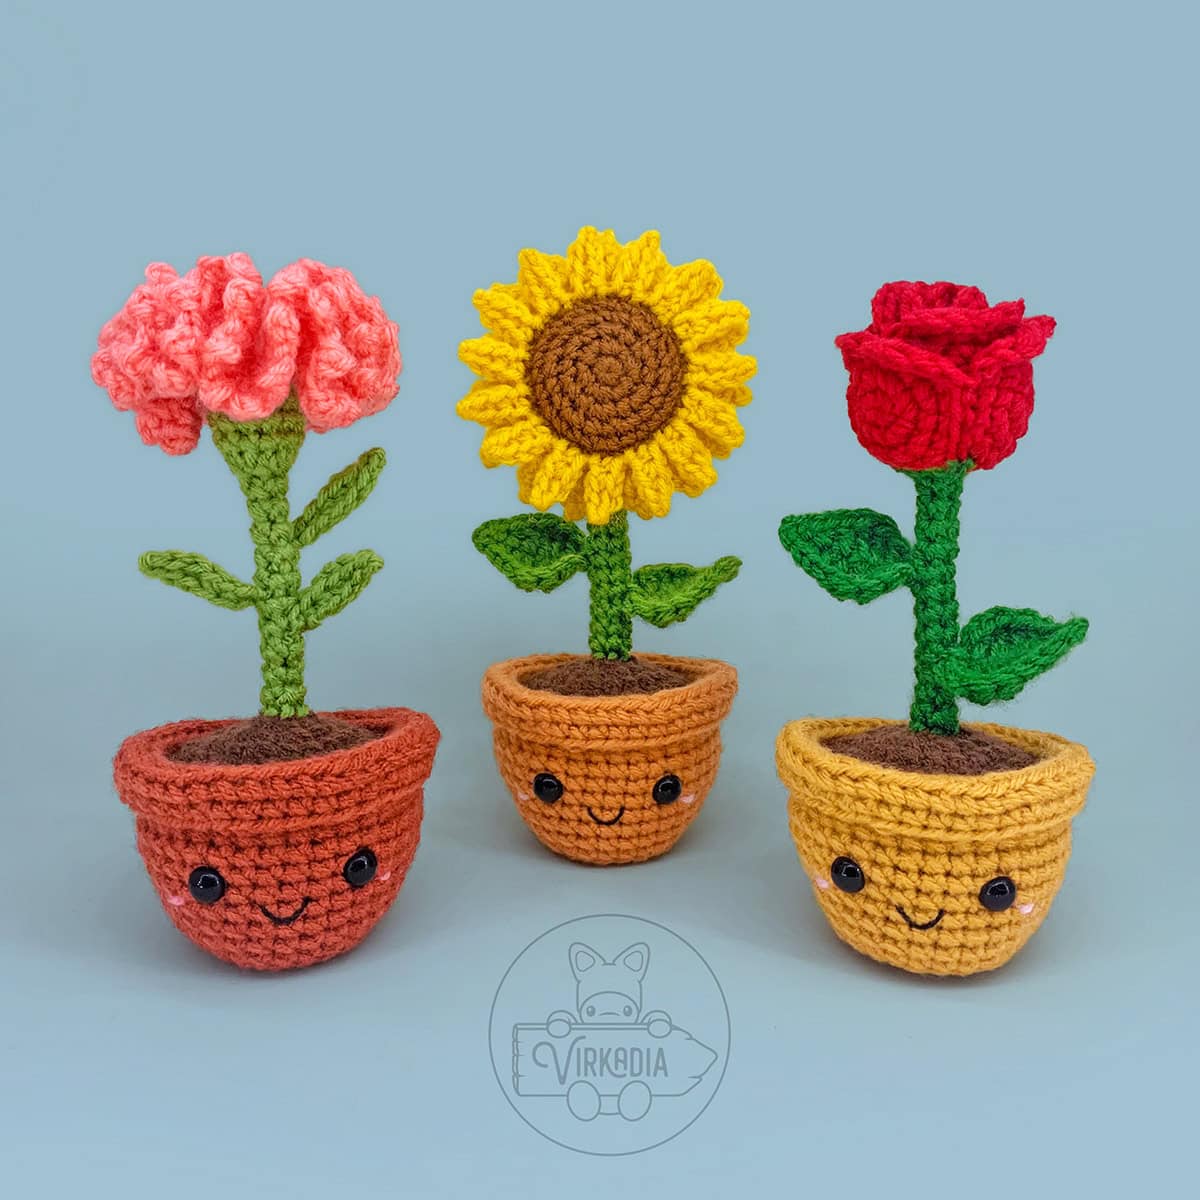
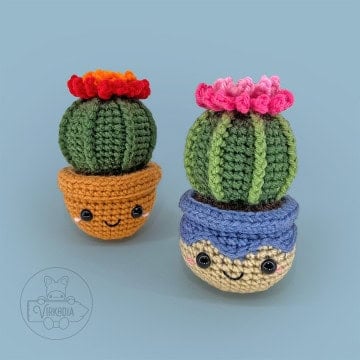
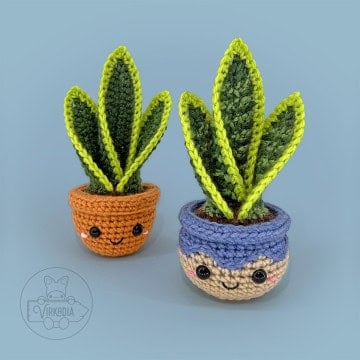
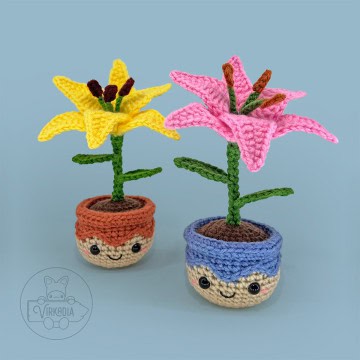
So, without further ado, here is the pattern for the Terracotta Pot Cutie—compatible with our entire library of Flower Cuties and Plant Cuties!
Pattern Information | Free Crochet Terracotta Pot Amigurumi
This free crochet terracotta pot amigurumi pattern has a difficulty rating of intermediate.
The finished dimensions are 2.25 inches (height) by 3.25 inches (width) by 3.25 inches (depth) before adding your chosen flower.*
You may also make your pieces larger or smaller by increasing or decreasing your yarn weight and/or hook size, respectively.
*Finished dimensions are calculated from a model using medium weight yarn, a size H-8 (5 mm) crochet hook, the YU/YO method and the following gauge: 18 sc x 21 rows = 4 inches.
Supplies:
- Size H-8 (5 mm) crochet hook
- Medium (4) weight yarn in 2 colors:
- Yarn A – brown (example uses Loops & Threads Soft Classic: Mocha)
- Yarn B – orange (example uses Caron One Pound: Faded Brick)
- 10mm black safety eyes (x2)
- Black embroidery floss
- Pink embroidery floss or pink yarn (example uses Red Heart Super Saver: Baby Pink)
- Polyester fiberfill
- Yarn needle
- Scissors
- Stitch markers
Terminology:
This free crochet terracotta pot amigurumi pattern uses English (US) terminology:
- st (sts) = stitch (stitches)
- ch = chain stitch
- sl st = slip stitch
- sc = single crochet
- sc2tog = single crochet 2 together (over the span of 2 stitches), also known as a decrease
- FLO = front loop only
- BLO = back loop only
Please note that this pattern is written so that each crochet stitch abbreviation is attached to a number, such as 1sc, 2sc, etc. This number denotes how many of that stitch is to be worked into the same stitch.
You can learn more about how to read Virkadia patterns on our Pattern Help FAQ page!
Special Stitch Instructions:
Please review our special stitch instructions on our Stitch Tutorials FAQ before beginning, as some techniques may be unique to this pattern.
You can also watch our amigurumi techniques video tutorial for all of our tips and tricks for improving your project!
This free crochet terracotta pot amigurumi pattern uses the following special stitch tutorials:
- Single Crochet (YU/YO Method)
- Invisible Decrease
- Joining Rounds
This pattern is worked in the round, with each round joined at the end with a slip stitch. Unless otherwise instructed, the first stitch of your next round will always be worked into the same stitch as your joining slip stitch has been worked into.
Be sure to always keep the ‘right side’ of your stitches facing outwards as you work. The right side is the front side of the stitch that is facing you as you are completing each stitch.
Pattern Instructions | Free Crochet Terracotta Pot Amigurumi
Crochet Pot Dirt – Rounds 1 to 5:
If you are continuing along from a Flower Cutie or Plant Cutie pattern, be sure to refer to that specific pattern for its unique pot dirt instructions. Then, you may skip ahead to round 1 of your crochet terracotta pot.
The example pot used for this tutorial will be using a dirt pattern with a 6 chain hole in the center, as seen below.
With yarn A (brown), leave a tail for sewing and chain 6. Slip stitch into the first chain to form a circle and chain 1.
Rnd 1: 2sc into each ch around, sl st into 1st st to join, ch 1 (12).
Rnd 2: [1sc into next st, 2sc into next st] 6 times, join, ch 1 (18).
Rnd 3: [2sc into next st, 1sc into each of next 2 sts] 6 times, join, ch 1 (24).
Rnd 4: [1sc into each of next 3 sts, 2sc into next st] 6 times, join, ch 1 (30).
Rnd 5: [2sc into next st, 1sc into each of next 4 sts] 6 times, join (36).
Fasten off yarn A and leave a short tail for tying.

Crochet Terracotta Pot – Rounds 1 to 7:
Join yarn B (orange) by inserting your hook into the front loop only of the first stitch of your next round.
Leaving a long beginning tail (~2 ft) for sewing, pull up a loop of yarn B and ch 1.
Rnd 1: 1sc into FLO of each st around, join, ch 1 (36).
Rnd 2: 1sc into each st around, join, ch 1 (36).
Rnd 3: in BLO of each st around, [1sc into each of next 5 sts, 2sc into next st] 6 times, join, ch 1 (42).
Rnd 4: 1sc into BLO of each st around, join, ch 1 (42).
Rnd 5: 1sc into each st around, join, ch 1 (42).
Rnd 6: in BLO of each st around, [sc2tog over next 2 sts, 1sc into each of next 5 sts] 6 times, join, ch 1 (36).
Rnd 7: 1sc into FLO of each st around, join, ch 1 (36).
Secure your working loop with a stitch marker and follow the directions below for sewing the rim of the crochet terracotta pot before continuing to round 8.
Crochet Terracotta Pot – Sewing the Rim:
Flip your work and locate the two rounds of loops (the back loops from the last round of the dirt and the back loops from round 5 of the pot) that are left over on the interior of your crochet terracotta pot.
With your long (~2 ft) beginning tail of yarn B, sew these two rounds of back loops only together around the entire circumference of the pot in order to seal off your rim.

Then, secure with a knot on the interior of your piece using the short end tail of yarn A and trim any excess tail.
Remove the stitch marker from your working loop and continue to round 8 of your crochet terracotta pot below.
Crochet Terracotta Pot – Rounds 8 to 14:
Rnd 8: 1sc into each st around, join, ch 1 (36).
Rnd 9: [sc2tog over next 2 sts, 1sc into each of next 16 sts] 2 times, join, ch 1 (34).
Rnd 10: [1sc into each of next 15 sts, sc2tog over next 2 sts] 2 times, join, ch 1 (32).
Rnd 11: [sc2tog over next 2 sts, 1sc into each of next 14 sts] 2 times, join, ch 1 (30).
Rnd 12: [1sc into each of next 13 sts, sc2tog over next 2 sts] 2 times, join, ch 1 (28).
Rnd 13: [sc2tog over next 2 sts, 1sc into each of next 12 sts] 2 times, join, ch 1 (26).
Rnd 14: [1sc into each of next 11 sts, sc2tog over next 2 sts] 2 times, join, ch 1 (24).
Secure your working loop with a stitch marker and follow the directions below for adding the eyes, mouth, and blush onto your crochet terracotta pot before continuing to round 15.
Adding Eyes:
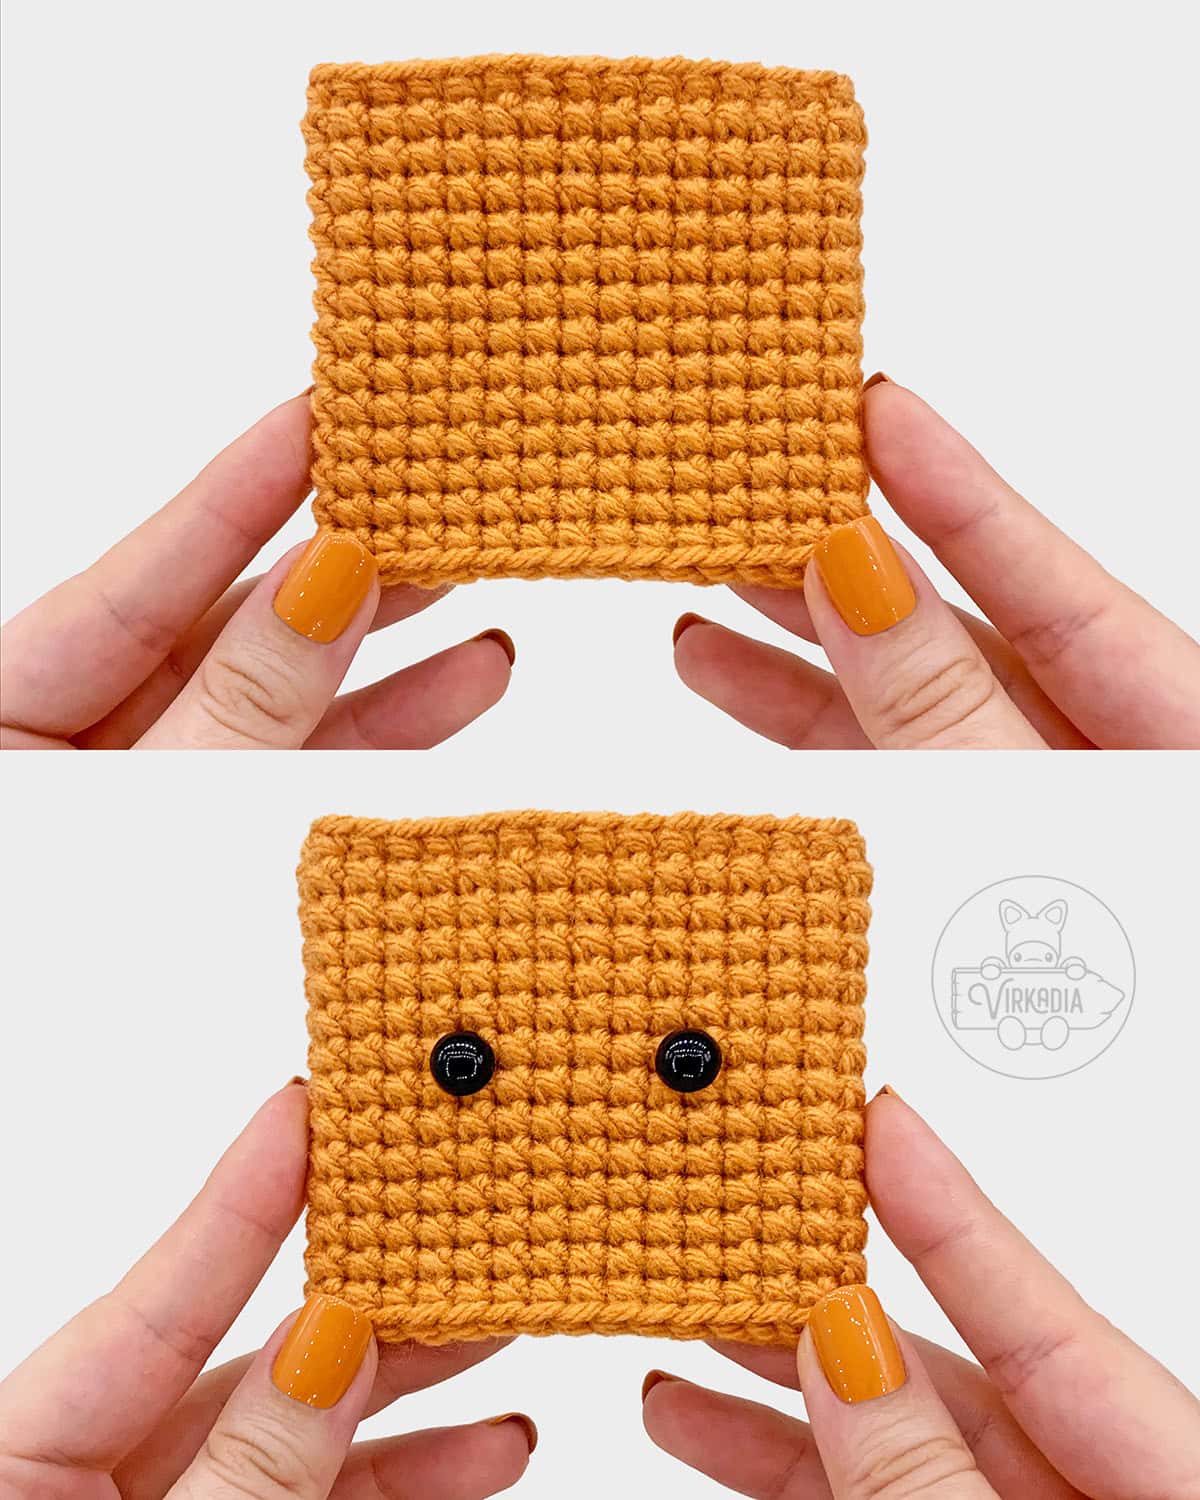
Using the example piece below as reference, insert both safety eyes through the center of the front of your crochet flower pot (a quarter-turn before your joining seam).
The safety eyes should be inserted between rounds 9 and 10 and should sit 6 stitches apart.
Adding Mouth:
Rotate your piece so that the beginning rounds face upwards and your last round faces downwards.
Using the example piece below as reference, embroider a mouth using black embroidery floss.
The mouth should be embroidered over top of round 11 and be centered between the eyes. The mouth will be 2 stitches wide and 1 round tall.
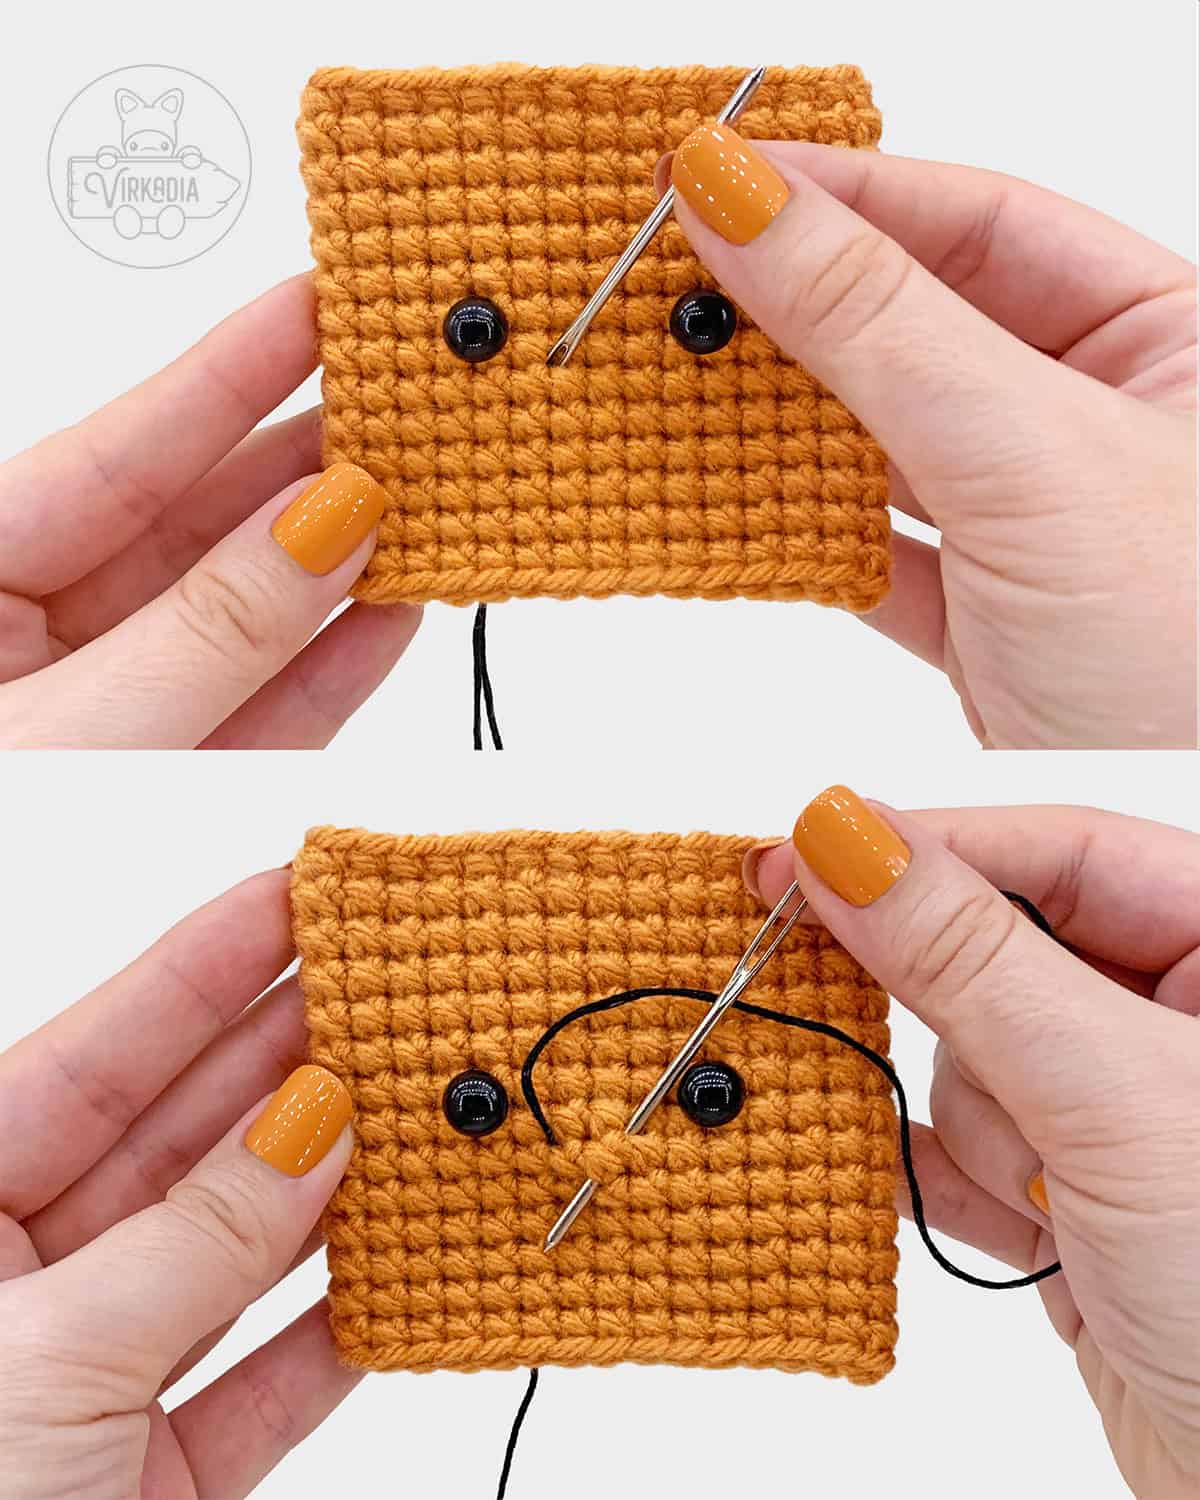
Begin by inserting your needle from inside to outside, 1 round down and 2 stitches to the right from where you’ve inserted the left eye. Pull through and leave some tail for tying later.
Then, insert your needle again, 2 stitches to the right, and out again, 1 round down and 1 stitch to the left from where you’ve just inserted, and pull through.
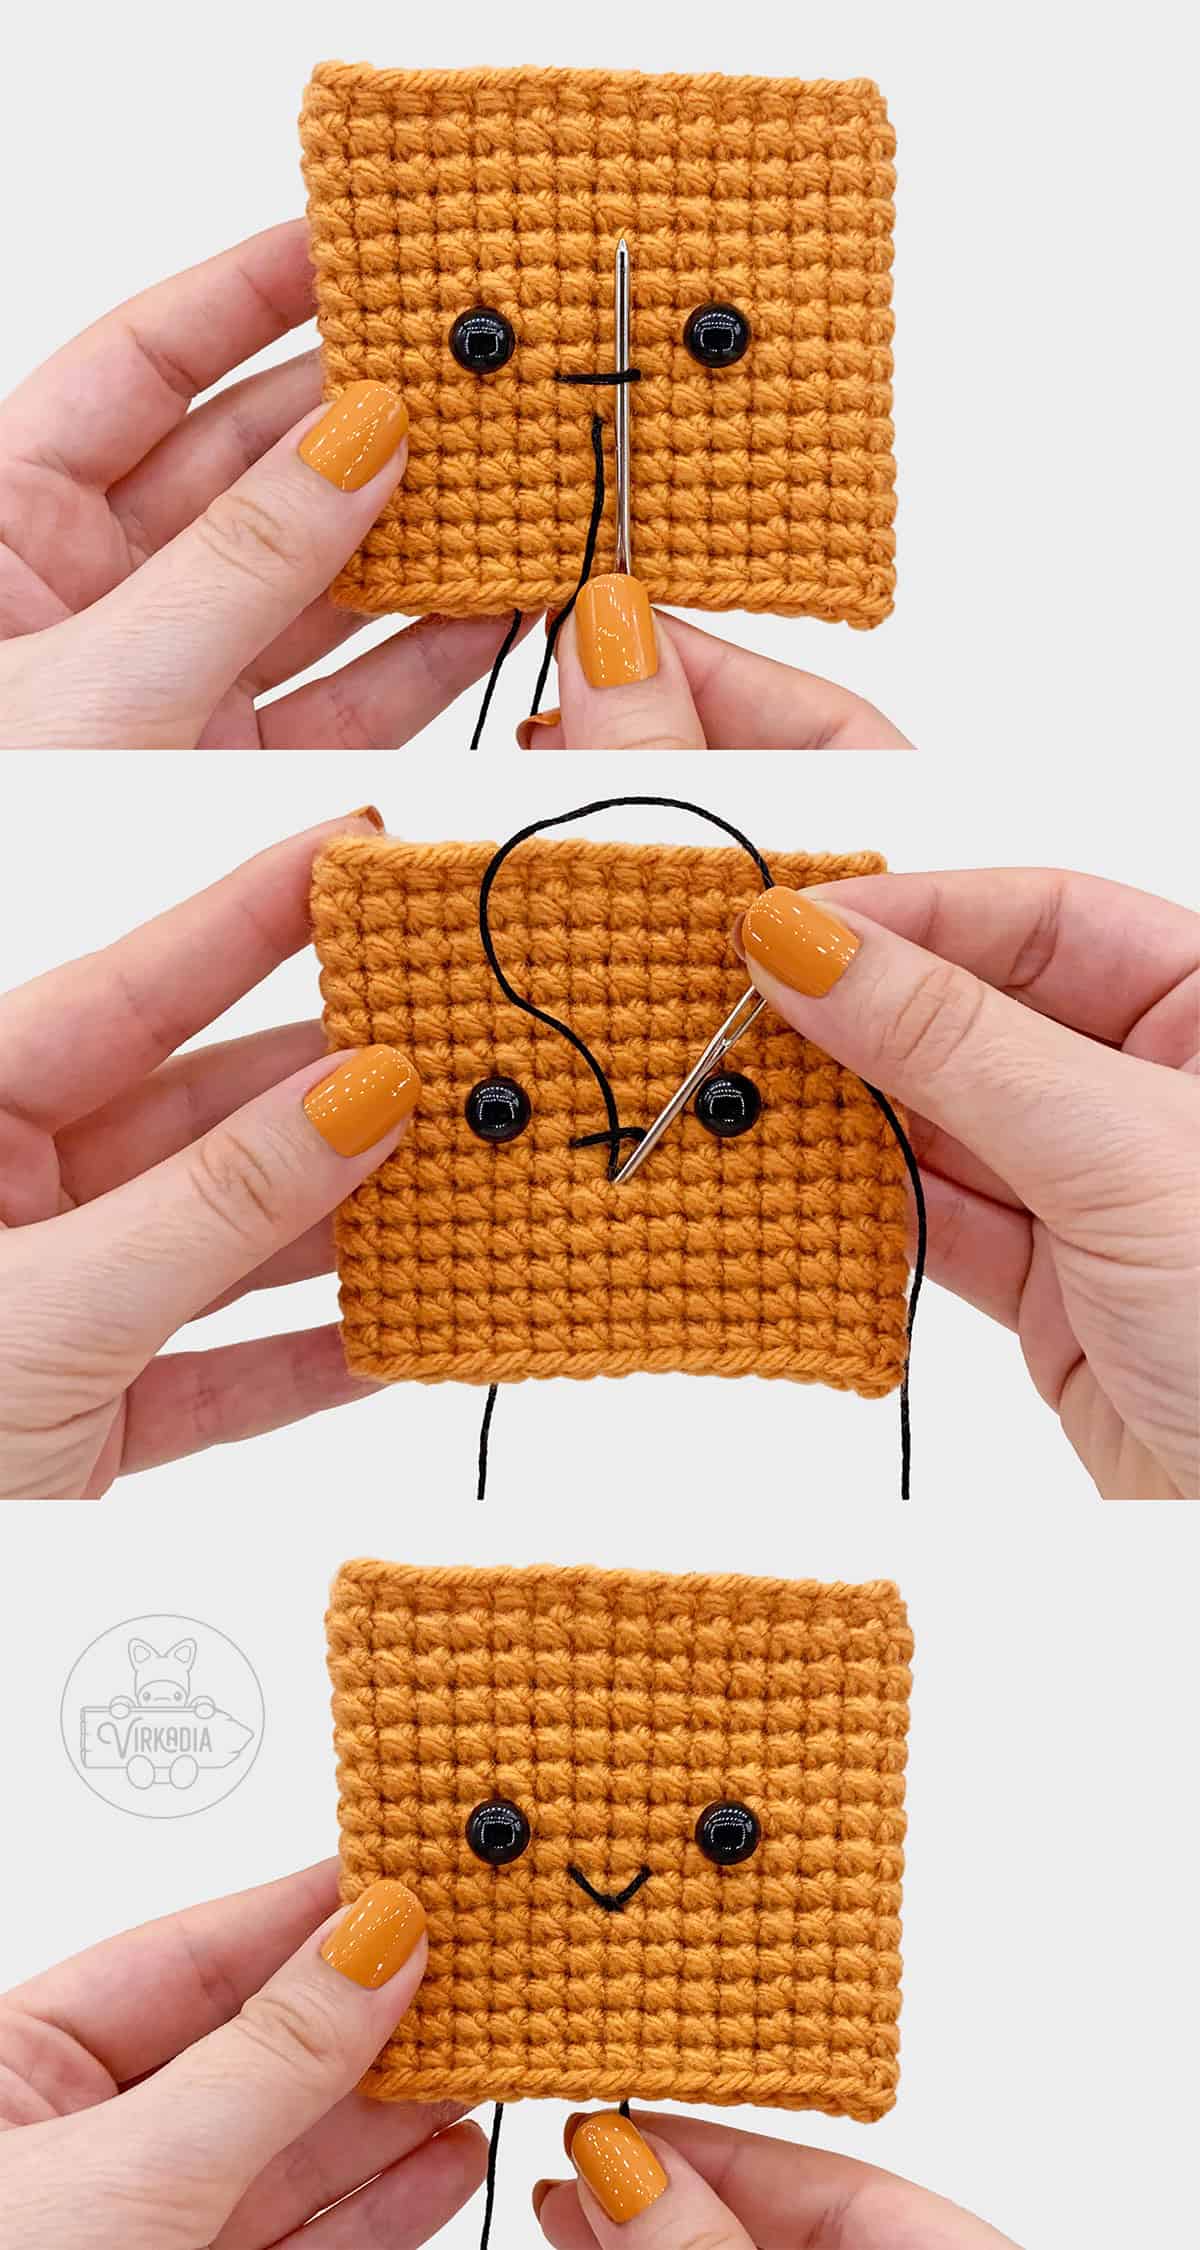
Pass your needle up and underneath the horizontal strand you’ve just created and pull through. Then, insert your needle back into the same space as you’ve last exited from.
Pull your thread through and tug it down slightly until it forms a V-shape. Gently tie both ends together inside your piece, but take extra care not to pull the threads too tight!
Adding Blush:
Using the example piece below as reference, embroider a blush line using pink embroidery floss or yarn next to each eye.
Each blush line should start 1 round down (between rounds 10 and 11) and 1 stitch outwards from where each eye was inserted, and span 1 stitch length outwards (away from the center of the face).
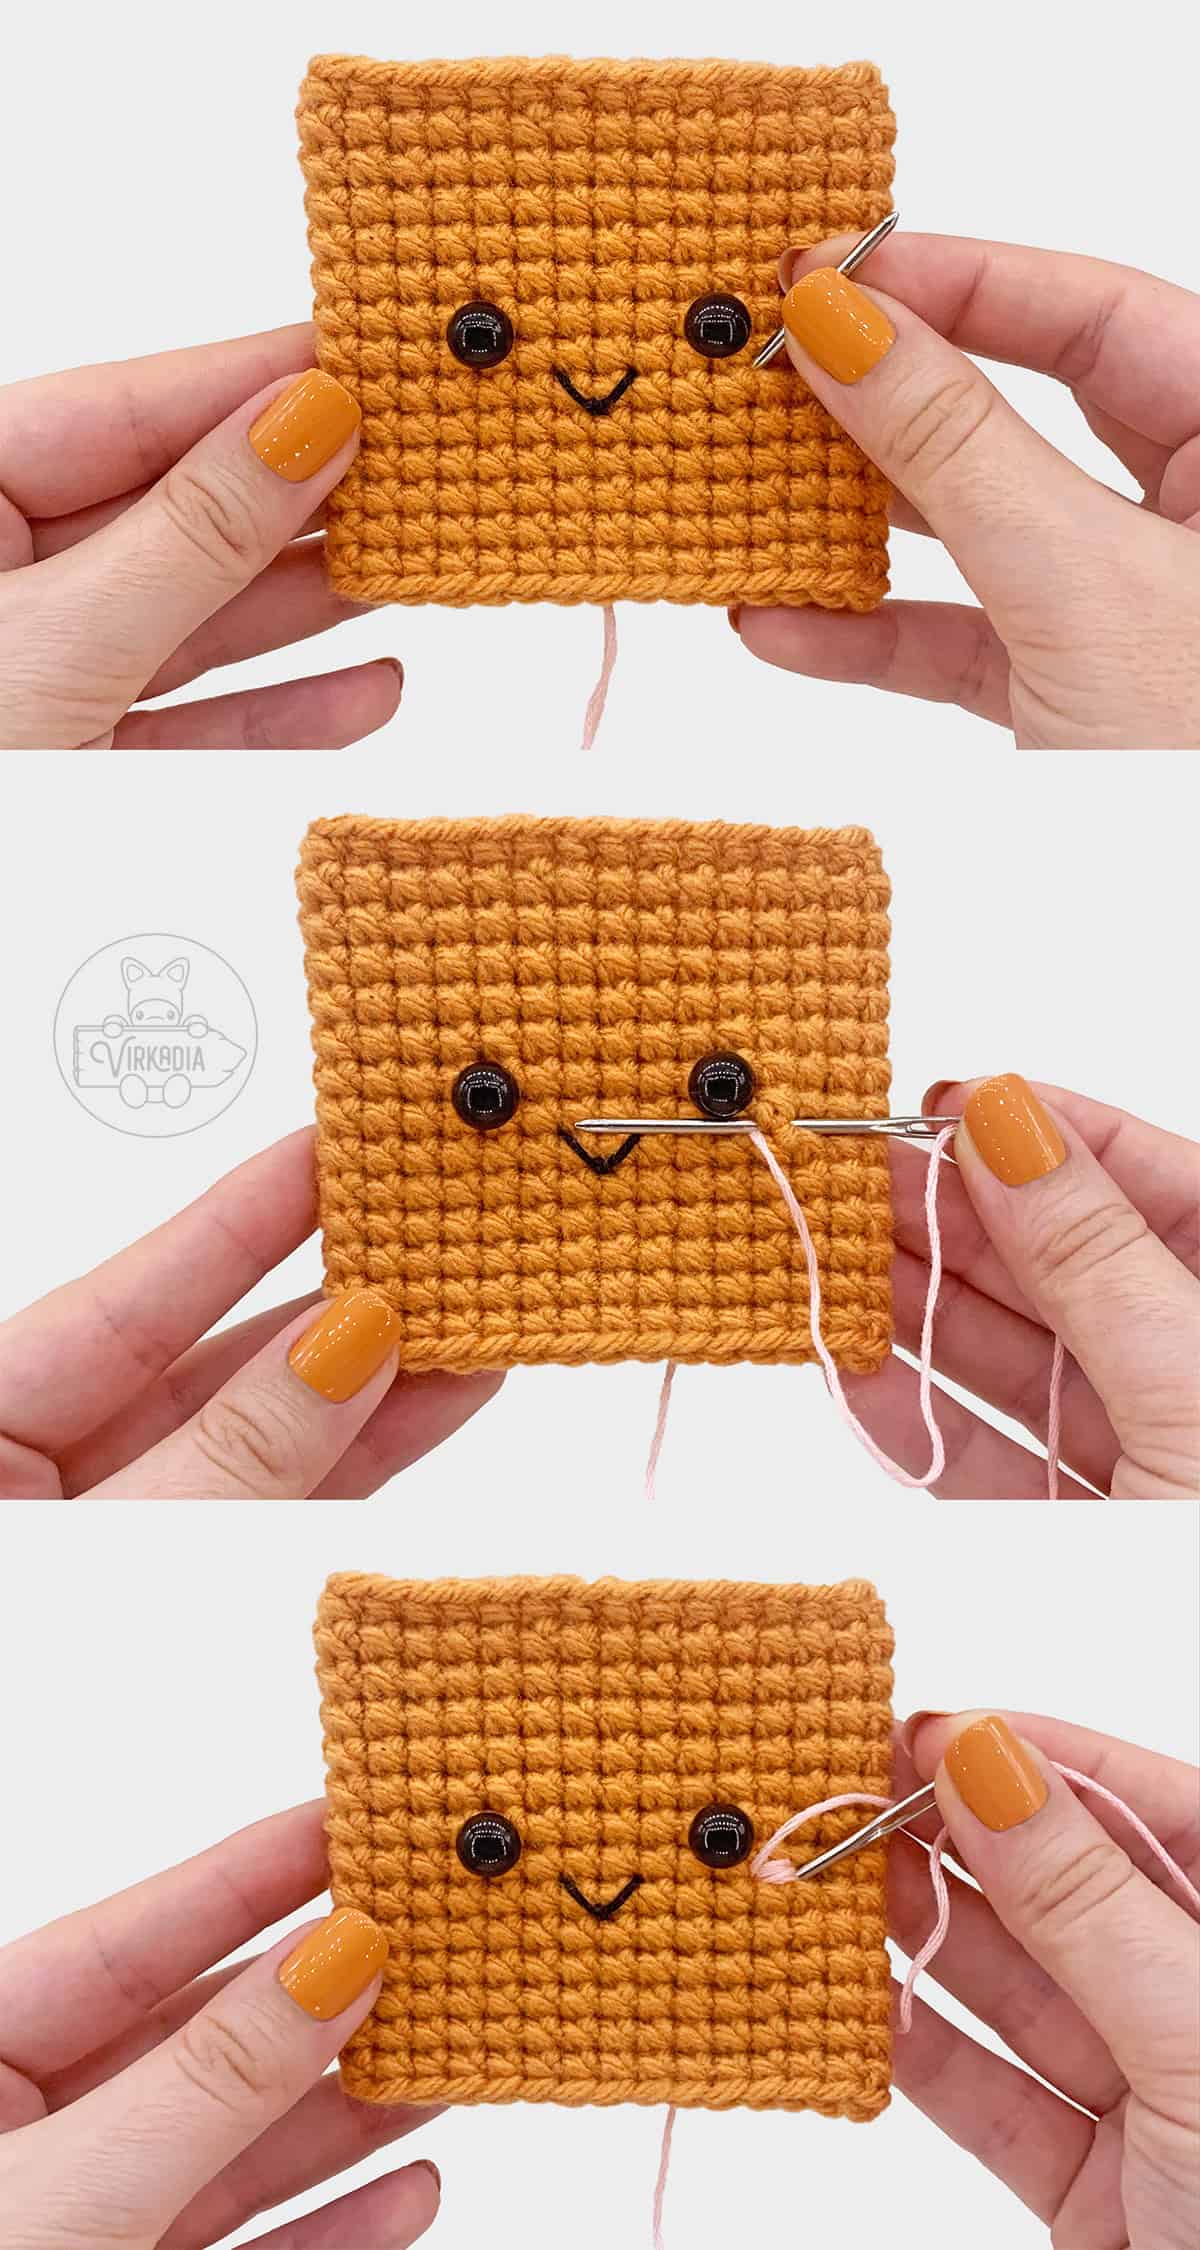
Begin by inserting your needle from inside to outside, 1 round down and 1 stitch outwards from where you’ve inserted the eye.
Pull through, leaving some tail inside for tying later. Then, insert your needle back in, 1 more stitch outwards.
If using medium weight yarn, you may skip ahead to tying both ends together on the inside of your piece.
If using embroidery floss, pass your needle back out through the same space as you’ve last exited from. Pull through and repeat both steps 4 more times.
On the next pass, insert your needle as normal but do not exit. Instead, pull through and remove your needle, then gently tie both ends together on the inside of your piece, taking extra care not to pull the threads too tight!
Crochet Terracotta Pot – Rounds 15 to 17:
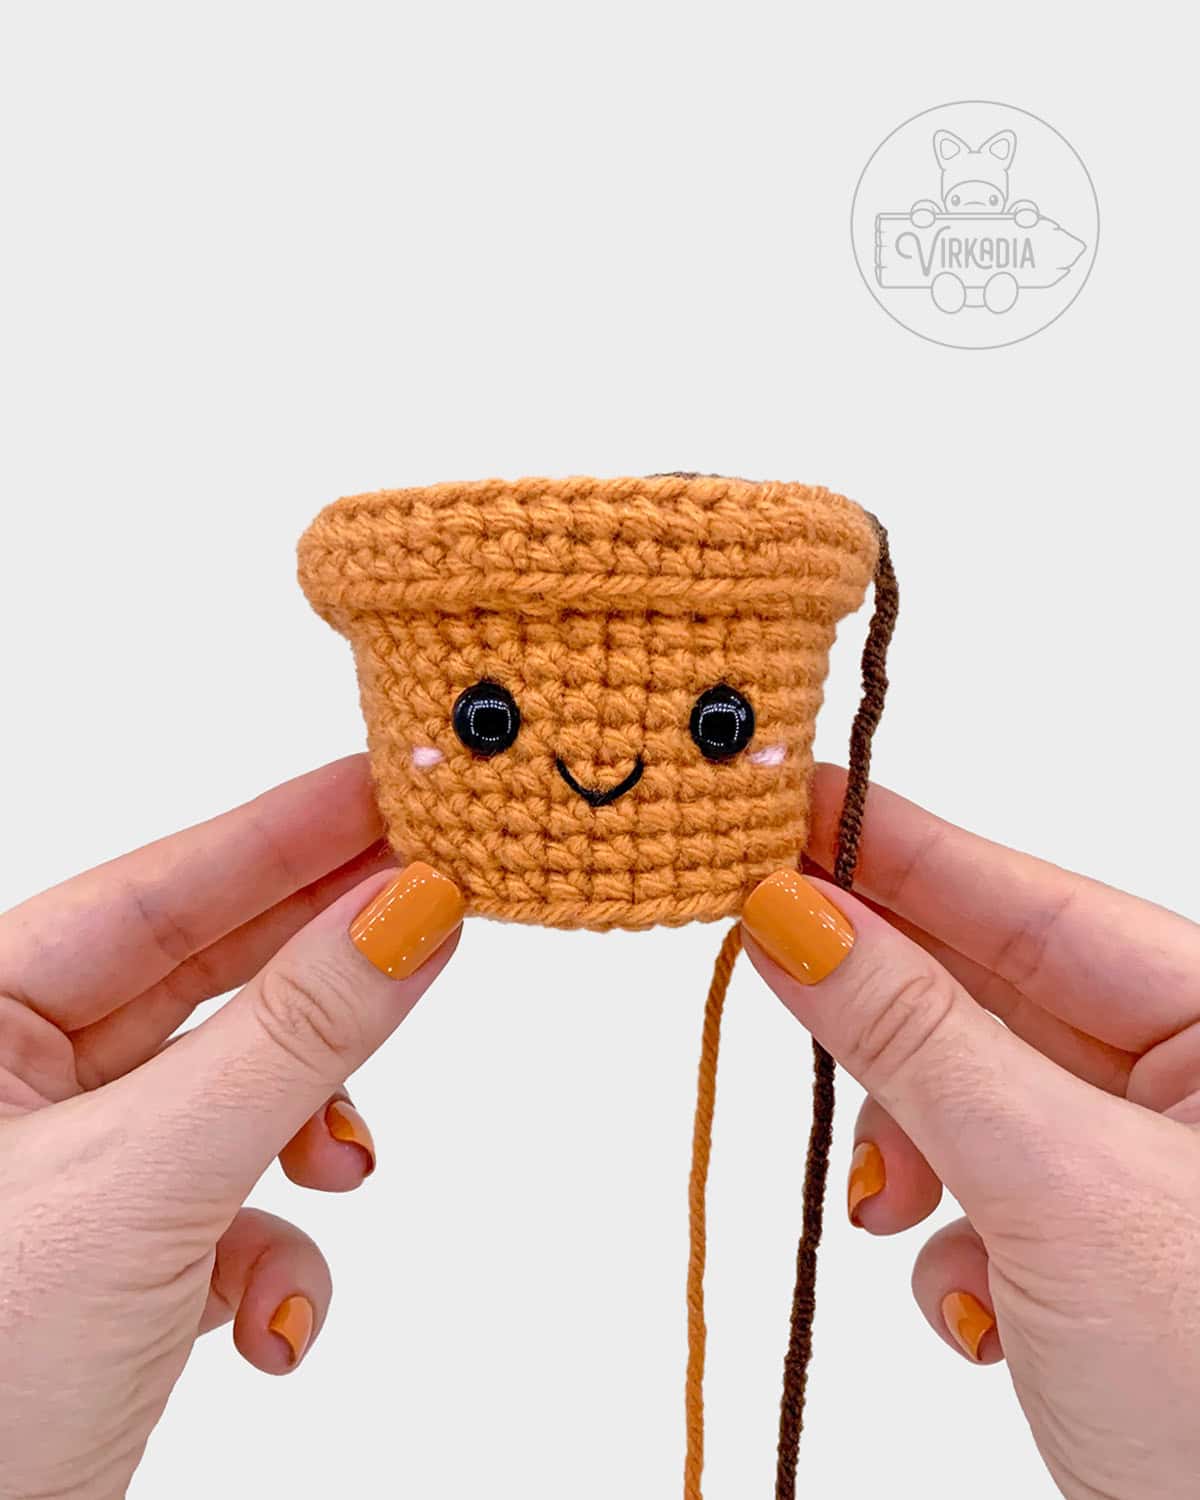
Continue to the next round of your crochet terracotta pot and begin stuffing as you go.
For best results, do not overstuff your piece! You’ll want to keep the bottom of your pot as flat as possible so that it can stand upright without tipping over.
You can also trace the bottom of your pot and cut out a circle of cardboard to add into the bottom of your pot to help keep the bottom flat, if desired.
Depending on your chosen flower, some pieces may be more top heavy than others. You may also consider adding coins, stones, or a small bag or balloon of sand into the bottom of your pot to help keep it weighed down.
If you are still having trouble with your project being unable to stand upright on its own, you may follow the instructions for adding a cloth onto the bottom of your pot, after sewing closed.
Rnd 15: in BLO of each st around, [sc2tog over next 2 sts, 1sc into each of next 2 sts] 6 times, join, ch 1 (18).
Rnd 16: [1sc into next st, sc2tog over next 2 sts] 6 times, join, ch 1 (12).
Rnd 17: [sc2tog over next 2 sts] 6 time, join (6).
Fasten off yarn B and leave a tail for sewing closed.
Sewing Closed:

To sew the bottom hole closed, pass the needle, from front to back, through the front loop only of each stitch around and then pull tight. Secure your tail with a knot, trim the tail, and sew in any remaining length.
Adding Cloth:
If you’re still struggling to keep your project standing upright, despite keeping the bottom flat or adding weight into the pot, you may consider adding a cloth onto your pot!
As seen below, this embellishment will add the illusion that your pot is sitting on top of a doily-like cloth, while also helping to widen the base of your project and preventing it from tipping over.

Join your chosen yarn color by inserting your hook into any front loop only, left over from round 14, along the bottom edge of your pot.
Be sure to insert your hook from the direction of the top of your project and towards the bottom, so that the right side of your stitches will be facing upwards.
Leaving a short tail for weaving in, pull up a loop of your chosen yarn and ch 1.
Rnd 1: [1sc into each of next 3 sts, 2sc into next st] 6 times, join, ch 1 (30).
Rnd 2: [2sc into next st, 1sc into each of next 4 sts] 6 times, join, ch 1 (36).
Rnd 3: [1sc into each of next 5 sts, 2sc into next st] 6 times, join, ch 1 (42).
Rnd 4: [2sc into next st, 1sc into each of next 6 sts] 6 times, join (48).
Rnd 5: [sk next 2 sts, 7dc into next st, sk next 2 sts, sl st into next st] 8 times (64).
Fasten off your chosen yarn and weave in both tails.
Conclusion | Free Crochet Terracotta Pot Amigurumi
And with that, you’re done the free crochet Terracotta Pot Cutie pattern! If you enjoyed this pattern, be sure to check out our full library of Flower Cuties and Plant Cuties, all of which are compatible with this pattern!
You can also explore the Cutie Collections and the Pocket Pets archives for more original and free amigurumi patterns, or our Home Decor Patterns for other homemade household goodies!
If you’re looking to cozy up with a longer project, check out our Clothing Patterns, or assemble your own designs from one of our Granny Square Patterns!
And don’t forget to browse our downloadable, ad-free patterns in our Etsy store!
Follow Virkadia on Instagram to stay updated on all new and upcoming patterns, crochet content, and amigurumi adventures! Thank you for all of your support!


Ana Carolina says
Hi Joey! It’s a pleasure to get to know your work and a bit of your story. We are people living in places so far apart, probably in very different realities, but sometimes we all need a break from the real world. I would love to wander through Virkadia, and I’ll do my best to create my own little place of comfort. I hope your wife is now fully recovered. Challenges like the ones you both faced have the power to show us what truly matters in this life. I hope only the good things remain! Congratulations on your work — you are an artist who never ceases to amaze me. You are an inspiration! Thank you for everything you create and share.
Virkadia says
Hi Ana Carolina! Wow, thank you so much for all of these kind words. I am so happy that some of my journey and words has resonated with you and that—despite any distance in location or experiences we may have—that you feel welcome in Virkadia, and that it can help inspire you to find a healthy break from the real world, too.
And I am very happy to share that my wife celebrated 3 years in remission this past April! She is doing amazing and she helps behind-the-scenes with the blog, too! We’ve both poured a lot of our love and creative passion into Virkadia, so your words truly mean a lot to us! Sincerely, we appreciate you taking the time to share all of your kind words. ❤️